 @urre
@urre Back in march I wrote a post about setting up a Jekyll site on Amazon S3. I covered:
- Setting up a Amazon S3 bucket for static hosting on Amazon Web Services
- Setting up permissions and connect Bucket and IAM
- Setting up permissions and to handle API keys
- Use Jekyll-assets for fingerprinted assets
- Use s3_website for deploying to Amazon S3
In this post I’m going to continue with

- Use Amazon CloudFront as a CDN
- Use your custom domain with Route 53
Amazon S3 is already fast as it is, but while S3 is mainly a storage service you can use CloudFront to serve on top of your bucket and deliver contents at a much higher speed with lower latency.
Custom domain
In this example i will use Route 53, Amazons DNS service. You don’t need to, but if you want to use a naked domain (Apex), using example.com without www, you will have to.
Setup a Hosted Zone
Click Hosted Zones and Create Hosted Zone:
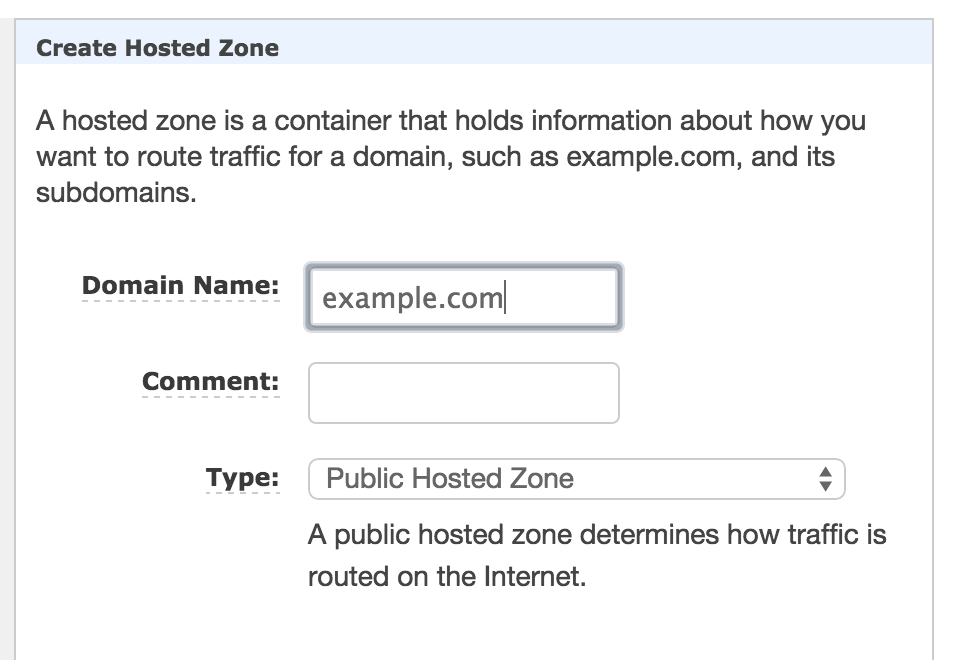
Enter your domain name
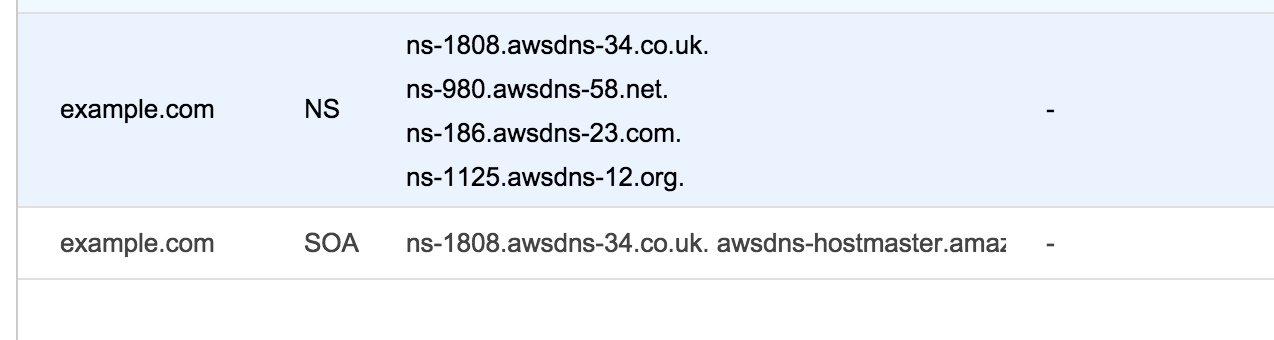
Make a note of the NS servers for your domain. You will need them later.
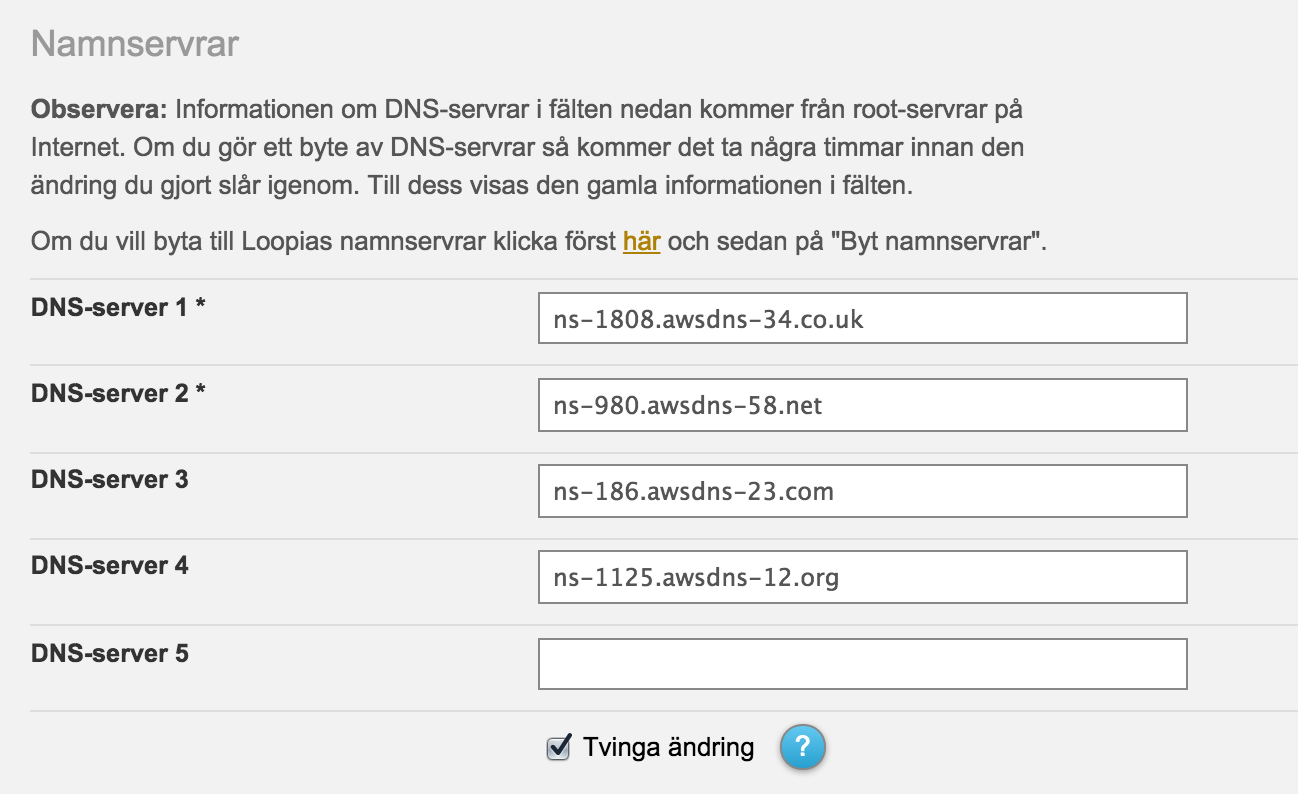
Point your domain to Route 53
In my example i change the name servers and use Route 53 for all my records. You don’t have to, if your have records for other things, like email.
Change the name servers. This is what it look like at Loopia DNS:
Configure Cloudfront
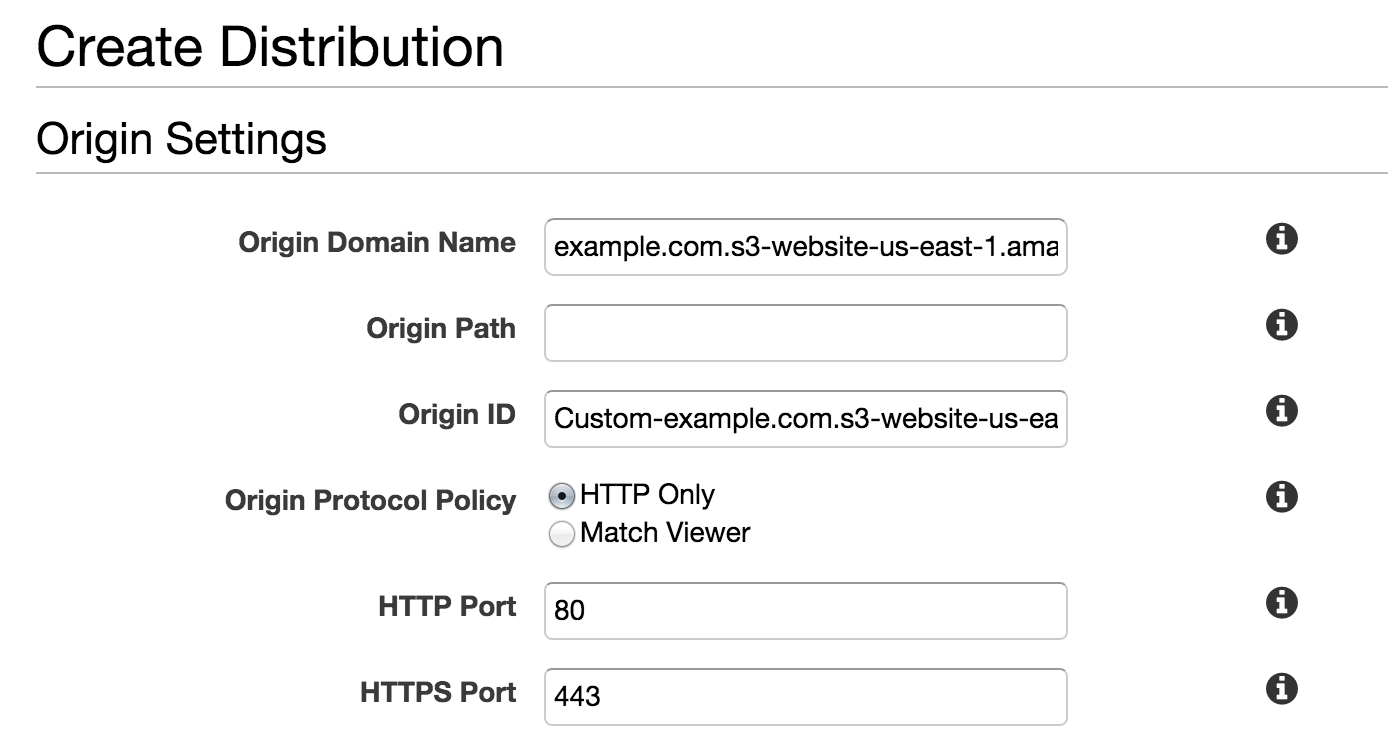
Create distribution
Login to the AWS console, open up Cloudfront and click “Create distribution”. Choose “Web” and “Get started”.
Under Origin Domain name, paste your S3 endpoint:
example.com.s3-website-us-east-1.amazonaws.com
For everything else just keep it like AWS suggests, with the exception of “Forward Query String”. If you like to invalidate assets with a query string: screen.css?version=2. I recommend using Jekyll Assets that creates versioned assets like: app-908e25fa5b62f54.css.
Settings
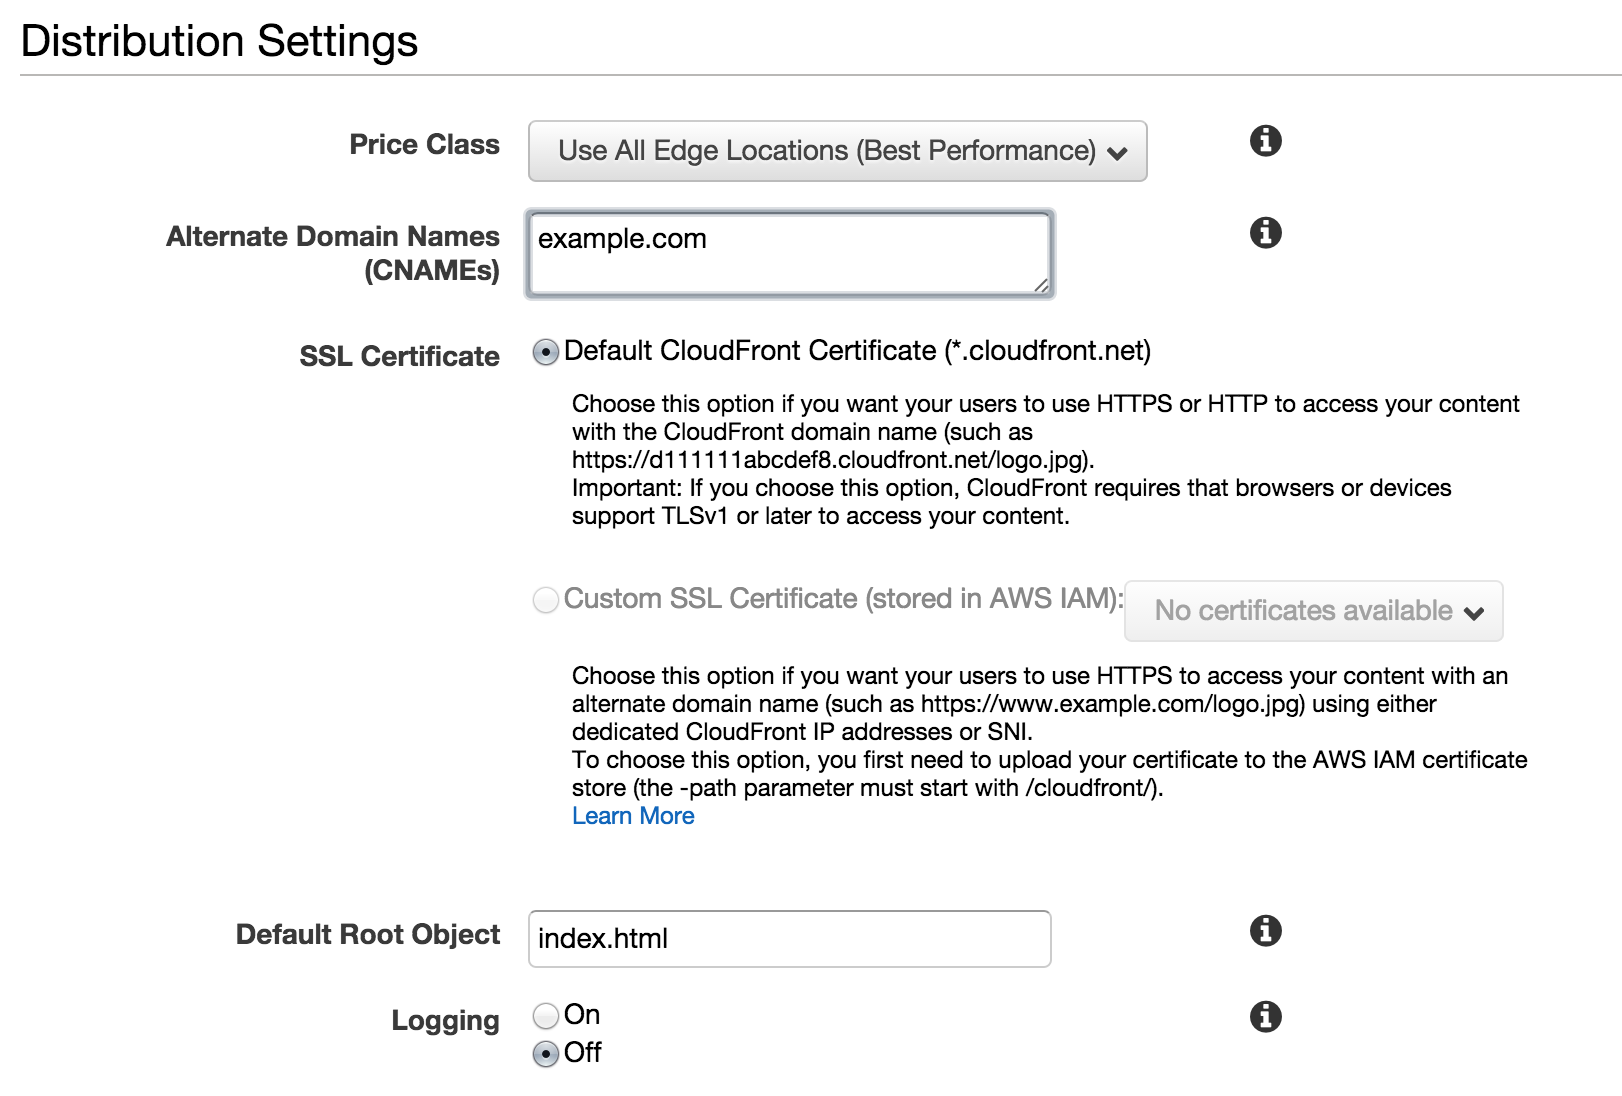
Type your domain under CNAMEs and use index.html as Default Root Object.
Copy your Cloudfront address, it looks like this: bvtbnxdmn65sio.cloudfront.net
If everything works, you should now see the same thing on your domain
example.comas on your Cloudfront address. Only now it will load much faster!
Connect your Cloudfront distribution with your domain name
Login to Route 53 again.
- Click “Create Record Set”
- Leave the “Name” field blank. “Type” should be “A - IPv4 address”.
- Choose “Yes” for Alias
- Choose your CloudFront distribution as “Alias target”.
- Leave “Routing Policy” as “Simple”
Grab a coffee. When the DNS cache has fully refreshed and you haven’t made any misstakes you now have your Jekyll-sajt on Amazon S3, using Cloudfront as CDN and with your custom domain.
Congratulations!
You now have a website that costs almost nothing to host and loads faster than most websites!
The
s3_websitegem don’t support the latest version of the Amazon API (is i write this). So you can’t use the Frankfurteu-central-1region just yet. As i wrote in the beginning, there are other tools aswell. Whatever floats your boat!
Links
Next step?
Read Part 2
