I Built an Art Frame Powered by Raspberry Pi
I wanted to have a nice digital frame on the wall in my office to display art and family pictures. I had an old Raspberry PI laying around and decided to put it to good use.
Stuff
- A Raspberry Pi. I had an Raspberry Pi 2 laying around, works perfectly for this. (~$25)
- A TV or a monitor. I bought a 32” JVC TV from a local thrift store. (~$20)
- I built a simple wooden frame to make it look nice. (~$10) (Nice to have)
All together under $60.
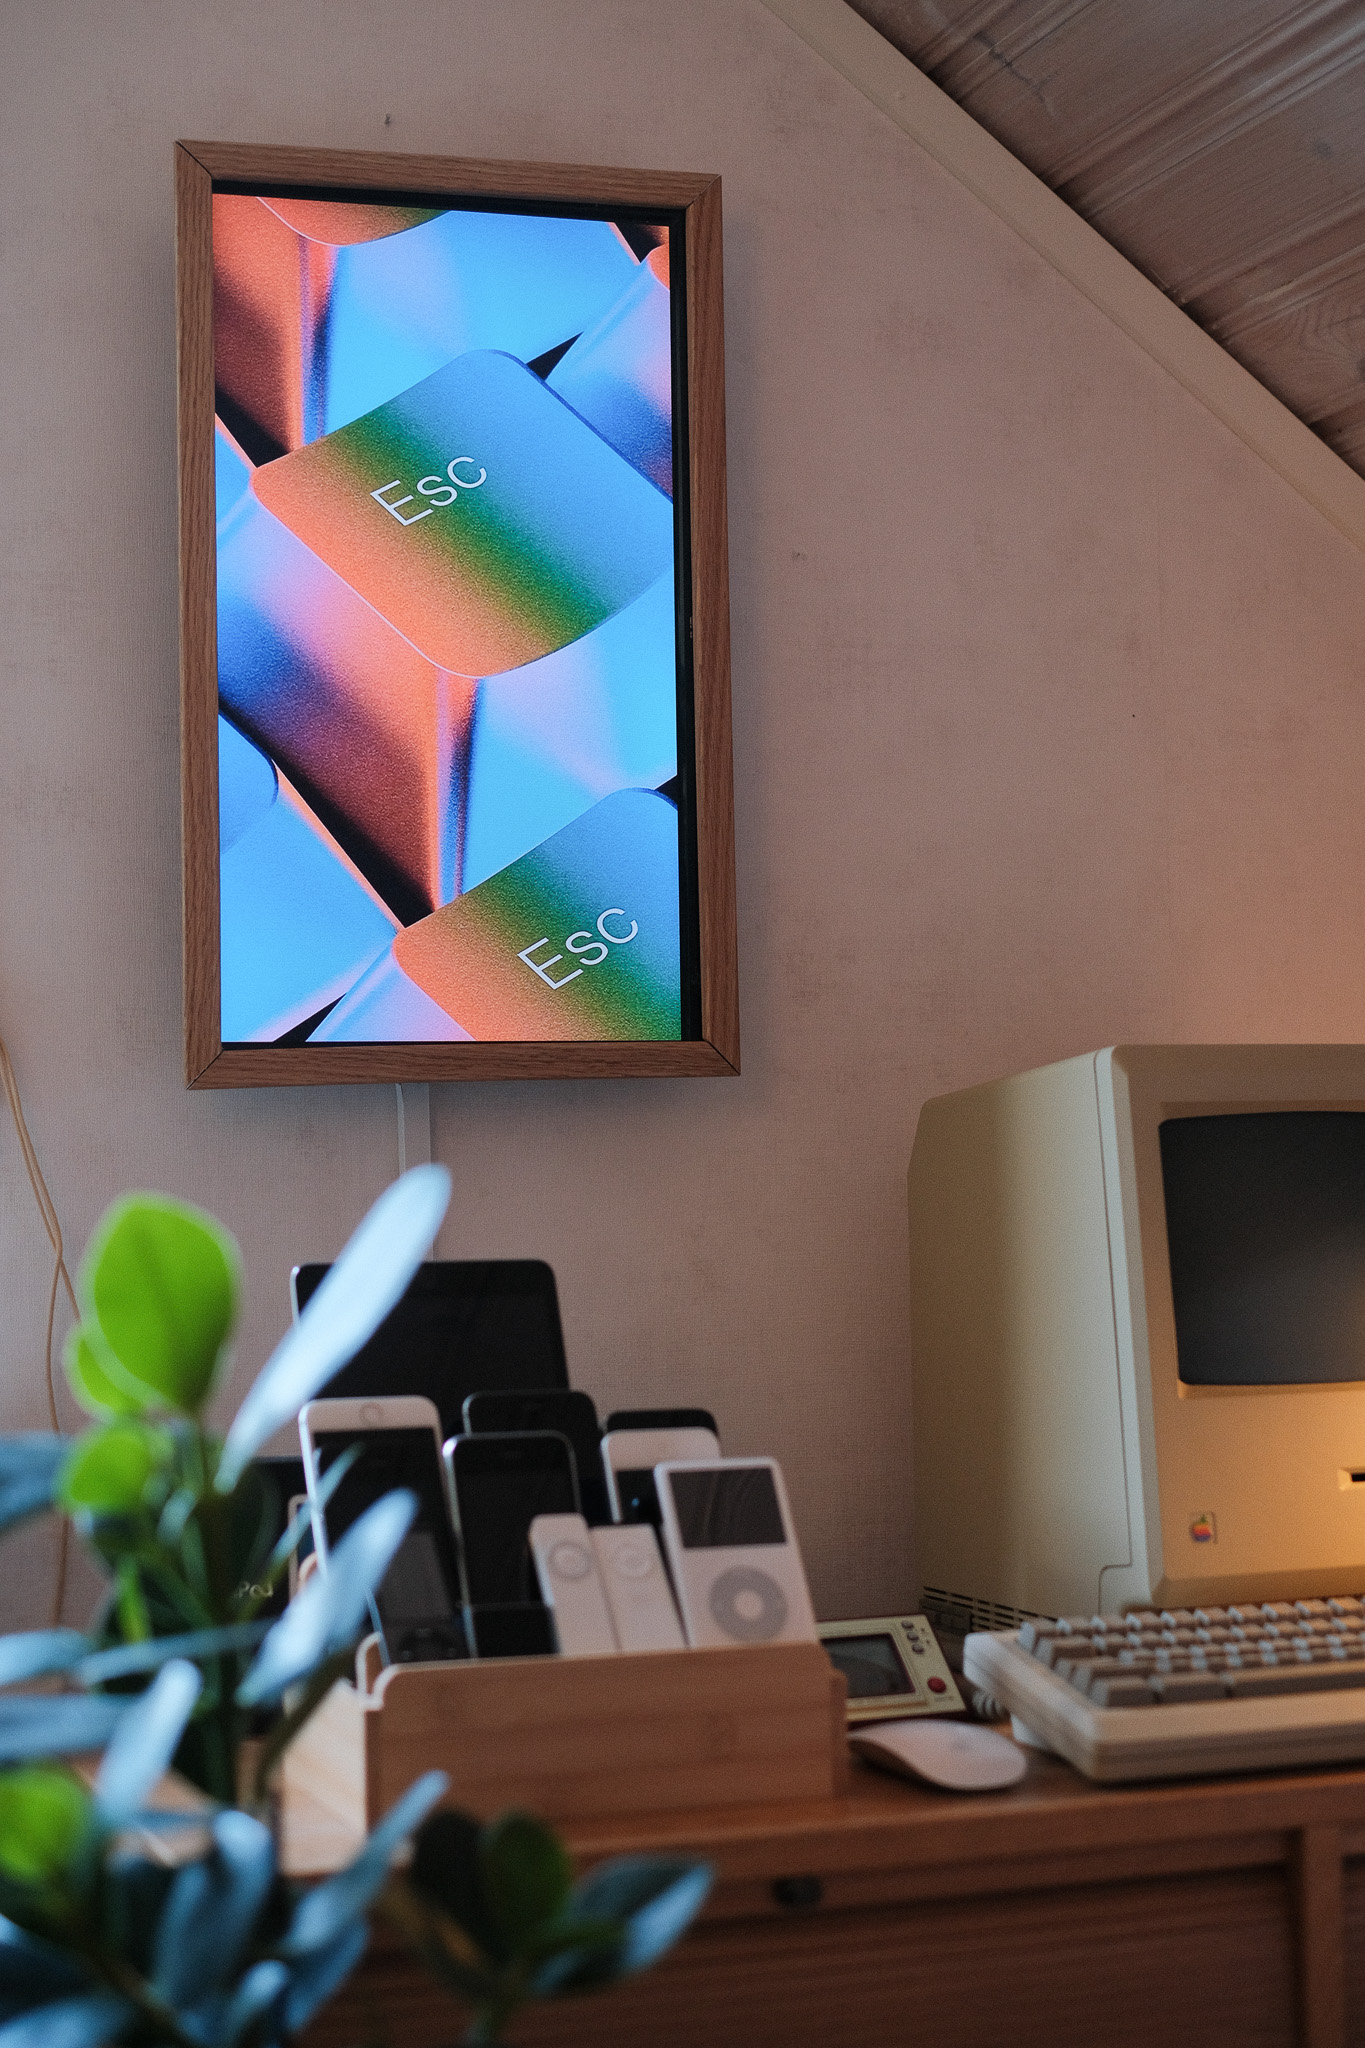
View images
I’m using feh. It’s a powerful, fast, and lightweight imlib2-based X11 image viewer that can be run from command-line arguments.
sudo apt-get install fehMy Art frame feh script
I created a simple art.sh bash script to control my art frame.
DISPLAY=:0.0 XAUTHORITY=/home/pi/.Xauthority /usr/bin/feh -q -p -Z -F -R 60 -Y -D 10.0 -r /home/pi/Pictures/artThis script runs the feh image viewer with specific options. Here’s a breakdown of what each part does:
DISPLAY=:0.0 tells the system to run the command on the primary display (:0.0). This is useful when running graphical applications from a script or remotely.
Sets the X Authority File:
XAUTHORITY=/home/pi/.Xauthority ensures the script has permission to access the X server (the graphical interface). This is needed when running the script as a different user or from a startup process.
Runs feh (a lightweight image viewer) with specific options:
/usr/bin/fehspecifies the path to the feh executable.- -q (quiet mode) suppresses unnecessary output.
- -p (preload images) loads images into memory for faster transitions.
- -Z (zoom to fill) ensures images fit the screen while maintaining their aspect ratio.
- -F (fullscreen) runs the slideshow in fullscreen mode.
- -R 60 (reload interval) refreshes the image list every 60 seconds, useful if new images are added to the directory.
- -Y (hide cursor) hides the mouse cursor when the slideshow is running.
- -D 10.0 (display time) sets each image to be shown for 10 seconds before transitioning.
- -r (recursive mode) includes images from subdirectories. Specifies the Image Directory:
/home/pi/Pictures/art is the directory where feh looks for images to display in the slideshow.
To start i just run ssh username@192.168.XX.XX 'nohup bash art.sh > /dev/null 2>&1 &'
Rotate the screen
Since my frame is in portrait mode, I needed to rotate the screen.
sudo nano /boot/config.txt
display_rotate=1 (90 deg)
sudo reboot
Controlling the art frame with Raycast script commands or iOS Shortcuts
I created a few simple scripts to control the art frame remotely. You can use iOS Shortcuts or Raycast to run these commands over SSH.
I keep a simple folder on my ~/Desktop called art-frame where I put images to be transferred to the art frame.
Raycast script command example
I created a Raycast extension to control the art frame.

Image optimization tips
A few scripts to help you optimize your images for the art frame.
Make all images in 9:16 ratio using Imagemagick
Resize and crop all jpg images in the current directory to fit a 9:16 aspect ratio (1080x1920 pixels) using ImageMagick:
mogrify -path . -resize 1080x1920^ -gravity center -extent 1080x1920 *.jpg
Script to make a single image 9:16 with background color
This script extends the outer edges of an image to fit a 9:16 ratio using the color of the top-left pixel as the background color.
#!/usr/bin/env bash

# Usage: ./make_9_16.sh input.jpg
# Requires: ImageMagick

input="$1"

if [ -z "$input" ]; then
    echo "Usage: $0 input_image"
    exit 1
fi

# Extract base name and extension
filename="${input%.*}"
extension="${input##*.}"
output="${filename}-output.${extension}"

# Detect background color from the top-left pixel
bgcolor=$(magick "$input" -format "%[pixel:p{0,0}]" info:-)

# Target size (change as needed)
target_width=1080
target_height=1920

# Resize proportionally and pad to 9:16
magick "$input" \
    -resize "${target_width}x${target_height}" \
    -gravity center \
    -background "$bgcolor" \
    -extent "${target_width}x${target_height}" \
    "$output"

echo "Saved: $output (background color: $bgcolor)"