 @urre
@urre 
Recently we launched a tiny side project called WordPress Plugin UI template, a simple resource with the simple goal of empowering WordPress developers making beautiful banners and icons for their plugins.
In this post, I will walk through the steps for building the website, accepting payments via Stripe using Checkout, the best payment flow, on web and mobile.
We’re also going to automate some things using Zapier and the Multi-Steps Zaps which they launched in 2016.
Core idea
The idea behind this little project, was to make it a bit easier for developers when submitting their plugins to the official WordPress plugin repo. Having made a bunch of plugins myself in the past, I wanted to save you from the hassle of dealing with sizes and formats.
For $3 you’ll get a nice vector based template file for both Sketch and Photoshop. Stop worring about pixel sizes and file formats and be productive developing your plugin instead.
Accepting payments width Stripe
Before you do anything, you will need a Stripe account. The process is fairly painless, but requires a some information, including your company details, address, and account number and IBAN for transfers to your bank account. Under account settings you will find everything you need.
API Keys
Next you need to collect your API keys.
Create an .env file and store your keys. Never version control API keys.
SECRET_KEY="sk_test_XXXXXXXXXX"
PUBLISHABLE_KEY="pk_test_YYYYYYYYYYYY"
Stripe offers both test and live keys. Remember to switch out the correct ones when your going live!
Embedding Stripe Checkout
Stripe has an embeddable checkout process called Stripe Checkout. It has a beautiful look and feel for desktop, tablet, and mobile devices. A great payment flow, on web and mobile. It works within your site—customers can pay instantly, without being redirected away to complete the transaction.
To get started, here is some some boilerplate to get you started. Making sure that the form submits to your own server-side code within the action attribute.
  <form action="/charge.php" method="POST">
    <script
    src="https://checkout.stripe.com/checkout.js" class="stripe-button"
    data-key="<?php echo $stripe['publishable_key']; ?>"
    data-amount="300"
    data-name="Urban Sanden"
    data-description="Download the Wordpress Plugin UI template."
    data-image="/dist/images/logo.png"
    data-locale="auto"
    data-label="Download template files ($3)"
    data-currency="usd">
  </script>
</form>
Completing the charge server-side
I used the Stripe PHP library via Composer for this simple website, but use whatever you like. Express, Rails, Flask etc.
1.config.php. Just loading the environtment variables (API-keys.)
<?php
require('./vendor/autoload.php');

$dotenv = new Dotenv\Dotenv(__DIR__);
$dotenv->load();

$stripe = array(
  "secret_key"      => getenv('SECRET_KEY'),
  "publishable_key" => getenv('PUBLISHABLE_KEY')
);

\Stripe\Stripe::setApiKey($stripe['secret_key']);
2.charge.php
<?php
require_once('./config.php');

$email = $_POST['stripeEmail'];
$token  = $_POST['stripeToken'];

$charge = \Stripe\Charge::create(array(
    'source' => $token,
    'amount'   => 300,
    'currency' => 'usd',
    'metadata' => ['email' => $email, 'sku' => 'banner-1'],
    'description' => 'Download the Wordpress Plugin UI template.'
));
The code above, plus the client side form is pretty much all you need to complete the charging process.
When charge is successful you can display a Thank you message or redirecting to a special Thank You-page.
Zapier - automate all the things!
Now that we have the payment workflow going, why don’t we look in to some automation.
Zapier is a great service that allows hundreds of different apps to be connected, in new and interesting ways. Using a system of triggers and actions, you can build powerful custom recipes - called Zaps. The Stripe Zapier trigger workflows is based on common activities in Stripe like getting new customers, receiving a new payment, and more.
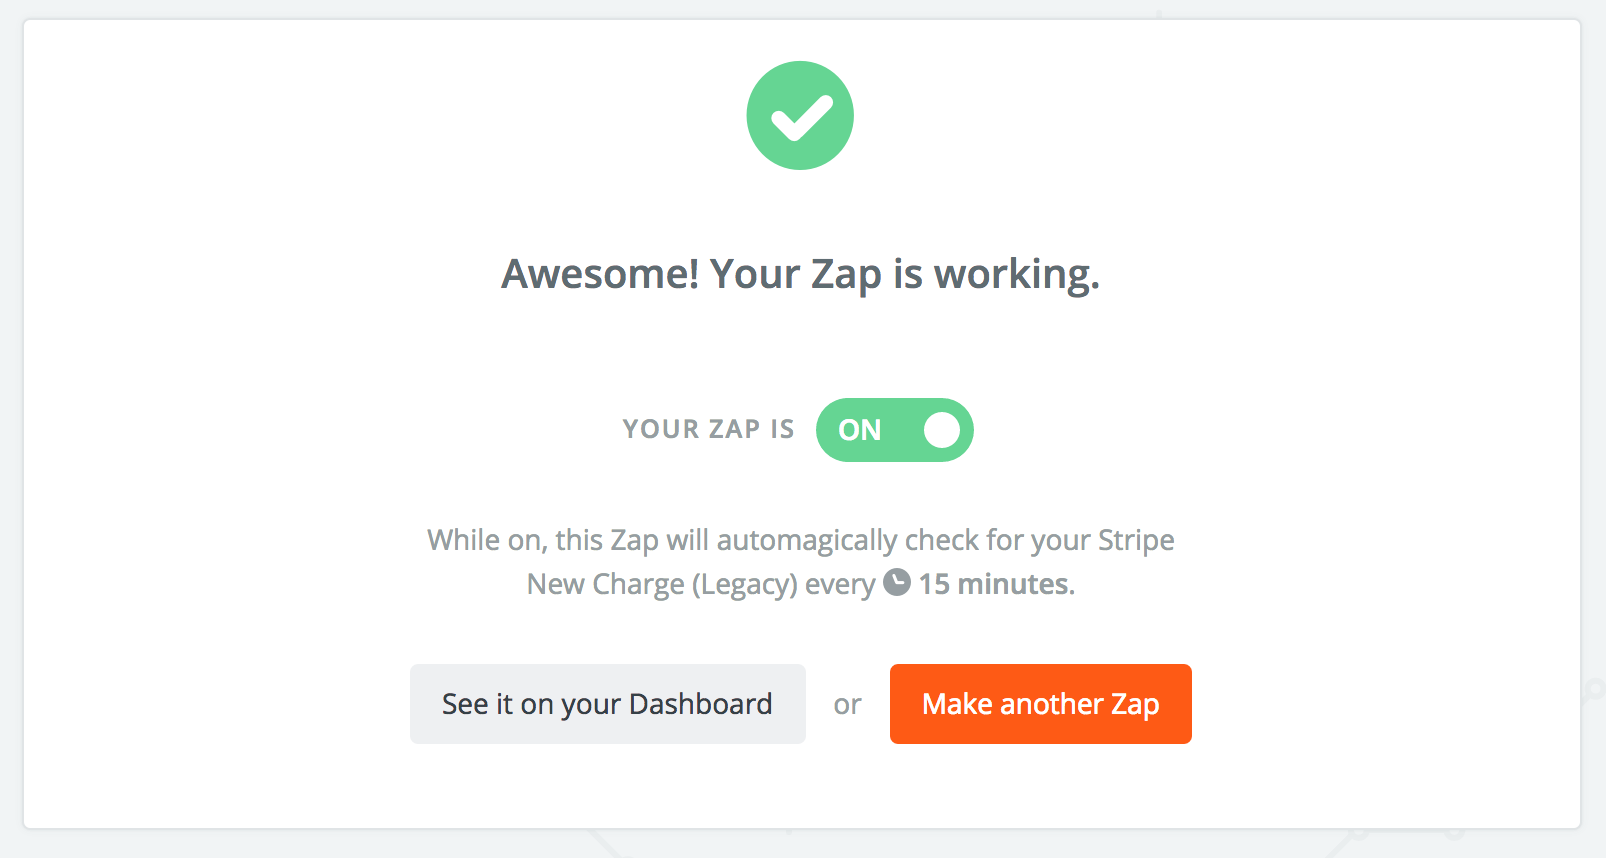
Nowadays Zaps don’t just stop at two steps. They can expand to as many steps that you like. Multi-Steps Zaps to the rescue!
As always, automating workflows is more fun!
The Zap
This is our current Zap:
- Look for a new charge from Stripe
- Find the charge via its ID
- Send out an email using Sparkpost
- Send a Slack notification

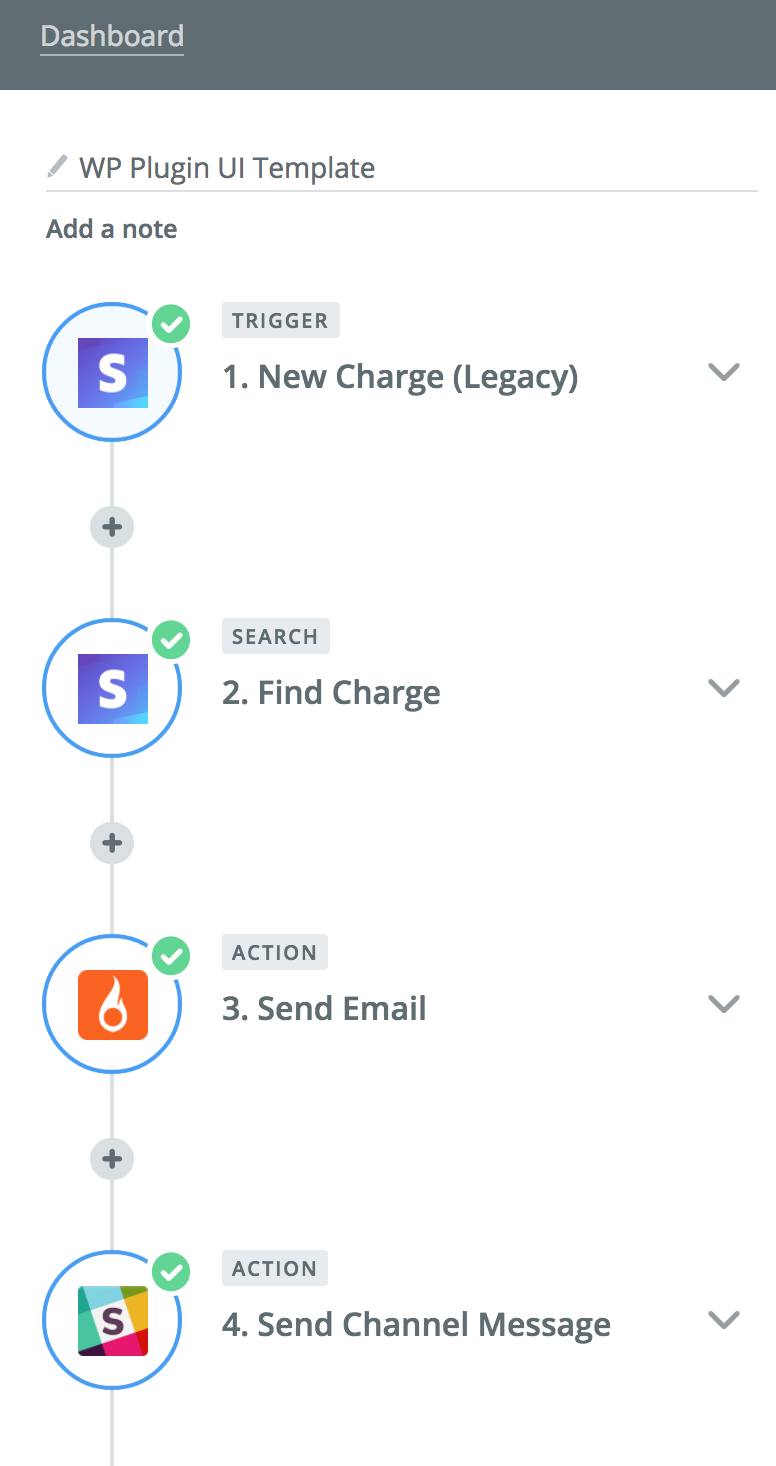
Sparkpost is a great service for sending transactional emails. I used Sparkpost for delivering the template files. Via the Stripe Action you can also select a predesigned template for your Sparkpost account. For this I used the Really Simple Responsive HTML Email Template.
Slack

The friendly Slack notification.
Website domain and hosting
- Domain wp-plugin.design bought from Namecheap
- Served on HTTP2/HTTPS via Cloudflare
- Hosted on a Digital Ocean droplet. Running on ServerPilot.
Final notes
Hopefully you’re now equipped with the essential steps to start accepting payments on the web using Stripe.
Get the template now!
