 @urre
@urre 
Cloudinary is awesome. It’s cheap, fast, stores a lot of images even in the free tier and doesn’t take up data space in your apps and projects. You images loads fast everyhere with the CDN and you can also create transformations programmatically and on the fly without the need for graphic designers and fancy editing tools. Change formats, resize, crop and more.
Wouldn’t it be nice to upload images from your computer, ex blog images, screenshots etc directly to the Cloudinary Media Library and then be able to get back and paste a CDN link anywhere?
Install the Cloudinary CLI
Prerequisite: To use the Cloudinary CLI, you need Python 3.6 or later.
To use it in scripts or in Automator, first install the CLoudinary CLI
pip3 install cloudinary-cli
To make all your cld commands point to your Cloudinary account, set up your CLOUDINARY_URL environment variable.
export CLOUDINARY_URL=cloudinary://XXX:XXX@yourname
Check your configuration by running:
cld config
Create the Automator Workflow
- Open Automator
- Create a new Quick Action, give it a name ex. “Cloudinary”
- Set Workflow Recieves
- Select folders and files, and Finder
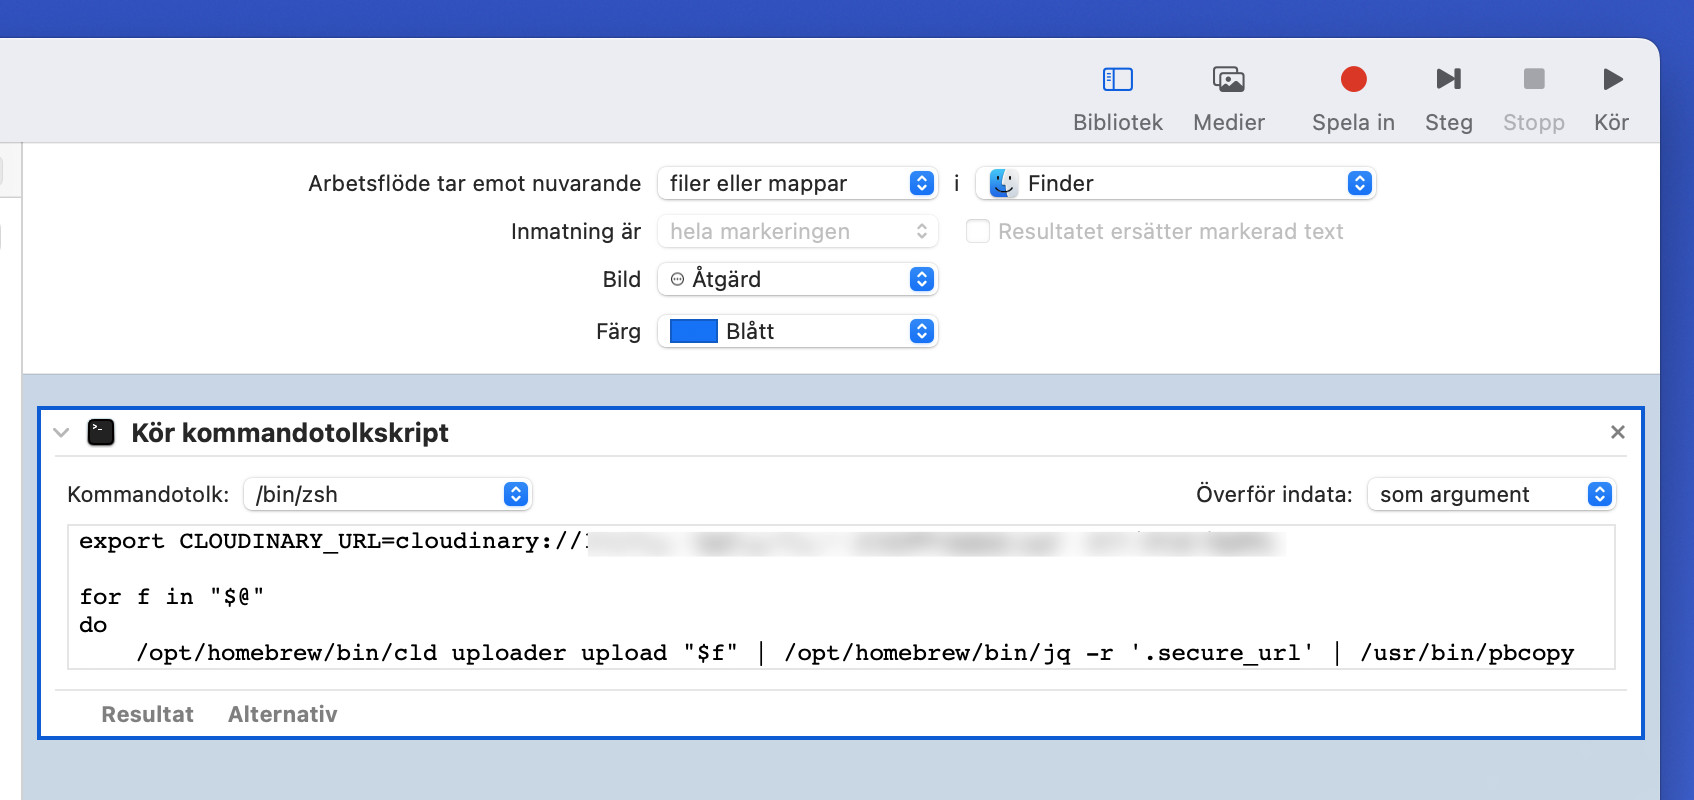
- Add a Run Shell Script and drag it over to the main window:
for f in "$@"
do
	/opt/homebrew/bin/cld uploader upload "$f" | /opt/homebrew/bin/jq -r '.secure_url' | /usr/bin/pbcopy
done
I’ve added a pipe command here to copy the URL to the uploaded image into your clipboard. You’ll need
jqto parse the JSON and extract the HTTPS link.
This screenshot is in Swedish, but you get the idea.
How to use it
- Right click on a file in Finder
- Select “Cloudinary” under the Quick Action list
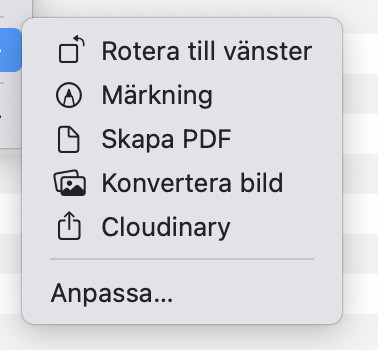
- Just cmd + v in your project! The CDN URL is already in your clipboard.
