<?xml version="1.0" encoding="UTF-8"?><rss version="2.0" xmlns:content="http://purl.org/rss/1.0/modules/content/"><channel><title>Urban Sandén</title><description>Welcome to my website. I`m Urban Sandén. A web developer and product designer working at Curity.</description><link>https://urre.me/</link><item><title>I Built an Art Frame Powered by Raspberry Pi</title><link>https://urre.me/writing/i-built-an-art-frame/</link><guid isPermaLink="true">https://urre.me/writing/i-built-an-art-frame/</guid><description>I wanted to have a nice digital frame on the wall in my office to display art and family pictures. I had an old Raspberry PI laying around and decided to put it to good use. Controlling it using Apple Shortcuts was a breeze.</description><pubDate>Wed, 07 Jan 2026 00:00:00 GMT</pubDate><content:encoded>&lt;p&gt;I wanted to have a nice digital frame on the wall in my office to display art and family pictures. I had an old Raspberry PI laying around and decided to put it to good use.&lt;/p&gt;
&lt;p&gt;&lt;img src=&quot;https://res.cloudinary.com/urre/image/upload/v1757051241/k9cedtbxsf2t7cznnqco.jpg&quot; alt=&quot;&quot; /&gt;&lt;/p&gt;
&lt;h2&gt;Stuff&lt;/h2&gt;
&lt;ol&gt;
&lt;li&gt;A Raspberry Pi. I had an Raspberry Pi 2 laying around, works perfectly for this. (~$25)&lt;/li&gt;
&lt;li&gt;A TV or a monitor. I bought a 32&quot; JVC TV from a local thrift store. (~$20)&lt;/li&gt;
&lt;li&gt;I built a simple wooden frame to make it look nice.  (~$10) (Nice to have)&lt;/li&gt;
&lt;/ol&gt;
&lt;p&gt;All together under $60.&lt;/p&gt;
&lt;h2&gt;View images&lt;/h2&gt;
&lt;p&gt;I&apos;m using &lt;a href=&quot;https://feh.finalrewind.org/&quot;&gt;feh&lt;/a&gt;. It&apos;s a powerful, fast, and lightweight imlib2-based X11 image viewer that can be run from command-line arguments.&lt;/p&gt;
&lt;pre&gt;&lt;code&gt;sudo apt-get install feh
&lt;/code&gt;&lt;/pre&gt;
&lt;h2&gt;My Art frame feh script&lt;/h2&gt;
&lt;p&gt;I created a simple &lt;code&gt;art.sh&lt;/code&gt; bash script to control my art frame.&lt;/p&gt;
&lt;pre&gt;&lt;code&gt;DISPLAY=:0.0 XAUTHORITY=/home/pi/.Xauthority /usr/bin/feh -q -p -Z -F -R 60 -Y -D 10.0 -r /home/pi/Pictures/art
&lt;/code&gt;&lt;/pre&gt;
&lt;p&gt;This script runs the feh image viewer with specific options. Here&apos;s a breakdown of what each part does:&lt;/p&gt;
&lt;p&gt;&lt;code&gt;DISPLAY=:0.0&lt;/code&gt; tells the system to run the command on the primary display (:0.0). This is useful when running graphical applications from a script or remotely.&lt;/p&gt;
&lt;p&gt;Sets the X Authority File:
&lt;code&gt;XAUTHORITY=/home/pi/.Xauthority&lt;/code&gt; ensures the script has permission to access the X server (the graphical interface). This is needed when running the script as a different user or from a startup process.
Runs feh (a lightweight image viewer) with specific options:&lt;/p&gt;
&lt;ul&gt;
&lt;li&gt;&lt;code&gt;/usr/bin/feh&lt;/code&gt; specifies the path to the feh executable.&lt;/li&gt;
&lt;li&gt;-q (quiet mode) suppresses unnecessary output.&lt;/li&gt;
&lt;li&gt;-p (preload images) loads images into memory for faster transitions.&lt;/li&gt;
&lt;li&gt;-Z (zoom to fill) ensures images fit the screen while maintaining their aspect ratio.&lt;/li&gt;
&lt;li&gt;-F (fullscreen) runs the slideshow in fullscreen mode.&lt;/li&gt;
&lt;li&gt;-R 60 (reload interval) refreshes the image list every 60 seconds, useful if new images are added to the directory.&lt;/li&gt;
&lt;li&gt;-Y (hide cursor) hides the mouse cursor when the slideshow is running.&lt;/li&gt;
&lt;li&gt;-D 10.0 (display time) sets each image to be shown for 10 seconds before transitioning.&lt;/li&gt;
&lt;li&gt;-r (recursive mode) includes images from subdirectories.
Specifies the Image Directory:&lt;/li&gt;
&lt;/ul&gt;
&lt;p&gt;&lt;code&gt;/home/pi/Pictures/art&lt;/code&gt; is the directory where feh looks for images to display in the slideshow.&lt;/p&gt;
&lt;p&gt;To start i just run &lt;code&gt;ssh username@192.168.XX.XX &apos;nohup bash art.sh &amp;gt; /dev/null 2&amp;gt;&amp;amp;1 &amp;amp;&apos;&lt;/code&gt;&lt;/p&gt;
&lt;h2&gt;Rotate the screen&lt;/h2&gt;
&lt;p&gt;Since my frame is in portrait mode, I needed to rotate the screen.&lt;/p&gt;
&lt;pre&gt;&lt;code&gt;sudo nano /boot/config.txt
display_rotate=1 (90 deg)
sudo reboot
&lt;/code&gt;&lt;/pre&gt;
&lt;h2&gt;Controlling the art frame with Raycast script commands or iOS Shortcuts&lt;/h2&gt;
&lt;p&gt;I created a few simple scripts to control the art frame remotely. You can use iOS Shortcuts or Raycast to run these commands over SSH.&lt;/p&gt;
&lt;p&gt;I keep a simple folder on my &lt;code&gt;~/Desktop&lt;/code&gt; called &lt;code&gt;art-frame&lt;/code&gt; where I put images to be transferred to the art frame.&lt;/p&gt;
&lt;h3&gt;Raycast script command example&lt;/h3&gt;
&lt;p&gt;I created a Raycast extension to control the art frame.&lt;/p&gt;
&lt;h2&gt;Image optimization tips&lt;/h2&gt;
&lt;p&gt;A few scripts to help you optimize your images for the art frame.&lt;/p&gt;
&lt;h3&gt;Make all images in 9:16 ratio using Imagemagick&lt;/h3&gt;
&lt;p&gt;Resize and crop all jpg images in the current directory to fit a 9:16 aspect ratio (1080x1920 pixels) using ImageMagick:&lt;/p&gt;
&lt;pre&gt;&lt;code&gt;mogrify -path . -resize 1080x1920^ -gravity center -extent 1080x1920 *.jpg

&lt;/code&gt;&lt;/pre&gt;
&lt;h3&gt;Script to make a single image 9:16 with background color&lt;/h3&gt;
&lt;p&gt;This script extends the outer edges of an image to fit a 9:16 ratio using the color of the top-left pixel as the background color.&lt;/p&gt;
&lt;pre&gt;&lt;code&gt;#!/usr/bin/env bash

# Usage: ./make_9_16.sh input.jpg
# Requires: ImageMagick

input=&quot;$1&quot;

if [ -z &quot;$input&quot; ]; then
    echo &quot;Usage: $0 input_image&quot;
    exit 1
fi

# Extract base name and extension
filename=&quot;${input%.*}&quot;
extension=&quot;${input##*.}&quot;
output=&quot;${filename}-output.${extension}&quot;

# Detect background color from the top-left pixel
bgcolor=$(magick &quot;$input&quot; -format &quot;%[pixel:p{0,0}]&quot; info:-)

# Target size (change as needed)
target_width=1080
target_height=1920

# Resize proportionally and pad to 9:16
magick &quot;$input&quot; \
    -resize &quot;${target_width}x${target_height}&quot; \
    -gravity center \
    -background &quot;$bgcolor&quot; \
    -extent &quot;${target_width}x${target_height}&quot; \
    &quot;$output&quot;

echo &quot;Saved: $output (background color: $bgcolor)&quot;
&lt;/code&gt;&lt;/pre&gt;
</content:encoded></item><item><title>Edit Videos With FFmpeg</title><link>https://urre.me/writing/ffmpeg-commands-for-quick-video-editing/</link><guid isPermaLink="true">https://urre.me/writing/ffmpeg-commands-for-quick-video-editing/</guid><description>It&apos;s already installed on your machine</description><pubDate>Tue, 23 Sep 2025 00:00:00 GMT</pubDate><content:encoded>&lt;p&gt;&lt;a href=&quot;https://ffmpeg.org/&quot;&gt;FFmpeg&lt;/a&gt; is a powerful command-line tool for working with video, audio, and images. It can do it all. It has support for literally everything and it powers everything from Netflix to YouTube. You can find it under the hood of a lot of video tools.&lt;/p&gt;
&lt;p&gt;FFmpeg can speed up your workflow dramatically. Here are some of the tools I use often:&lt;/p&gt;
&lt;h2&gt;1. Add text on top of a video&lt;/h2&gt;
&lt;p&gt;This is a nice command just to add a title or caption to a video. You can customize the font, size, color, position, and duration of the text.&lt;/p&gt;
&lt;pre&gt;&lt;code&gt;ffmpeg -hide_banner -stats -y \
  -i input.mp4 \
  -vf &quot;drawtext=fontfile=&apos;/System/Library/Fonts/Helvetica.ttc&apos;:text=&apos;My Custom Title&apos;:fontcolor=white:fontsize=256:x=(w-text_w)/2:y=200:line_spacing=40:enable=&apos;lte(t,5)&apos;&quot; \
  -c:v h264_videotoolbox -b:v 8M \
  -c:a aac -b:a 192k \
  -movflags +faststart \
  output.mp4
&lt;/code&gt;&lt;/pre&gt;
&lt;ul&gt;
&lt;li&gt;&lt;code&gt;ffmpeg&lt;/code&gt; → runs the ffmpeg program&lt;/li&gt;
&lt;li&gt;&lt;code&gt;-hide_banner&lt;/code&gt; → suppress startup banner (build/config info)&lt;/li&gt;
&lt;li&gt;&lt;code&gt;-stats&lt;/code&gt; → show encoding progress (fps, size, bitrate, time)&lt;/li&gt;
&lt;li&gt;&lt;code&gt;-y&lt;/code&gt; → overwrite output file without asking&lt;/li&gt;
&lt;li&gt;&lt;code&gt;-i input.mp4&lt;/code&gt; → input video file&lt;/li&gt;
&lt;li&gt;&lt;code&gt;-vf&lt;/code&gt; → apply a video filter&lt;/li&gt;
&lt;li&gt;&lt;code&gt;drawtext=&lt;/code&gt; → overlay text filter&lt;/li&gt;
&lt;li&gt;&lt;code&gt;text=&apos;My Custom Title&apos;&lt;/code&gt; → hardcoded text string&lt;/li&gt;
&lt;li&gt;&lt;code&gt;fontfile=&apos;/System/Library/Fonts/Helvetica.ttc&lt;/code&gt; → Use Helvetica&lt;/li&gt;
&lt;li&gt;&lt;code&gt;fontcolor=white&lt;/code&gt; → set text color to white&lt;/li&gt;
&lt;li&gt;&lt;code&gt;fontsize=256&lt;/code&gt; → text size in pixels&lt;/li&gt;
&lt;li&gt;&lt;code&gt;x=(w-text_w)/2&lt;/code&gt; → center text horizontally&lt;/li&gt;
&lt;li&gt;&lt;code&gt;y=200&lt;/code&gt; → place text 200px from top&lt;/li&gt;
&lt;li&gt;&lt;code&gt;line_spacing=40&lt;/code&gt; → vertical spacing between lines&lt;/li&gt;
&lt;li&gt;&lt;code&gt;enable=&apos;lte(t,5)&apos;&lt;/code&gt; → show text only for first 5 seconds&lt;/li&gt;
&lt;li&gt;&lt;code&gt;-c:v h264_videotoolbox&lt;/code&gt; → use Apple’s hardware H.264 encoder&lt;/li&gt;
&lt;li&gt;&lt;code&gt;-b:v 8M&lt;/code&gt; → set video bitrate to 8 Mbps&lt;/li&gt;
&lt;li&gt;&lt;code&gt;-c:a aac&lt;/code&gt; → use AAC audio codec&lt;/li&gt;
&lt;li&gt;&lt;code&gt;-b:a 192k&lt;/code&gt; → set audio bitrate to 192 kbps&lt;/li&gt;
&lt;li&gt;&lt;code&gt;-movflags +faststart&lt;/code&gt; → optimize MP4 for web playback&lt;/li&gt;
&lt;li&gt;&lt;code&gt;output.mp4&lt;/code&gt; → output file name&lt;/li&gt;
&lt;/ul&gt;
&lt;h2&gt;2. Merge multiple videos into one&lt;/h2&gt;
&lt;p&gt;Just create a new file with all the videos stitched together.&lt;/p&gt;
&lt;pre&gt;&lt;code&gt;ffmpeg -f concat -safe 0 -i &amp;lt;(for f in *.mp4; do echo &quot;file &apos;$PWD/$f&apos;&quot;; done) -c copy output.mp4
&lt;/code&gt;&lt;/pre&gt;
&lt;h2&gt;3. Create a Instagram Story Video from Images&lt;/h2&gt;
&lt;p&gt;If you want to stitch multiple images into a 9x16 vertical video (perfect for Instagram Stories), you can do this:&lt;/p&gt;
&lt;pre&gt;&lt;code&gt;ffmpeg -framerate 1/1.5 -i %d.jpg -vf &quot;scale=1080:1920,format=yuv420p&quot; -c:v libx264 -crf 23 -preset fast output.mp4
&lt;/code&gt;&lt;/pre&gt;
&lt;p&gt;This command:&lt;/p&gt;
&lt;ul&gt;
&lt;li&gt;&lt;code&gt;-framerate 1/1.5&lt;/code&gt; → Each image shows for 1.5 seconds&lt;/li&gt;
&lt;li&gt;&lt;code&gt;scale=1080:1920&lt;/code&gt; → Sets the video to portrait size (9:16 ratio)&lt;/li&gt;
&lt;li&gt;&lt;code&gt;libx264&lt;/code&gt; → High-quality compression for MP4&lt;/li&gt;
&lt;/ul&gt;
&lt;h2&gt;4. Convert MP4 to GIF&lt;/h2&gt;
&lt;p&gt;Need to make lightweight GIFs? This works even on low-power devices like the Raspberry Pi:&lt;/p&gt;
&lt;pre&gt;&lt;code&gt;ffmpeg -i input.mp4 -vf &quot;fps=15,scale=1280:-1:flags=lanczos&quot; output.gif
&lt;/code&gt;&lt;/pre&gt;
&lt;p&gt;Key parameters:&lt;/p&gt;
&lt;ul&gt;
&lt;li&gt;&lt;code&gt;fps=15&lt;/code&gt; → Keeps the file size reasonable&lt;/li&gt;
&lt;li&gt;&lt;code&gt;scale=1280:-1&lt;/code&gt; → Resizes while preserving aspect ratio&lt;/li&gt;
&lt;/ul&gt;
&lt;h2&gt;5. Adjust a GIF to Fullscreen Size&lt;/h2&gt;
&lt;p&gt;This is a small trick I use on my Raspberry Pi powered art frame.&lt;/p&gt;
&lt;p&gt;If your GIF doesn`t fill the screen, you can extend it with a background color. Use a color picker to grab a matching background:&lt;/p&gt;
&lt;p&gt;First check the resolution on your display:&lt;/p&gt;
&lt;p&gt;On macOS:&lt;/p&gt;
&lt;pre&gt;&lt;code&gt;system_profiler SPDisplaysDataType | grep Resolution
&lt;/code&gt;&lt;/pre&gt;
&lt;p&gt;On Linux&lt;/p&gt;
&lt;pre&gt;&lt;code&gt;xrandr | grep &apos;*&apos;
&lt;/code&gt;&lt;/pre&gt;
&lt;p&gt;Then use ImageMagick to resize and add a background color:&lt;/p&gt;
&lt;pre&gt;&lt;code&gt;magick square.gif -coalesce -background &quot;#333333&quot; -gravity center -extent 656x1216 -layers optimize output.gif
&lt;/code&gt;&lt;/pre&gt;
&lt;h2&gt;6. Convert GIF to MP4&lt;/h2&gt;
&lt;p&gt;Converting GIFs to MP4 makes them smaller and more web-friendly:&lt;/p&gt;
&lt;pre&gt;&lt;code&gt;ffmpeg -i input.gif -c:v libx264 -preset slow -crf 23 -pix_fmt yuv420p output.mp4
&lt;/code&gt;&lt;/pre&gt;
&lt;h2&gt;7. Create a GIF from MP4&lt;/h2&gt;
&lt;p&gt;A smaller optimized for web&lt;/p&gt;
&lt;pre&gt;&lt;code&gt;ffmpeg -i input.mp4 -vf &quot;fps=10,scale=320:-1:flags=lanczos&quot; -c:v pam -f image2pipe - | convert -delay 10 - -loop 0 -layers optimize output.gif
&lt;/code&gt;&lt;/pre&gt;
&lt;p&gt;A higher-quality GIF:&lt;/p&gt;
&lt;pre&gt;&lt;code&gt;ffmpeg -i input.mp4 -vf &quot;fps=10,scale=320:-1:flags=lanczos&quot; -c:v pam -f image2pipe - | convert -delay 10 - -loop 0 -layers optimize output.gif
&lt;/code&gt;&lt;/pre&gt;
&lt;h2&gt;8. Convert Video to a Sequence of Images&lt;/h2&gt;
&lt;p&gt;This is great for making thumbnails or analyzing video frames:&lt;/p&gt;
&lt;pre&gt;&lt;code&gt;ffmpeg -i &quot;input.mp4&quot; &quot;frames/%04d.jpg&quot;
&lt;/code&gt;&lt;/pre&gt;
&lt;h2&gt;9. Lower Audio Volume&lt;/h2&gt;
&lt;p&gt;Quickly adjust audio levels:&lt;/p&gt;
&lt;pre&gt;&lt;code&gt;ffmpeg -i ac.mp4 -af volume=7 -vcodec copy ac2.mp4
&lt;/code&gt;&lt;/pre&gt;
&lt;h2&gt;10. Speed Up a Video&lt;/h2&gt;
&lt;p&gt;Perfect for timelapse-style edits:&lt;/p&gt;
&lt;pre&gt;&lt;code&gt;ffmpeg -i mp4.mp4 -filter:v &quot;setpts=PTS/6&quot; output.mp4
&lt;/code&gt;&lt;/pre&gt;
&lt;ul&gt;
&lt;li&gt;&lt;code&gt;filter:v &quot;setpts=PTS/6&quot;&lt;/code&gt;: Applies a video filter that modifies the presentation timestamp (PTS) of each frame&lt;/li&gt;
&lt;li&gt;&lt;code&gt;setpts&lt;/code&gt; is the filter that controls the speed of video playback&lt;/li&gt;
&lt;li&gt;&lt;code&gt;PTS/6&lt;/code&gt; means each frame will be displayed for 1/6th of its original duration, resulting in 6x faster playback&lt;/li&gt;
&lt;/ul&gt;
&lt;h2&gt;11. Add Audio to a Video Recording&lt;/h2&gt;
&lt;p&gt;Add background music:&lt;/p&gt;
&lt;pre&gt;&lt;code&gt;ffmpeg -i 1.mp4 -i audio.mp3 -map 0 -map 1:a -c:v copy -shortest output.mp4
&lt;/code&gt;&lt;/pre&gt;
&lt;h2&gt;12. Convert from MOV to MP4&lt;/h2&gt;
&lt;p&gt;Fast rewrapping without re-encoding:&lt;/p&gt;
&lt;pre&gt;&lt;code&gt;ffmpeg -i movie.mov -vcodec copy -acodec copy out.mp4
&lt;/code&gt;&lt;/pre&gt;
&lt;h2&gt;13. Change Video Resolution&lt;/h2&gt;
&lt;p&gt;Resize videos easily:&lt;/p&gt;
&lt;pre&gt;&lt;code&gt;ffmpeg -i input.avi -s 720x480 -c:a copy output.mkv
&lt;/code&gt;&lt;/pre&gt;
&lt;h2&gt;14. Remove Audio from a Video&lt;/h2&gt;
&lt;p&gt;Mute a video while keeping the visuals intact:&lt;/p&gt;
&lt;pre&gt;&lt;code&gt;ffmpeg -i input.mp4 -an output.mp4
&lt;/code&gt;&lt;/pre&gt;
&lt;h2&gt;15. Extract Images from a Video&lt;/h2&gt;
&lt;p&gt;Grab one image per second:&lt;/p&gt;
&lt;pre&gt;&lt;code&gt;ffmpeg -i input.mp4 -r 1 -f image2 image-%2d.png
&lt;/code&gt;&lt;/pre&gt;
&lt;h2&gt;Final Thoughts&lt;/h2&gt;
&lt;p&gt;FFmpeg can look intimidating at first, but once you get comfortable, it becomes one of the fastest ways to manipulate media.&lt;/p&gt;
</content:encoded></item><item><title>Darken or Lighten the Background Color in CSS Using Color-Mix() and Oklch()</title><link>https://urre.me/writing/darken-or-lighten-with-css/</link><guid isPermaLink="true">https://urre.me/writing/darken-or-lighten-with-css/</guid><description>When moving a code base away from Sass, this was one of the remaining things.</description><pubDate>Sun, 15 Dec 2024 00:00:00 GMT</pubDate><content:encoded>&lt;p&gt;One of the last pieces when moving a Sass codebase to vanilla CSS was to replace the &lt;code&gt;darken()&lt;/code&gt; and &lt;code&gt;lighten()&lt;/code&gt; color functions in Sass. Now it&apos;s easier than before. There are good browser support for both &lt;code&gt;color-mix()&lt;/code&gt; and the &lt;code&gt;oklch()&lt;/code&gt; color space.
A quick example:&lt;/p&gt;
&lt;pre&gt;&lt;code&gt;/* Darken background color in CSS, two options
Instead of using Sass lighten() and darken()
Urban Sanden 2024
*/

@layer demo;

@layer demo {
  :root {
    --first-color: hotpink;
    --second-color: brown;
    --third-color: dodgerblue;
    --fourth-color: purple;
  }

  .buttons {
    display: grid;
    grid-template-columns: repeat(2, minmax(0, 1fr));
    gap: 1rem;
  }

  .first {
    background-color: var(--first-color);
  }

  .second {
    background-color: var(--second-color);
  }

  .third {
    background-color: var(--third-color);
  }

  .fourth {
    background-color: var(--fourth-color);
  }

  .first:hover {
    /*
  The color-mix() functional notation takes two &amp;lt;color&amp;gt; values and returns the result of mixing them in a given colorspace by a given amount.
  https://developer.mozilla.org/en-US/docs/Web/CSS/color_value/color-mix
  */
    background-color: color-mix(in srgb, var(--first-color), #000 20%);
  }

  .second:hover {
    /*
  The oklch() expresses a given color in the Oklab color space. oklch() is the cylindrical form of oklab(), using the same L axis, but with polar Chroma (C) and Hue (h) coordinates.
  https://developer.mozilla.org/en-US/docs/Web/CSS/color_value/oklch
  */
    background-color: oklch(from var(--second-color) calc(l - 0.2) c h);
  }

  .third:hover {
    /*
Lighten
  */
    background-color: color-mix(in srgb, var(--third-color) 60%, white);
  }

  .fourth:hover {
    /*
Lighten
  */
    background-color: oklch(from var(--fourth-color) calc(l + 0.2) c h);
  }
}
&lt;/code&gt;&lt;/pre&gt;
</content:encoded></item><item><title>How to Import and Show All the Components From a Npm Package</title><link>https://urre.me/writing/show-all-components-from-a-package/</link><guid isPermaLink="true">https://urre.me/writing/show-all-components-from-a-package/</guid><description>How to import and show all the components from a npm package</description><pubDate>Tue, 15 Oct 2024 00:00:00 GMT</pubDate><content:encoded>&lt;p&gt;I was working on an npm package with React Components, and this is just a short note to self on how to import all the components from the package and list them.&lt;/p&gt;
&lt;pre&gt;&lt;code&gt;

export const IconDisplay = () =&amp;gt; (
  &amp;lt;ul&amp;gt;
    {Object.entries(Icons).map(([iconName, IconComponent]) =&amp;gt; (
      
    ))}
  &amp;lt;/ul&amp;gt;
);

interface IconItemProps {
  name: string;
  Component: React.ComponentType;
}

const IconItem = ({ name, Component }: IconItemProps) =&amp;gt; (
  &amp;lt;li&amp;gt;
    
    &amp;lt;p&amp;gt;{name}&amp;lt;/p&amp;gt;
  &amp;lt;/li&amp;gt;
);
&lt;/code&gt;&lt;/pre&gt;
&lt;p&gt;Now, use it like this&lt;/p&gt;
&lt;pre&gt;&lt;code&gt;


&lt;/code&gt;&lt;/pre&gt;
</content:encoded></item><item><title>How to Create a Spotify Playlist From a List of Tracks</title><link>https://urre.me/writing/how-to-create-a-spotify-playlist-from-a-list-of-tracks-in-a-text-file/</link><guid isPermaLink="true">https://urre.me/writing/how-to-create-a-spotify-playlist-from-a-list-of-tracks-in-a-text-file/</guid><description>When you come across a plain list of great songs, but there is no playlist linked to any music service.</description><pubDate>Mon, 22 Apr 2024 00:00:00 GMT</pubDate><content:encoded>&lt;p&gt;
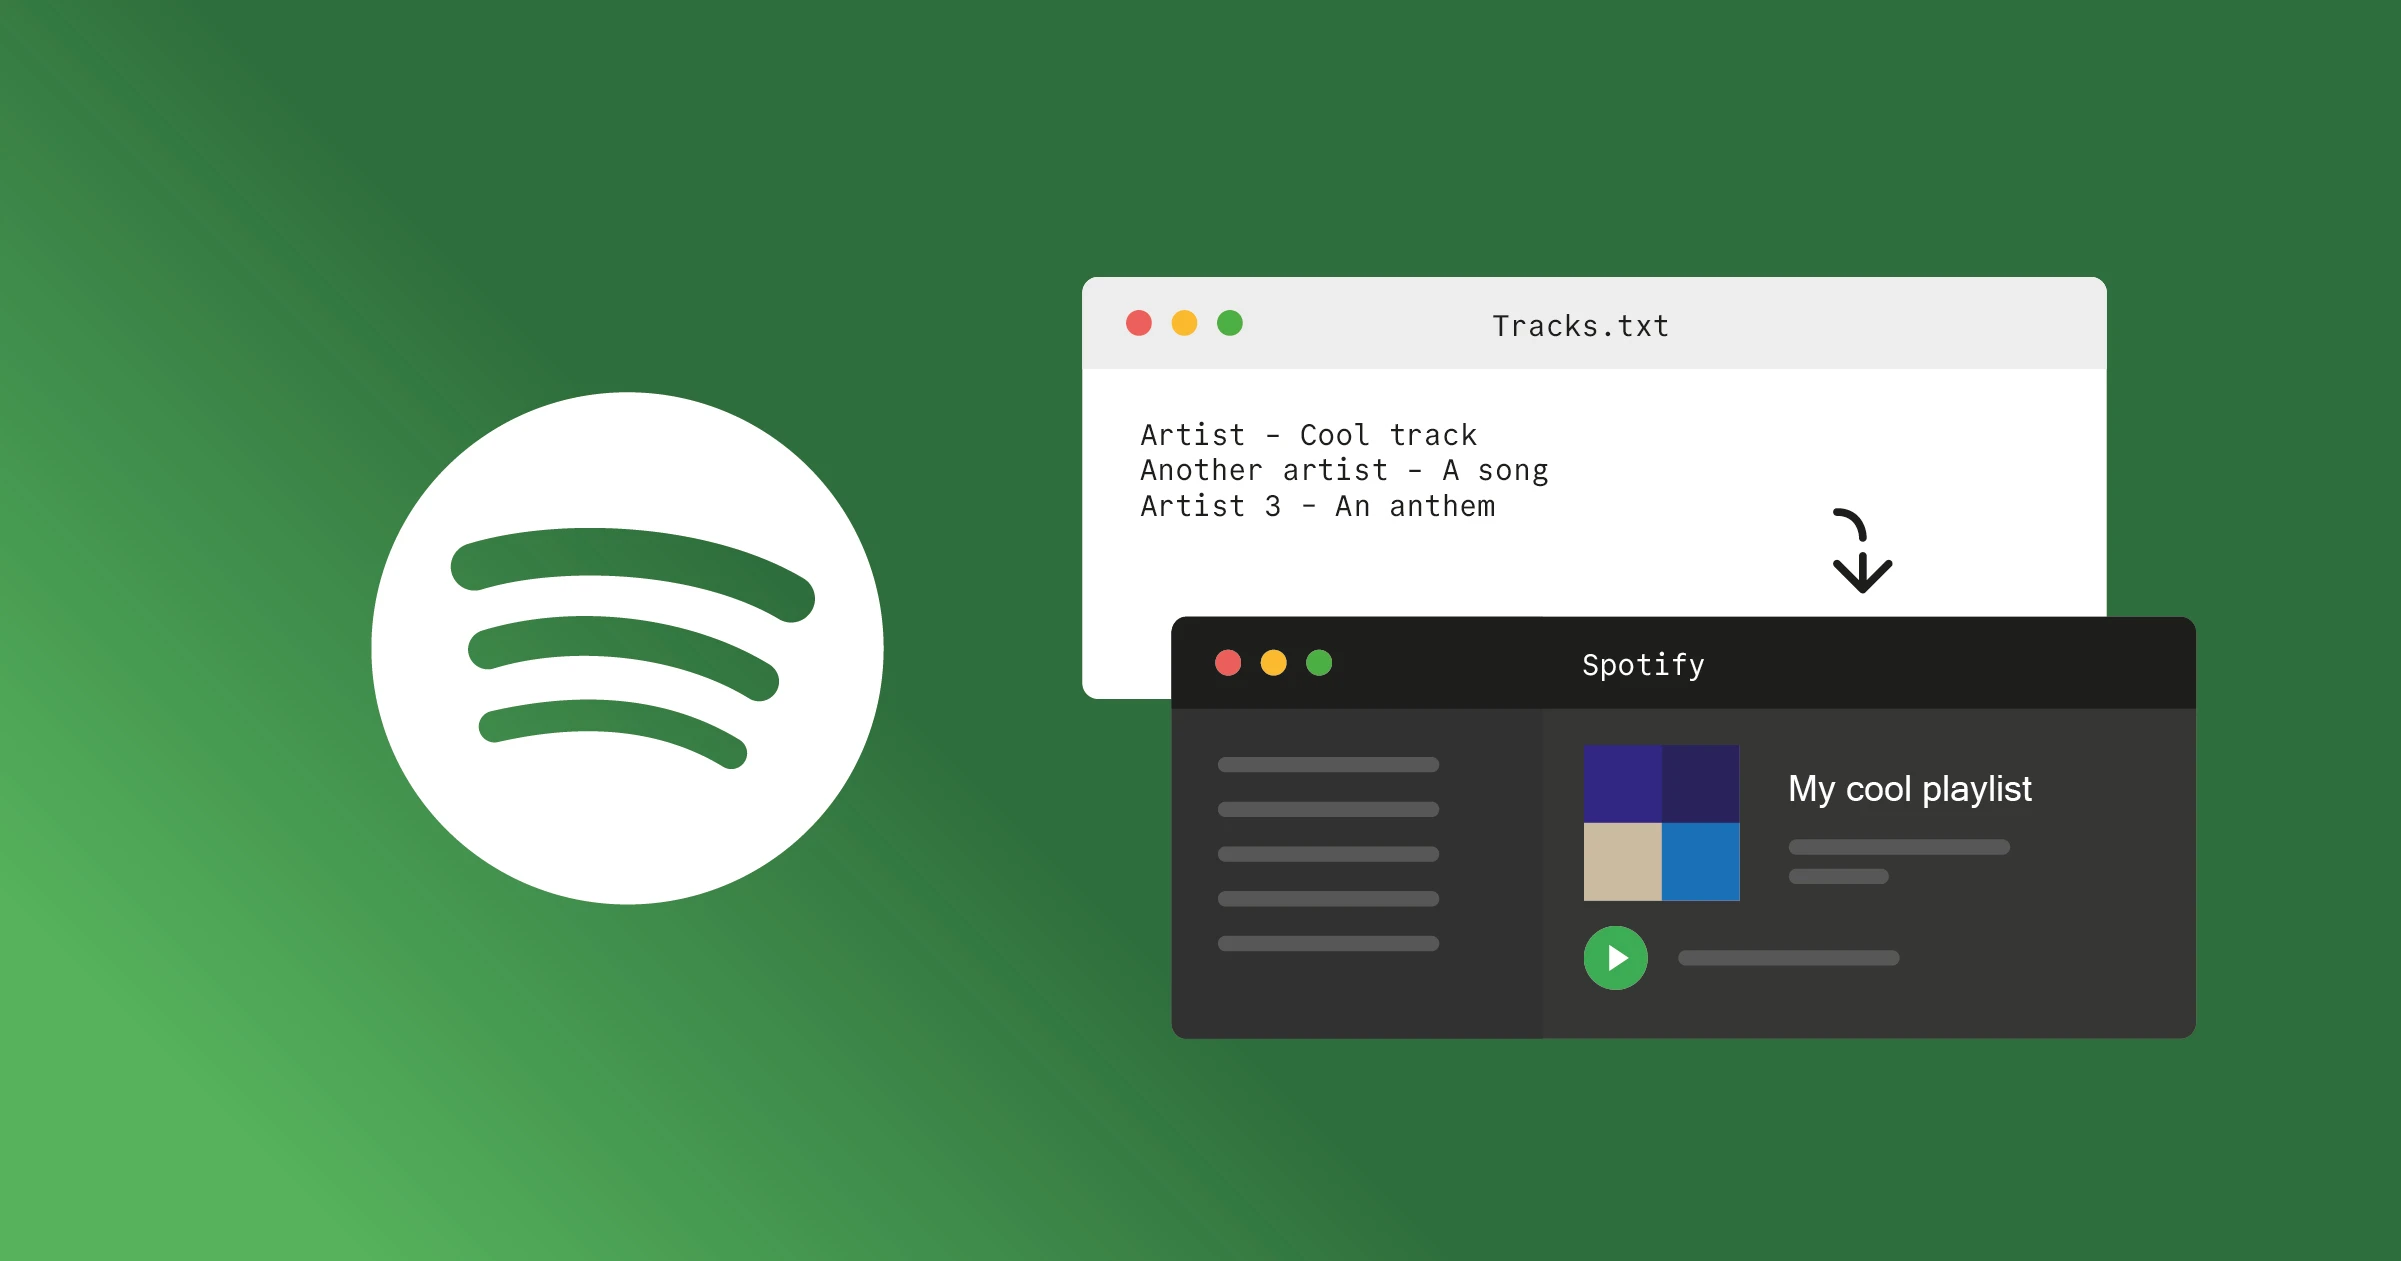
Very often you come across a plain list of tracks of good songs, but with no playlist on Spotify, Apple Music or TIDAL etc is linked. For example I often see it on YouTube in the video description field. Often I like the songs so much I want to add it to a real playlist. I create a little script for this using the Spotify Web API.&lt;/p&gt;
&lt;p&gt;Lets get started!&lt;/p&gt;
&lt;h2&gt;Create a Spotify application&lt;/h2&gt;
&lt;ol&gt;
&lt;li&gt;Head over to &lt;a href=&quot;%5Bhttps://developer.spotify.com/dashboard%5D(https://developer.spotify.com/dashboard)&quot;&gt;Spotify for Developers&lt;/a&gt;&lt;/li&gt;
&lt;li&gt;Create an App, give it a name and set a redirect URI for example &lt;code&gt;http://localhost:8080/callback&lt;/code&gt;&lt;/li&gt;
&lt;li&gt;Select  “Web API” on the question &quot;Which API/SDKs are you planning to use&quot;?&lt;/li&gt;
&lt;li&gt;Click Save and copy your Client ID and Client Secret, you will need these in your a secrets file &lt;code&gt;.env&lt;/code&gt; shortly.&lt;/li&gt;
&lt;/ol&gt;
&lt;h2&gt;Setup a project&lt;/h2&gt;
&lt;ol&gt;
&lt;li&gt;Initialize a new project using &lt;code&gt;npm init -y&lt;/code&gt;&lt;/li&gt;
&lt;li&gt;Install dependencies &lt;code&gt;npm i dotenv express spotify-web-api-node&lt;/code&gt;&lt;/li&gt;
&lt;li&gt;Create a &lt;code&gt;tracks.txt&lt;/code&gt; with a song on each line for example:&lt;/li&gt;
&lt;/ol&gt;
&lt;pre&gt;&lt;code&gt;Four Walls - Constellations
Randee Jean - You Got It
Cengiz - On On On
Don Pascal - Cape Verdean Bruk (Haze City Remix)
Future Disco - Future Disco Poolside 4 (DJ Mix)
28 Nathan Haines - Right Now (feat. Marlena Shaw)
&lt;/code&gt;&lt;/pre&gt;
&lt;ol&gt;
&lt;li&gt;Create an &lt;code&gt;.env&lt;/code&gt; file and enter your client ID and secret like this&lt;/li&gt;
&lt;/ol&gt;
&lt;pre&gt;&lt;code&gt;SPOTIFY_CLIENT_ID=XXX
SPOTIFY_CLIENT_SECRET=XXX
&lt;/code&gt;&lt;/pre&gt;
&lt;ol&gt;
&lt;li&gt;Create a &lt;code&gt;.index.js&lt;/code&gt;. First define a few variables, port and playlist name&lt;/li&gt;
&lt;/ol&gt;
&lt;pre&gt;&lt;code&gt;const PORT = 8080;
let playlistName = &quot;&quot;;
&lt;/code&gt;&lt;/pre&gt;
&lt;ol&gt;
&lt;li&gt;Then instantiate the wrapper&lt;/li&gt;
&lt;/ol&gt;
&lt;pre&gt;&lt;code&gt;const spotifyApi = new SpotifyWebApi({
  clientId: process.env.SPOTIFY_CLIENT_ID,
  clientSecret: process.env.SPOTIFY_CLIENT_SECRET,
  redirectUri: &quot;http://localhost:8080/callback&quot;,
});
&lt;/code&gt;&lt;/pre&gt;
&lt;ol&gt;
&lt;li&gt;Define the request to the &lt;code&gt;/login&lt;/code&gt; endpoint. The URL is used to initiate the authorization flow. We need to specify the scopes needed to define the access permissions the application requests from the user.  We then redirect the user&apos;s browser to the generated authorization URL. In my example I&apos;m using three different scopes to be able to do what I want. Read more about &lt;a href=&quot;https://developer.spotify.com/documentation/web-api/concepts/scopes&quot;&gt;Spotify Scopes here&lt;/a&gt;.&lt;/li&gt;
&lt;/ol&gt;
&lt;pre&gt;&lt;code&gt;app.get(&quot;/login&quot;, (req, res) =&amp;gt; {
  const authorizeURL = spotifyApi.createAuthorizeURL(
    [&quot;playlist-modify-public&quot;, &quot;playlist-modify-private&quot;],
    &quot;state&quot;
  );
  res.redirect(authorizeURL);
});
&lt;/code&gt;&lt;/pre&gt;
&lt;ol&gt;
&lt;li&gt;Define the request to the &lt;code&gt;/callback&lt;/code&gt; endpoint. When the user will visit&lt;code&gt;/login&lt;/code&gt; it redirects to the &lt;code&gt;http://localhost:8080/callback?code=AQDD61QPdOo)XXXXX&lt;/code&gt; where &lt;code&gt;XXXXX&lt;/code&gt; is the access token we need to use the Spotify Web API. If we are successful we proceed with the the &lt;code&gt;createPlaylistAndAddTracks&lt;/code&gt;.&lt;/li&gt;
&lt;/ol&gt;
&lt;pre&gt;&lt;code&gt;app.get(&quot;/callback&quot;, async (req, res) =&amp;gt; {
  const { code } = req.query;
  try {
    const data = await spotifyApi.authorizationCodeGrant(code);
    const { access_token, refresh_token } = data.body;
    spotifyApi.setAccessToken(access_token);
    spotifyApi.setRefreshToken(refresh_token);
    console.log(&quot;✅ Successfully obtained access token: &quot;, access_token);
    res.send(&quot;✅ Authorization successful! You can now close this window.&quot;);
    await createPlaylistAndAddTracks();
  } catch (err) {
    console.log(&quot;Error during authorization:&quot;, err);
    res.send(&quot;Authorization failed. Please try again.&quot;);
  }
});
&lt;/code&gt;&lt;/pre&gt;
&lt;ol&gt;
&lt;li&gt;Define the &lt;code&gt;createPlaylistAndAddTracks&lt;/code&gt; method. We read the contents of the &lt;code&gt;tracks.txt&lt;/code&gt; file and for each track we run &lt;code&gt;searchAndAddTrack&lt;/code&gt;.&lt;/li&gt;
&lt;/ol&gt;
&lt;pre&gt;&lt;code&gt;async function createPlaylistAndAddTracks() {
  try {
    const data = await spotifyApi.createPlaylist(playlistName, {
      description: &quot;A nice playlist&quot;,
      public: false,
    });
    const playlistId = data.body.id;
    const cleanedLines = await processTracksFile(&quot;tracks.txt&quot;);
    await Promise.all(
      cleanedLines.map((trackInfo) =&amp;gt; searchAndAddTrack(trackInfo, playlistId))
    );
    console.log(&quot;All tracks added to playlist!&quot;);
    process.exit();
  } catch (err) {
    console.log(&quot;Error creating playlist or adding tracks:&quot;, err);
  }
}
&lt;/code&gt;&lt;/pre&gt;
&lt;ol&gt;
&lt;li&gt;Now we define the &lt;code&gt;searchAndAddTrack&lt;/code&gt; method which does a search on Spotify, if a result was found it adds it to the playlist using the &lt;code&gt;addTracksToPlaylist&lt;/code&gt; method.&lt;/li&gt;
&lt;/ol&gt;
&lt;pre&gt;&lt;code&gt;async function searchAndAddTrack(trackInfo, playlistId) {
  try {
    const [artist, song] = trackInfo.split(&quot; - &quot;);
    const data = await spotifyApi.searchTracks(
      `artist:${artist} track:${song}`,
      { limit: 1 }
    );
    const track = data.body.tracks.items[0];
    if (track) {
      const trackId = track.id;
      console.log(`✅ Added track for song ${artist} - ${song}`);
      await spotifyApi.addTracksToPlaylist(playlistId, [
        `spotify:track:${trackId}`,
      ]);
    } else {
      console.log(`🚫 Track not found for ${artist} - ${song}`);
    }
  } catch (err) {
    console.log(&quot;Error searching and adding track:&quot;, err);
  }
}
&lt;/code&gt;&lt;/pre&gt;
&lt;ol&gt;
&lt;li&gt;Start the Express application on port 8080 using &lt;code&gt;node index.js&lt;/code&gt;&lt;/li&gt;
&lt;/ol&gt;
&lt;pre&gt;&lt;code&gt;app.listen(PORT, () =&amp;gt; {
  process.stdout.write(&apos;\x1B[2J\x1B[0f&apos;); // Just clear the shell
  console.log(`Server is listening on port ${PORT}.`);
  process.stdout.write(
    &quot;This tool will convert tracks from a text file to a Spotify playlist.&quot;
  );
  process.stdout.write(&quot;Give the playlist a name: &quot;);
  process.stdin.once(&quot;data&quot;, (data) =&amp;gt; {
    playlistName = data.toString().trim();
    console.log(
      &quot;✅ Will create and add tracks to this playlist: &quot;,
      playlistName
    );
    console.log(
      &quot;\n\nNow Please open your browser and navigate to `http://localhost:8080/login` to authorize the application&quot;
    );
  });
});
&lt;/code&gt;&lt;/pre&gt;
&lt;ol&gt;
&lt;li&gt;Now the app is running&lt;/li&gt;
&lt;/ol&gt;
&lt;pre&gt;&lt;code&gt;Server is listening on port 8080.
This tool will convert tracks in text file to a Spotify playlist
Give the playlist a name: Soulful House, Rare Grooves
✅ Will create and add tracks to this playlist:  Soulful House, Rare Grooves

Now Please open your browser and navigate to http://localhost:8080/login to authorize the application
&lt;/code&gt;&lt;/pre&gt;
&lt;ol&gt;
&lt;li&gt;The user visits &lt;code&gt;http://localhost:8080/login&lt;/code&gt; and then the tracks are starting to add to the new playlist. Keep in mind, not all music is available on streaming platforms, so there&apos;s a chance that some tracks may not be found.&lt;/li&gt;
&lt;/ol&gt;
&lt;pre&gt;&lt;code&gt;✅ Successfully obtained access token:  XXXXX
🚫 Track not found for Future Disco - Future Disco Poolside  (DJ Mix
✅ Added track for song Nathan Haines - Right Now (feat. Marlena Shaw
✅ Added track for song Cengiz - On On On
✅ Added track for song Four Walls - Constellations
✅ Added track for song Randee Jean - You Got It
✅ Added track for song Don Pascal - Cape Verdean Bruk (Haze City Remix
&lt;/code&gt;&lt;/pre&gt;
&lt;p&gt;🎷 Enjoy the music!&lt;/p&gt;
</content:encoded></item><item><title>Add Jira Ticket Numbers to Git Commits Using Git Hooks</title><link>https://urre.me/writing/prepend-jira-ticket-to-git-commit/</link><guid isPermaLink="true">https://urre.me/writing/prepend-jira-ticket-to-git-commit/</guid><description>How to automate the boring things.</description><pubDate>Wed, 10 Apr 2024 00:00:00 GMT</pubDate><content:encoded>&lt;h2&gt;Why&lt;/h2&gt;
&lt;p&gt;At work we use JIRA and usually use a consistent branch naming system where all branches and commits should include the ticket name.&lt;/p&gt;
&lt;p&gt;For example branches looks like this:&lt;/p&gt;
&lt;pre&gt;&lt;code&gt;feature/dev/PROJ-1234-branch-name-example
&lt;/code&gt;&lt;/pre&gt;
&lt;p&gt;and commits:&lt;/p&gt;
&lt;pre&gt;&lt;code&gt;PROJ-1234 Fix tests
&lt;/code&gt;&lt;/pre&gt;
&lt;h2&gt;Setting up the Git Hook&lt;/h2&gt;
&lt;p&gt;Go to the git hooks directory inside your repo.&lt;/p&gt;
&lt;pre&gt;&lt;code&gt;cd .git/hooks/
&lt;/code&gt;&lt;/pre&gt;
&lt;p&gt;Create a file called &lt;code&gt;prepare-commit-msg&lt;/code&gt;&lt;/p&gt;
&lt;pre&gt;&lt;code&gt;touch .git/hooks/prepare-commit-msg
&lt;/code&gt;&lt;/pre&gt;
&lt;p&gt;Make it executable.&lt;/p&gt;
&lt;pre&gt;&lt;code&gt;chmod +x .git/hooks/prepare-commit-msg
&lt;/code&gt;&lt;/pre&gt;
&lt;h2&gt;Add the script&lt;/h2&gt;
&lt;p&gt;Open prepare-commit-msg in your editor and paste the following script:&lt;/p&gt;
&lt;pre&gt;&lt;code&gt;#!/bin/bash

# Create .git/hooks/prepare-commit-msg
# Run before using: chmod +x prepare-commit-msg

# Example: If the branch is called ex feature/dev/PROJ-1234-branch-name-example or
# feature/PROJ-6789/PROJ-1234-another-branch-name-example
# then the commit will be &quot;PROJ-1234 Your commit message&quot;

FILE=$1
MESSAGE=$(cat &quot;$FILE&quot;)
BRANCH_NAME=$(git rev-parse --abbrev-ref HEAD)
SEPARATOR=&quot; &quot;

# Extract ticket (handles feature/PROJ-1234, PROJ-1234, etc)
TICKET=$(echo &quot;$BRANCH_NAME&quot; | grep -Eo &apos;[A-Za-z]+-[0-9]+&apos; | head -n 1 | tr &apos;[:lower:]&apos; &apos;[:upper:]&apos;)

# Only modify if a ticket was found and it&apos;s not already in the commit message
if [[ -n &quot;$TICKET&quot; &amp;amp;&amp;amp; &quot;$MESSAGE&quot; != &quot;$TICKET&quot;* ]]; then
  echo &quot;$TICKET$SEPARATOR$MESSAGE&quot; &amp;gt; &quot;$FILE&quot;
fi

&lt;/code&gt;&lt;/pre&gt;
&lt;p&gt;This shell script extracts the JIRA ticket number from your branch name and appends it to your commit message.&lt;/p&gt;
&lt;h3&gt;Enjoy!&lt;/h3&gt;
</content:encoded></item><item><title>Update Transitive Dependencies in Npm</title><link>https://urre.me/writing/pin-transitive-dependencies/</link><guid isPermaLink="true">https://urre.me/writing/pin-transitive-dependencies/</guid><description>How to fix transitive dependencies that have vulnabilities.</description><pubDate>Thu, 07 Sep 2023 00:00:00 GMT</pubDate><content:encoded>&lt;p&gt;Let&apos;s say you are working with a project that has transitive dependencies that have vulnabilities. Updating the main library might not be enough.
The use case for this is when there is a security vulnerability and you have to update a nested dependency otherwise your project would be vulnerable.&lt;/p&gt;
&lt;h3&gt;Check the dependency tree&lt;/h3&gt;
&lt;p&gt;The &lt;code&gt;ls&lt;/code&gt; command is used to list the dependency tree of a specific package in your Node.js project.&lt;/p&gt;
&lt;pre&gt;&lt;code&gt;npm ls packagename
&lt;/code&gt;&lt;/pre&gt;
&lt;p&gt;Example output:&lt;/p&gt;
&lt;pre&gt;&lt;code&gt;npm ls third-package-name
myproject@0.1.0 /Users/username/path/to/myproject
├─┬ package-name@3.12.0
│ └─┬ another-package-name@4.12.0
│   └── third-package-name@9.17.0
├─┬ ...

&lt;/code&gt;&lt;/pre&gt;
&lt;p&gt;When you perform security scans and audits with Snyk or Fossa or a similar tool, you may discover that for example &lt;code&gt;third-package-name@9.17.0&lt;/code&gt; has a vulnability. Updating the library or package using this transitive package is the best, but if this is not possible your could pin it like this.&lt;/p&gt;
&lt;h2&gt;Use npm overrides&lt;/h2&gt;
&lt;p&gt;Since npm 8.3, npm has built-in support for overriding transitive dependencies through the &lt;code&gt;overrides&lt;/code&gt; field in &lt;code&gt;package.json&lt;/code&gt;. This is the native equivalent of yarn&apos;s selective dependency resolutions — no extra packages or preinstall scripts needed.&lt;/p&gt;
&lt;h3&gt;Add an overrides key to package.json&lt;/h3&gt;
&lt;pre&gt;&lt;code&gt;  &quot;overrides&quot;: {
    &quot;third-package-name&quot;: &quot;^12.0.0&quot;
  }
&lt;/code&gt;&lt;/pre&gt;
&lt;p&gt;Where as an example &lt;code&gt;12.0.0&lt;/code&gt; is the updated version that doesn&apos;t have vulnabilities.&lt;/p&gt;
&lt;p&gt;If you only want to override the version when it&apos;s nested under a specific parent, you can scope it:&lt;/p&gt;
&lt;pre&gt;&lt;code&gt;  &quot;overrides&quot;: {
    &quot;package-name&quot;: {
      &quot;third-package-name&quot;: &quot;^12.0.0&quot;
    }
  }
&lt;/code&gt;&lt;/pre&gt;
&lt;h3&gt;Install and update the transitive dependency&lt;/h3&gt;
&lt;p&gt;Install again&lt;/p&gt;
&lt;pre&gt;&lt;code&gt;npm i
&lt;/code&gt;&lt;/pre&gt;
&lt;p&gt;Now, when you check the dependency tree agin, you can see it has been fixed:&lt;/p&gt;
&lt;pre&gt;&lt;code&gt;npm ls third-package-name
myproject@0.1.0 /Users/username/path/to/myproject
├─┬ package-name@3.12.0
│ └─┬ another-package-name@4.12.0
│   └── third-package-name@12.0.0
├─┬ ...

&lt;/code&gt;&lt;/pre&gt;
</content:encoded></item><item><title>Test Local Npm Packages With Ease</title><link>https://urre.me/writing/local-npm-packages/</link><guid isPermaLink="true">https://urre.me/writing/local-npm-packages/</guid><description>Waus to test a package locally without the necessity of publishing it to npm.</description><pubDate>Mon, 19 Jun 2023 00:00:00 GMT</pubDate><content:encoded>&lt;p&gt;When working with npm packages, it is good to be able to test it locally without the necessity of publishing it to npm. Here are some ways you can achieve that.&lt;/p&gt;
&lt;h2&gt;Use npm link&lt;/h2&gt;
&lt;p&gt;You can create a symlink like this.&lt;/p&gt;
&lt;p&gt;In the package:&lt;/p&gt;
&lt;pre&gt;&lt;code&gt;npm link
&lt;/code&gt;&lt;/pre&gt;
&lt;p&gt;In the project that uses the package:&lt;/p&gt;
&lt;pre&gt;&lt;code&gt;npm link my-package
&lt;/code&gt;&lt;/pre&gt;
&lt;p&gt;Now the packages are linked.&lt;/p&gt;
&lt;p&gt;To unlink:&lt;/p&gt;
&lt;pre&gt;&lt;code&gt;npm unlink my-package
&lt;/code&gt;&lt;/pre&gt;
&lt;h2&gt;Install locally&lt;/h2&gt;
&lt;p&gt;Install by just referencing the local path inside &lt;code&gt;package.json&lt;/code&gt;&lt;/p&gt;
&lt;pre&gt;&lt;code&gt;{
  &quot;name&quot;: &quot;my-project&quot;,
  &quot;dependencies&quot;: {
    &quot;@myuser/my-package&quot;: &quot;file:../lib&quot;
  }
}
&lt;/code&gt;&lt;/pre&gt;
&lt;p&gt;And then just install&lt;/p&gt;
&lt;pre&gt;&lt;code&gt;npm i
&lt;/code&gt;&lt;/pre&gt;
&lt;h2&gt;Install locally by using npm pack&lt;/h2&gt;
&lt;p&gt;If you want, you can package the local package and use it locally. Here you are using the same artifact that gets uploaded to npm.&lt;/p&gt;
&lt;pre&gt;&lt;code&gt;npm pack
&lt;/code&gt;&lt;/pre&gt;
&lt;p&gt;This command is generating this file &lt;code&gt;my-package-X-X-X.tgz&lt;/code&gt;. Where X.X.X is the semver version.&lt;/p&gt;
&lt;p&gt;You can now reference this tarball directly in your main project inside &lt;code&gt;package.json&lt;/code&gt;&lt;/p&gt;
&lt;pre&gt;&lt;code&gt;&quot;dependencies&quot;: {
  &quot;@myuser/my-package&quot;: &quot;file:../lib/my-package-X-X-X.tgz&quot;
}
&lt;/code&gt;&lt;/pre&gt;
&lt;h2&gt;Use the package&lt;/h2&gt;
&lt;pre&gt;&lt;code&gt;
&lt;/code&gt;&lt;/pre&gt;
&lt;p&gt;Just one example of importing a file from the package.&lt;/p&gt;
&lt;h3&gt;Bonus: Pre-install a local package with the main project install&lt;/h3&gt;
&lt;p&gt;Maybe you are developing a package and making a Documentation website for it, or another project that is using &lt;code&gt;lib&lt;/code&gt;.&lt;/p&gt;
&lt;pre&gt;&lt;code&gt;.
├── docs
├── lib
&lt;/code&gt;&lt;/pre&gt;
&lt;p&gt;Then you can install the package&apos;s dependencies upon installation in the &lt;code&gt;docs&lt;/code&gt; project. Using the &lt;code&gt;preinstall&lt;/code&gt; built in npm script, it will install this first upon &lt;code&gt;npm i&lt;/code&gt; in he docs project.&lt;/p&gt;
&lt;pre&gt;&lt;code&gt;&quot;scripts&quot;: {
    &quot;preinstall&quot;: &quot;npm install ../lib/&quot;
}
&lt;/code&gt;&lt;/pre&gt;
</content:encoded></item><item><title>MDX and Inline Images in Gatsby</title><link>https://urre.me/writing/gatsby-mdx-images/</link><guid isPermaLink="true">https://urre.me/writing/gatsby-mdx-images/</guid><description>Plain old images, or images processed with gatsby-image.</description><pubDate>Fri, 02 Jun 2023 00:00:00 GMT</pubDate><content:encoded>&lt;p&gt;&amp;lt;img width=&quot;1200&quot; height=&quot;600&quot; class=&quot;img-wide skeleton-loading&quot; src=&quot;https://res.cloudinary.com/urre/image/upload/v1685689627/portzpansuqfeq4pexze.svg&quot; loading=&quot;lazy&quot; alt=&quot;MDX and inline images in Gatsby&quot; /&amp;gt;&lt;/p&gt;
&lt;h2&gt;1. Plain old images, no processing&lt;/h2&gt;
&lt;p&gt;This is the simplest option. When you do this, images won&apos;t be processed in any way by Gatsby.&lt;/p&gt;
&lt;ol&gt;
&lt;li&gt;Place images in &lt;code&gt;static/images&lt;/code&gt;&lt;/li&gt;
&lt;li&gt;Reference like this &lt;code&gt;![A blue bicycle](/static/images/bicycle.jpg)&lt;/code&gt;&lt;/li&gt;
&lt;/ol&gt;
&lt;h2&gt;2. Images processed by Sharp and gatsby-plugin-image&lt;/h2&gt;
&lt;p&gt;This is easy to miss in the Docs. If you do this, the images will be processed by sharp and appear as if you placed them in a gatsby-plugin-image component.
So you benefit from allt he goodies in, responsive images/placeholders/modern image formats and more.&lt;/p&gt;
&lt;ol&gt;
&lt;li&gt;Place images in &lt;code&gt;src/images&lt;/code&gt;&lt;/li&gt;
&lt;li&gt;Install &lt;code&gt;npm install gatsby-plugin-image gatsby-plugin-sharp gatsby-source-filesystem gatsby-transformer-sharp&lt;/code&gt;&lt;/li&gt;
&lt;li&gt;Configure &lt;code&gt;gatsby-config.js&lt;/code&gt; or if you use Gatsby 5+ and ESM you edit &lt;code&gt;gatsby-config.mjs&lt;/code&gt;&lt;/li&gt;
&lt;/ol&gt;
&lt;pre&gt;&lt;code&gt;plugins: [
  &quot;gatsby-plugin-image&quot;,
  {
    resolve: `gatsby-plugin-mdx`,
    options: {
      gatsbyRemarkPlugins: [
        {
          resolve: `gatsby-remark-images`,
          options: {
            maxWidth: 1200,
          },
        },
      ],
    },
  },
  &quot;gatsby-plugin-sharp&quot;,
  &quot;gatsby-transformer-sharp&quot;,
  {
    resolve: &quot;gatsby-source-filesystem&quot;,
    options: {
      name: &quot;images&quot;,
      path: &quot;./src/images/&quot;,
    },
    __key: &quot;images&quot;,
  }
]
&lt;/code&gt;&lt;/pre&gt;
&lt;ol&gt;
&lt;li&gt;Reference like this &lt;code&gt;![A blue bicycle](../images/bicycle.jpg)&lt;/code&gt;&lt;/li&gt;
&lt;/ol&gt;
&lt;p&gt;Read more about &lt;a href=&quot;https://www.gatsbyjs.com/docs/how-to/images-and-media/working-with-images-in-markdown/&quot;&gt;images in MDX&lt;/a&gt;&lt;/p&gt;
&lt;h2&gt;3. Use a separate React component that uses Gatsby Image&lt;/h2&gt;
&lt;p&gt;The two image components &lt;code&gt;and&lt;/code&gt; is meant to be used in JSX, not in MDX. You can however, if you want; create a separate Image component.&lt;/p&gt;
&lt;pre&gt;&lt;code&gt;


export const Image = ({ src, alt }) =&amp;gt; {
  const data = useStaticQuery(graphql`
    query {
      allFile {
        nodes {
          relativePath
          childImageSharp {
            gatsbyImageData(
              placeholder: BLURRED
              formats: [AUTO, WEBP, AVIF]
            )
          }
        }
      }
    }
  `);

  const imageNode = data.allFile.nodes.find(
    (node) =&amp;gt; node.relativePath === src
  );

  if (!imageNode || !imageNode.childImageSharp) {
    return &amp;lt;div&amp;gt;Image not found&amp;lt;/div&amp;gt;;
  }

  const image = getImage(imageNode.childImageSharp);

  return (
    &amp;lt;div&amp;gt;
      
    &amp;lt;/div&amp;gt;
  );
};
&lt;/code&gt;&lt;/pre&gt;
&lt;p&gt;And then use like this:&lt;/p&gt;
&lt;pre&gt;&lt;code&gt;

&lt;/code&gt;&lt;/pre&gt;
&lt;h2&gt;Conclusion&lt;/h2&gt;
&lt;ul&gt;
&lt;li&gt;Option 1) – Don&apos;t process my images. I&apos;ll do it myself&lt;/li&gt;
&lt;li&gt;Option 2) – I want to let Gatsby process my images and benefit from the goodies in gatsby-plugin-images. Will peform best regarding SEO, Web Core Vitals etc.&lt;/li&gt;
&lt;li&gt;Option 3) – Just to show an alternative way using a custom React component. But i recommend using 2).&lt;/li&gt;
&lt;/ul&gt;
&lt;p&gt;&lt;a href=&quot;https://www.gatsbyjs.com/plugins/gatsby-plugin-image/&quot;&gt;Read more about gatsby-plugin-image&lt;/a&gt;&lt;/p&gt;
</content:encoded></item><item><title>Getting Jsconfig and VS Code to Work Together for Your Gatsby Site</title><link>https://urre.me/writing/jsconfig/</link><guid isPermaLink="true">https://urre.me/writing/jsconfig/</guid><description>Improve your development experience.</description><pubDate>Thu, 20 Apr 2023 00:00:00 GMT</pubDate><content:encoded>&lt;h3&gt;What is jsconfig.json?&lt;/h3&gt;
&lt;p&gt;The presence of jsconfig.json file in a directory indicates that the directory is the root of a JavaScript Project. The jsconfig.json file specifies the root files and the options for the features provided by the JavaScript language service.&lt;/p&gt;
&lt;p&gt;Tip: jsconfig.json is a descendant of tsconfig.json, which is a configuration file for TypeScript. jsconfig.json is tsconfig.json with &quot;allowJs&quot; attribute set to true.&lt;/p&gt;
&lt;p&gt;VSCode uses a jsconfig.json file to aid your JavaScript language service and significantly improve your development experience.&lt;/p&gt;
&lt;p&gt;&lt;a href=&quot;https://code.visualstudio.com/docs/languages/jsconfig&quot;&gt;Learn more about jsconfig&lt;/a&gt;&lt;/p&gt;
&lt;p&gt;Create a file in the root of your project &lt;code&gt;jsconfig.json&lt;/code&gt;&lt;/p&gt;
&lt;pre&gt;&lt;code&gt;{
  &quot;compilerOptions&quot;: {
    &quot;target&quot;: &quot;ES6&quot;,
    &quot;module&quot;: &quot;ES6&quot;,
    &quot;jsx&quot;: &quot;react&quot;,
    &quot;checkJs&quot;: true,
    &quot;allowSyntheticDefaultImports&quot;: true,
    &quot;experimentalDecorators&quot;: true,
    &quot;resolveJsonModule&quot;: true,
    &quot;moduleResolution&quot;:&quot;node&quot;,
    &quot;baseUrl&quot;: &quot;src&quot;,
    &quot;paths&quot;: {
      &quot;*&quot;: [&quot;*&quot;, &quot;src/*&quot;]
    }
  },
  &quot;paths&quot;: {
    &quot;components/*&quot;: [&quot;./src/components/*&quot;],
    &quot;utils/*&quot;: [&quot;./src/utils/*&quot;]
  },
  &quot;typeAcquisition&quot;: {
    &quot;enable&quot;: true
  },
  &quot;typingOptions&quot;: {
    &quot;enableAutoDiscovery&quot;: true
  },
  &quot;compileOnSave&quot;: true,
  &quot;allowJS&quot;: true,
  &quot;include&quot;: [&quot;src/**/*&quot;]
}
&lt;/code&gt;&lt;/pre&gt;
&lt;h3&gt;Webpack aliases&lt;/h3&gt;
&lt;p&gt;If you have set up Webpack aliases in &lt;code&gt;gatsby-node.js&lt;/code&gt;, to make your imports nicer. Ex like &lt;code&gt;import { Stuff } from &quot;components/stuff&quot;&lt;/code&gt; you can specify this in &lt;code&gt;paths: {}&lt;/code&gt;&lt;/p&gt;
&lt;h3&gt;JSON data&lt;/h3&gt;
&lt;p&gt;If you import JSON data you can use &lt;code&gt;json&quot;resolveJsonModule&quot;: true&lt;/code&gt;. With that being done, you should be able to import a JSON file as a JavaScript module.&lt;/p&gt;
&lt;h2&gt;VS Code settings&lt;/h2&gt;
&lt;p&gt;To make your configuration smooth and play nice with VS Code I recommend these settings.&lt;/p&gt;
&lt;pre&gt;&lt;code&gt;{
	...
  &quot;[javascript]&quot;: {
    &quot;editor.formatOnSave&quot;: true,
    &quot;editor.formatOnPaste&quot;: true
  },
  &quot;js/ts.implicitProjectConfig.checkJs&quot;: true,
  &quot;javascript.validate.enable&quot;: false,
  &quot;[scss]&quot;: {
    &quot;editor.formatOnSave&quot;: true,
    &quot;editor.formatOnPaste&quot;: true
  },
  &quot;editor.codeActionsOnSave&quot;: {
    &quot;source.organizeImports&quot;: true,
    &quot;source.addMissingImports&quot;: true
  },
  &quot;emmet.includeLanguages&quot;: { &quot;javascript&quot;: &quot;javascriptreact&quot; }
	...
}

&lt;/code&gt;&lt;/pre&gt;
&lt;p&gt;Notes:&lt;/p&gt;
&lt;p&gt;You can use javascript.validate turns off all error reporting for JS files. But it doesn&apos;t change how TypeScript operates. You need to set &lt;code&gt;javascript.implicitProjectConfig.checkJs&lt;/code&gt; to specify the settings for an implicit jsconfig project. This is the equivalent of having a &lt;code&gt;jsconfig.json&lt;/code&gt; with the contents &lt;code&gt;{ &quot;compilerOptions&quot;: { &quot;checkJs&quot;: true}}&lt;/code&gt;&lt;/p&gt;
&lt;h3&gt;Emmet&lt;/h3&gt;
&lt;p&gt;Emmet is always handy to have. You can include &lt;code&gt;&quot;emmet.includeLanguages&quot;: { &quot;javascript&quot;: &quot;javascriptreact&quot; }&lt;/code&gt; to enable Emmet support for JSX. The makes typoing HTML in React (.js) so much easier. And faster.&lt;/p&gt;
&lt;p&gt;Now you can get full auto-complete and file browsing support in your IDE!&lt;/p&gt;
</content:encoded></item><item><title>Explore Discogs From the Currently Playing Album Using Raycast and Lastfm</title><link>https://urre.me/writing/raycast-discosgs-nowplaying/</link><guid isPermaLink="true">https://urre.me/writing/raycast-discosgs-nowplaying/</guid><description>Explore albums and records</description><pubDate>Fri, 17 Feb 2023 00:00:00 GMT</pubDate><content:encoded>&lt;p&gt;&amp;lt;img width=&quot;1200&quot; height=&quot;600&quot; class=&quot;img-wide skeleton-loading&quot; src=&quot;https://res.cloudinary.com/urre/image/upload/w_2000,f_auto/v1676616640/khi9ss3vbavnaxod3qyr.webp&quot; loading=&quot;lazy&quot; alt=&quot;Explore Discogs from the currently plaing song using Raycast&quot; /&amp;gt;&lt;/p&gt;
&lt;p&gt;If you&apos;re looking for a fast and highly extensible launcher, Raycast is an excellent choice. As someone who has used &lt;a href=&quot;https://www.alfredapp.com/&quot;&gt;Alfred&lt;/a&gt; for a long time, I recently made the switch and have been impressed with the features and functionality of Raycast. One of the things I often do when listening to music is browse &lt;a href=&quot;https://www.discogs.com/&quot;&gt;Discogs&lt;/a&gt; to explore new albums and records. With this script command, I can open Discogs and automatically search for the current album I&apos;m listening to, which I find very handy. To fetch the music I&apos;m currently listening to, I use &lt;a href=&quot;https://www.last.fm/sv/home&quot;&gt;LastFM&lt;/a&gt; to &lt;a href=&quot;https://www.last.fm/api/scrobbling&quot;&gt;scrobble&lt;/a&gt; tracks from TIDAL. Many music services and apps supports LastFM natively, or as plugins. Even though some apps supports getting the currently playing track/artist/album via Apple Script, it&apos;s not possible for all apps. That&apos;s why I like the option of using LastFM, since I already scrobble all my music.&lt;/p&gt;
&lt;h2&gt;Raycast scripts&lt;/h2&gt;
&lt;p&gt;Raycast executes your local scripts and enables you to perform frequent and useful commands without having to open a terminal window.
&lt;a href=&quot;https://www.raycast.com/blog/getting-started-with-script-commands&quot;&gt;Getting started with Raycast Scripts&lt;/a&gt;&lt;/p&gt;
&lt;p&gt;Under Raycast Preferences you can go to &quot;Extensions → Scripts and find your scripts. Manage them, set aliases, record a hotkey and more.&lt;/p&gt;
&lt;h2&gt;Creating the script&lt;/h2&gt;
&lt;p&gt;&amp;lt;img width=&quot;1200&quot; height=&quot;800&quot; class=&quot;img-wide&quot; src=&quot;https://res.cloudinary.com/urre/image/upload/w_1600,f_auto/v1676617906/fe9z3sqoivynhhwc431g.jpg&quot; loading=&quot;lazy&quot; alt=&quot;Explore Discogs from the currently plaing song using Raycast&quot; /&amp;gt;&lt;/p&gt;
&lt;p&gt;When you launch Raycast, type &quot;script&quot; and key down to &quot;Create Script Command&quot;. Select template, mode, title, description and more.&lt;/p&gt;
&lt;p&gt;All scripts have parameters to instruct Raycast on how to process and output your request. You can &lt;a href=&quot;https://github.com/raycast/script-commands#standard-output&quot;&gt;read more about them here&lt;/a&gt;. In the example, we have set the &lt;code&gt;@raycast.mode&lt;/code&gt; parameter to silent, which means that the script will run instantly and silently, allowing you to access the newly opened page when you are ready.&lt;/p&gt;
&lt;pre&gt;&lt;code&gt;#!/usr/bin/env bash

# Required parameters:
# @raycast.schemaVersion 1
# @raycast.title Discogs Now Playing
# @raycast.mode silent
#
# Optional parameters:
# @raycast.icon icon.png
# @raycast.iconDark icon.png
#
# Documentation:
# @raycast.description Open Discogs and explore the currently playing album
# @raycast.author Urban Sanden
# @raycast.authorURL https://urre.me

# Read secrets from the .env file
source &quot;./.env&quot;

# Specify LastFM API and specify JSON as the format
URL=&quot;http://ws.audioscrobbler.com/2.0/?method=user.getrecenttracks&amp;amp;user=${DISCOGS_USER}&amp;amp;api_key=${DISCOGS_API_KEY}&amp;amp;format=json&quot;

# Query the LastFM API with cURL
result=`curl -s ${URL}`

# Get currently playing track using jq, Artist and Album name, flatten and remove whitespace
nowplaying=`echo ${result} | jq -r &apos;[.recenttracks.track[0].artist[&quot;#text&quot;], .recenttracks.track[0].album[&quot;#text&quot;]] | flatten[]&apos; | xargs`

# Now open Discogs in the browser
open &quot;https://discogs.com/search?q=${nowplaying}&quot;
&lt;/code&gt;&lt;/pre&gt;
&lt;p&gt;I&apos;m using &lt;code&gt;jq&lt;/code&gt;. It&apos;s a lightweight and flexible command-line JSON processor. You can install it with &lt;code&gt;brew install jq&lt;/code&gt;&lt;/p&gt;
&lt;h3&gt;LastFM credentials&lt;/h3&gt;
&lt;p&gt;Create an .env file with your credentials&lt;/p&gt;
&lt;pre&gt;&lt;code&gt;DISCOGS_API_KEY=&quot;XXX&quot;
DISCOGS_USER=&quot;XXX&quot;
&lt;/code&gt;&lt;/pre&gt;
&lt;h2&gt;How to use it&lt;/h2&gt;
&lt;p&gt;Play some music, open Raycast and start typing Disc...&lt;/p&gt;
&lt;p&gt;&amp;lt;a class=&quot;btn&quot; href=&quot;https://github.com/urre/raycast-discogs-lastfm&quot;&amp;gt;Get it on GitHub&amp;lt;/a&amp;gt;&lt;/p&gt;
&lt;p&gt;&amp;lt;video
id=&quot;video&quot;
muted
controls
loop
autoPlay
playsInline
class=&quot;lazy&quot;
poster=&quot;https://res.cloudinary.com/urre/image/upload/v1676616640/khi9ss3vbavnaxod3qyr.jpg&quot;
title=&quot;How to use the Raycast script command&quot;&lt;/p&gt;
&lt;blockquote&gt;&lt;/blockquote&gt;
&lt;pre&gt;&lt;code&gt;&amp;lt;source
	data-src=&quot;https://res.cloudinary.com/urre/video/upload/v1676618875/tt9wyiayww0useyzz1ne.mp4&quot;
	type=&quot;video/mp4&quot;
/&amp;gt;
Your browser does not support HTML5 video.
&lt;/code&gt;&lt;/pre&gt;
&lt;p&gt;&amp;lt;/video&amp;gt;&lt;/p&gt;
</content:encoded></item><item><title>Upload a File From Finder to Cloudinary Using Automator</title><link>https://urre.me/writing/finder-and-cloudinary/</link><guid isPermaLink="true">https://urre.me/writing/finder-and-cloudinary/</guid><description>Sit back and upload images to the Cloudinary CDN from your Mac.</description><pubDate>Fri, 15 Jul 2022 00:00:00 GMT</pubDate><content:encoded>&lt;p&gt;&amp;lt;img width=&quot;1500&quot; height=&quot;790&quot; class=&quot;img-wide skeleton-loading&quot; src=&quot;https://res.cloudinary.com/urre/image/upload/v1657890633/k32xeg2m7qsbo07sn31a.webp&quot; loading=&quot;lazy&quot; alt=&quot;Upload a file from Finder to Cloudinary using Automator&quot; /&amp;gt;&lt;/p&gt;
&lt;p&gt;&lt;a href=&quot;https://cloudinary.com/&quot;&gt;Cloudinary&lt;/a&gt; is awesome. It&apos;s cheap, fast, stores a lot of images even in the free tier and doesn&apos;t take up data space in your apps and projects. You images loads fast everyhere with the CDN and you can also create transformations programmatically and on the fly without the need for graphic designers and fancy editing tools. &lt;a href=&quot;https://cloudinary.com/documentation/image_transformations&quot;&gt;Change formats, resize, crop and more.&lt;/a&gt;&lt;/p&gt;
&lt;p&gt;Wouldn&apos;t it be nice to upload images from your computer, ex blog images, screenshots etc directly to the Cloudinary Media Library and then be able to get back and paste a CDN link anywhere?&lt;/p&gt;
&lt;h2&gt;Install the Cloudinary CLI&lt;/h2&gt;
&lt;p&gt;Prerequisite: To use the Cloudinary CLI, you need Python 3.6 or later.&lt;/p&gt;
&lt;p&gt;To use it in scripts or in Automator, first install the &lt;a href=&quot;https://cloudinary.com/documentation/cloudinary_cli&quot;&gt;CLoudinary CLI&lt;/a&gt;&lt;/p&gt;
&lt;pre&gt;&lt;code&gt;pip3 install cloudinary-cli
&lt;/code&gt;&lt;/pre&gt;
&lt;p&gt;To make all your &lt;code&gt;cld&lt;/code&gt; commands point to your Cloudinary account, set up your CLOUDINARY_URL environment variable.&lt;/p&gt;
&lt;pre&gt;&lt;code&gt;export CLOUDINARY_URL=cloudinary://XXX:XXX@yourname
&lt;/code&gt;&lt;/pre&gt;
&lt;p&gt;Check your configuration by running:&lt;/p&gt;
&lt;pre&gt;&lt;code&gt;cld config
&lt;/code&gt;&lt;/pre&gt;
&lt;h2&gt;Create the Automator Workflow&lt;/h2&gt;
&lt;ol&gt;
&lt;li&gt;Open Automator&lt;/li&gt;
&lt;li&gt;Create a new Quick Action, give it a name ex. &quot;Cloudinary&quot;&lt;/li&gt;
&lt;li&gt;Set Workflow Recieves&lt;/li&gt;
&lt;li&gt;Select folders and files, and Finder&lt;/li&gt;
&lt;li&gt;Add a Run Shell Script and drag it over to the main window:&lt;/li&gt;
&lt;/ol&gt;
&lt;pre&gt;&lt;code&gt;for f in &quot;$@&quot;
do
	/opt/homebrew/bin/cld uploader upload &quot;$f&quot; | /opt/homebrew/bin/jq -r &apos;.secure_url&apos; | /usr/bin/pbcopy
done
&lt;/code&gt;&lt;/pre&gt;
&lt;blockquote&gt;
&lt;p&gt;I&apos;ve added a pipe command here to copy the URL to the uploaded image into your clipboard. You&apos;ll need &lt;code&gt;jq&lt;/code&gt; to parse the JSON and extract the HTTPS link.&lt;/p&gt;
&lt;/blockquote&gt;
&lt;p&gt;This screenshot is in Swedish, but you get the idea.&lt;/p&gt;
&lt;p&gt;&lt;img src=&quot;https://res.cloudinary.com/urre/image/upload/v1658496789/buo2ktz5hjycgcf2m6gb.jpg&quot; alt=&quot;Automator&quot; /&gt;&lt;/p&gt;
&lt;h2&gt;How to use it&lt;/h2&gt;
&lt;ol&gt;
&lt;li&gt;Right click on a file in Finder&lt;/li&gt;
&lt;li&gt;Select &quot;Cloudinary&quot; under the Quick Action list
&lt;img src=&quot;https://res.cloudinary.com/urre/image/upload/v1658820745/lqszcuhplzgsl9g5oysr.jpg&quot; alt=&quot;Right click&quot; /&gt;&lt;/li&gt;
&lt;li&gt;Just cmd + v in your project! The CDN URL is already in your clipboard.&lt;/li&gt;
&lt;/ol&gt;
</content:encoded></item><item><title>Create a Moodboard From an Instagram Collection</title><link>https://urre.me/writing/create-a-moodboard-from-saved-instagram-posts/</link><guid isPermaLink="true">https://urre.me/writing/create-a-moodboard-from-saved-instagram-posts/</guid><description>Using browser developer tools, cURL and imageMagick</description><pubDate>Tue, 26 Apr 2022 00:00:00 GMT</pubDate><content:encoded>&lt;p&gt;You are probably like me, you tap and save items on Instagram to collections. When you save a post, it&apos;s visible to you from a private section of your profile.&lt;/p&gt;
&lt;p&gt;But, what if you need to create a little collage or moodboard from the images. Well, there are a number of services that can download Instagram posts, but I wanted
to use something else. Just some JavaScript in the browser developer tools, &lt;a href=&quot;https://curl.se/&quot;&gt;cURL&lt;/a&gt; to download the images, and &lt;a href=&quot;https://imagemagick.org/&quot;&gt;ImageMagick&lt;/a&gt; to stich together a collage. Let&apos;s go!&lt;/p&gt;
&lt;blockquote&gt;
&lt;p&gt;Note: this is meant to be used for personal use only.&lt;/p&gt;
&lt;/blockquote&gt;
&lt;h2&gt;Prerequisites&lt;/h2&gt;
&lt;p&gt;The things you need to do this is &lt;a href=&quot;https://imagemagick.org/&quot;&gt;ImageMagick&lt;/a&gt;, a web browser of choice and a terminal.&lt;/p&gt;
&lt;p&gt;ImageMagick is free software that you can use to  create, edit, compose, or convert digital images. It runs everywhere, on Linux, Windows, macOS, iOS, Android OS, and more. It is distributed under a derived Apache 2.0 license.&lt;/p&gt;
&lt;p&gt;It&apos;s easy to install, you can install ImageMagick using &lt;a href=&quot;https://brew.sh/&quot;&gt;Homebrew&lt;/a&gt;&lt;/p&gt;
&lt;pre&gt;&lt;code&gt;brew install imagemagick
&lt;/code&gt;&lt;/pre&gt;
&lt;h2&gt;Visit one of your saved Instagram collections&lt;/h2&gt;
&lt;p&gt;Login to Instagram on the web and click on your profile image → Saved. The URL looks like this:&lt;/p&gt;
&lt;pre&gt;&lt;code&gt;https://www.instagram.com/USERNAME/saved/example-name/XXXXXX
&lt;/code&gt;&lt;/pre&gt;
&lt;p&gt;&amp;lt;figure class=&quot;img-wide&quot;&amp;gt;
&amp;lt;img src=&quot;https://res.cloudinary.com/urre/image/upload/v1650904801/screenshots/gwpcxyritf1tph01odqy.webp&quot; class=&quot;img-wide img-border&quot; loading=&quot;lazy&quot; alt=&quot;Collection&quot;/&amp;gt;
&amp;lt;figcaption class=&quot;figcaption figcaption-arrow&quot;&amp;gt;I used one I&apos;ve got called &quot;Tables&quot;.&amp;lt;/figcaption&amp;gt;
&amp;lt;/figure&amp;gt;&lt;/p&gt;
&lt;h2&gt;Open Developer Tools&lt;/h2&gt;
&lt;p&gt;The devtools live inside your browser in a subwindow. To open in Chrome, press Ctrl Shift J (on Windows) or Ctrl Option J (on Mac).&lt;/p&gt;
&lt;p&gt;Click on the Console tab and paste this code:&lt;/p&gt;
&lt;pre&gt;&lt;code&gt;imgs = document.querySelectorAll(&apos;article img&apos;)
downloadCommands = []

imgs.forEach((item, i) =&amp;gt; {
	downloadCommands += `curl ${item.currentSrc} --output ./images/${i+1}.jpg\n`
})

// Copy the list of download commands to your clipboard
copy(downloadCommands)
&lt;/code&gt;&lt;/pre&gt;
&lt;h2&gt;Download the images using cURL&lt;/h2&gt;
&lt;ul&gt;
&lt;li&gt;Open your terminal app&lt;/li&gt;
&lt;li&gt;Paste what&apos;s in your clipboard ⌘ + v&lt;/li&gt;
&lt;li&gt;Press Enter&lt;/li&gt;
&lt;/ul&gt;
&lt;p&gt;All the images from the Saved collection will now download into a folder called  &quot;images&quot;, relative the current path. If you are on your desktop the path will be &lt;code&gt;~/Desktop/images&lt;/code&gt;.&lt;/p&gt;
&lt;p&gt;&amp;lt;figure class=&quot;img-wide&quot;&amp;gt;
&amp;lt;img src=&quot;https://res.cloudinary.com/urre/image/upload/v1650904919/screenshots/u60ushmqtfrgixdylukg.webp&quot; class=&quot;img-wide img-border&quot; loading=&quot;lazy&quot; alt=&quot;Download images&quot;/&amp;gt;
&amp;lt;figcaption class=&quot;figcaption figcaption-arrow&quot;&amp;gt;Now all the images from the collection are downloaded.&amp;lt;/figcaption&amp;gt;
&amp;lt;/figure&amp;gt;&lt;/p&gt;
&lt;h2&gt;Create color palettes images&lt;/h2&gt;
&lt;p&gt;Create color palettes from the images. Use this command to exctract unique colors from the images. I just used one dominant color from each image, but you can customize how you want.&lt;/p&gt;
&lt;pre&gt;&lt;code&gt;convert ./images/*.jpg -colors 1 -unique-colors -scale 20000% -resize 1280x1280! ./images/color-scheme.jpg
&lt;/code&gt;&lt;/pre&gt;
&lt;h2&gt;Create a color collage&lt;/h2&gt;
&lt;p&gt;This creates a color scheme collage from all the color palettes. Grab all the color palette images and add them to a single collage.&lt;/p&gt;
&lt;pre&gt;&lt;code&gt;convert ./images/color-scheme*.jpg -gravity center -background none -extent 512x512 miff:- | montage - +repage -background white -tile 4x3 -border 80 -bordercolor white -geometry +5+5 collage-color-scheme.jpg
&lt;/code&gt;&lt;/pre&gt;
&lt;p&gt;&amp;lt;figure class=&quot;img-wide&quot;&amp;gt;
&amp;lt;img src=&quot;https://res.cloudinary.com/urre/image/upload/v1650905288/screenshots/tyzaqqbvigitv6krequa.webp&quot; class=&quot;img-wide img-border&quot; loading=&quot;lazy&quot; alt=&quot;The color scheme collage&quot;/&amp;gt;
&amp;lt;figcaption class=&quot;figcaption figcaption-arrow&quot;&amp;gt;The color scheme collage&amp;lt;/figcaption&amp;gt;
&amp;lt;/figure&amp;gt;&lt;/p&gt;
&lt;h2&gt;Create the moodboard&lt;/h2&gt;
&lt;p&gt;This command creates the moodboard, with all the images and the color palettes. I used a grid with 4 columns and 3 rows.&lt;/p&gt;
&lt;pre&gt;&lt;code&gt;convert ./images/*.jpg -gravity center -background none -extent 512x512 miff:- | montage - +repage -gravity center -background white -tile 4x3 -border 80 -bordercolor white -geometry +3+4 collage.jpg
&lt;/code&gt;&lt;/pre&gt;
&lt;p&gt;&amp;lt;figure class=&quot;img-wide&quot;&amp;gt;
&amp;lt;img src=&quot;https://res.cloudinary.com/urre/image/upload/v1650905626/screenshots/wgwzhmhmigc4za3ndnv5.webp&quot; class=&quot;img-wide img-border&quot; loading=&quot;lazy&quot; alt=&quot;The finished moodboard&quot;/&amp;gt;
&amp;lt;figcaption class=&quot;figcaption figcaption-arrow&quot;&amp;gt;The finished moodboard. Note: The screenshot only shows the first file. &amp;lt;/figcaption&amp;gt;
&amp;lt;/figure&amp;gt;&lt;/p&gt;
&lt;h2&gt;Need to print? – make a pdf&lt;/h2&gt;
&lt;p&gt;If you want to make PDF to be more printer friendly, you can specify page size as A4 or Letter.&lt;/p&gt;
&lt;pre&gt;&lt;code&gt;convert collage*.jpg -background white -compress JPEG -quality 65 -page a4 moodboard.pdf
&lt;/code&gt;&lt;/pre&gt;
&lt;h2&gt;Create a web based moodboard&lt;/h2&gt;
&lt;p&gt;A simple example on how to create a little web based responsive moodboard using CSS Grid.&lt;/p&gt;
&lt;pre&gt;&lt;code&gt;&amp;lt;!DOCTYPE html&amp;gt;
&amp;lt;html lang=&quot;en&quot;&amp;gt;

&amp;lt;head&amp;gt;
	&amp;lt;meta charset=&quot;UTF-8&quot;&amp;gt;
	&amp;lt;meta http-equiv=&quot;X-UA-Compatible&quot; content=&quot;IE=edge&quot;&amp;gt;
	&amp;lt;meta name=&quot;viewport&quot; content=&quot;width=device-width, initial-scale=1.0&quot;&amp;gt;
	&amp;lt;title&amp;gt;Moodboard&amp;lt;/title&amp;gt;
	&amp;lt;style&amp;gt;
		.grid {
			--auto-grid-min-size: 200px;
			--gap: 4vmin;
			display: grid;
			grid-template-columns: repeat(auto-fill, minmax(var(--auto-grid-min-size), 1fr));
			grid-gap: var(--gap);
			margin: var(--gap);
		}
	&amp;lt;/style&amp;gt;
&amp;lt;/head&amp;gt;

&amp;lt;body&amp;gt;
	&amp;lt;div class=&quot;grid&quot;&amp;gt;
		&amp;lt;img loading=&quot;lazy&quot; src=&quot;images/1.jpg&quot; alt=&quot;Image description&quot; width=&quot;200&quot; height=&quot;200&quot;/&amp;gt;
		&amp;lt;img loading=&quot;lazy&quot; src=&quot;images/2.jpg&quot; alt=&quot;Image description&quot; width=&quot;200&quot; height=&quot;200&quot;/&amp;gt;
		&amp;lt;img loading=&quot;lazy&quot; src=&quot;images/3.jpg&quot; alt=&quot;Image description&quot; width=&quot;200&quot; height=&quot;200&quot;/&amp;gt;
		&amp;lt;img loading=&quot;lazy&quot; src=&quot;images/4.jpg&quot; alt=&quot;Image description&quot; width=&quot;200&quot; height=&quot;200&quot;/&amp;gt;
		&amp;lt;img loading=&quot;lazy&quot; src=&quot;images/5.jpg&quot; alt=&quot;Image description&quot; width=&quot;200&quot; height=&quot;200&quot;/&amp;gt;
		&amp;lt;img loading=&quot;lazy&quot; src=&quot;images/6.jpg&quot; alt=&quot;Image description&quot; width=&quot;200&quot; height=&quot;200&quot;/&amp;gt;
		&amp;lt;img loading=&quot;lazy&quot; src=&quot;images/7.jpg&quot; alt=&quot;Image description&quot; width=&quot;200&quot; height=&quot;200&quot;/&amp;gt;
		&amp;lt;img loading=&quot;lazy&quot; src=&quot;images/8.jpg&quot; alt=&quot;Image description&quot; width=&quot;200&quot; height=&quot;200&quot;/&amp;gt;
		&amp;lt;img loading=&quot;lazy&quot; src=&quot;images/9.jpg&quot; alt=&quot;Image description&quot; width=&quot;200&quot; height=&quot;200&quot;/&amp;gt;
		&amp;lt;img loading=&quot;lazy&quot; src=&quot;images/10.jpg&quot; alt=&quot;Image description&quot; width=&quot;200&quot; height=&quot;200&quot;/&amp;gt;
	&amp;lt;/div&amp;gt;
&amp;lt;/body&amp;gt;

&amp;lt;/html&amp;gt;
&lt;/code&gt;&lt;/pre&gt;
&lt;p&gt;&amp;lt;figure class=&quot;img-wide&quot;&amp;gt;
&amp;lt;img src=&quot;https://res.cloudinary.com/urre/image/upload/v1652767467/screenshots/c1qjn1i3tormyfjdwun1.webp&quot; class=&quot;img-wide img-border&quot; loading=&quot;lazy&quot; alt=&quot;Look - a nice little web based moodboard!&quot;/&amp;gt;
&amp;lt;/figure&amp;gt;&lt;/p&gt;
</content:encoded></item><item><title>A/B Testing React Components With Mixpanel</title><link>https://urre.me/writing/react-ab-testing/</link><guid isPermaLink="true">https://urre.me/writing/react-ab-testing/</guid><description>Building a good UI is hard.</description><pubDate>Thu, 11 Nov 2021 00:00:00 GMT</pubDate><content:encoded>&lt;blockquote&gt;
&lt;p&gt;Note: I&apos;ve been using Gatsby, but this example can be applied in any React site.&lt;/p&gt;
&lt;/blockquote&gt;
&lt;p&gt;Building a good UI is hard and it both involves technical, copywriting, UX and design skills to do well. This won&apos;t be a long post on the why and what A/B Testing is. There is a lot to read in this topic though. How to do a statistically significant experimentation and so on. However, it&apos;s very important to research and think about why you want to test something.&lt;/p&gt;
&lt;p&gt;You might have Google Analyics tracking. You can see the number of visits, dropoffs, maybe also track conversions. But what do you do when you want try variants of the UI. A/B testing to the resque! You can test things individually in a variant like colors, UX copy, position, layout, Call to Action messages, buttons and more.&lt;/p&gt;
&lt;ol&gt;
&lt;li&gt;Identity the problem – Could a lower conversion or low degree of signups be because of something else?&lt;/li&gt;
&lt;li&gt;Research. Check all Analytics reports and the behaviour of your users&lt;/li&gt;
&lt;li&gt;Sketch out variants that could take care of the issues and improve the user experience&lt;/li&gt;
&lt;li&gt;Implement variants&lt;/li&gt;
&lt;li&gt;Track data for a time period&lt;/li&gt;
&lt;li&gt;Make your decisions based on these reports&lt;/li&gt;
&lt;/ol&gt;
&lt;p&gt;There are a number of different types of A/B testing techniques you can implement. In this example I work with a Gatsby site. It&apos;s a static site, and I can choose from:&lt;/p&gt;
&lt;ol&gt;
&lt;li&gt;Traditional A/B Testing&lt;/li&gt;
&lt;li&gt;Branch based. As an example &lt;a href=&quot;https://www.gatsbyjs.com/docs/how-to/testing/ab-testing-with-google-analytics-and-netlify/&quot;&gt;Netlify has this option&lt;/a&gt;&lt;/li&gt;
&lt;li&gt;Edge-based page splitting. Some JAMStack vendors like &lt;a href=&quot;https://www.outsmartly.com/&quot;&gt;Outsmartly&lt;/a&gt; and Uniform have edge CDN integrations that allow them to serve multiple versions of a page.&lt;/li&gt;
&lt;/ol&gt;
&lt;p&gt;Other great tools are &lt;a href=&quot;https://splitbee.io/&quot;&gt;Splitbee&lt;/a&gt; and &lt;a href=&quot;https://www.optimizely.com/&quot;&gt;Optimizely&lt;/a&gt;.&lt;/p&gt;
&lt;p&gt;I&apos;ll be working with Traditional A/B Testing in this example. I wanted to use libraries with a small footprint, so these where good options.&lt;/p&gt;
&lt;h2&gt;Install&lt;/h2&gt;
&lt;h3&gt;npm packages&lt;/h3&gt;
&lt;ol&gt;
&lt;li&gt;&lt;a href=&quot;https://github.com/pushtell/react-ab-test&quot;&gt;react-ab-test&lt;/a&gt;. A/B testing React components and debug tools. Isomorphic with a simple, universal interface. Well documented and lightweight. Tested in popular browsers and Node.js. Includes helpers for &lt;a href=&quot;https://mixpanel.com/&quot;&gt;Mixpanel&lt;/a&gt; and &lt;a href=&quot;https://segment.com/&quot;&gt;Segment&lt;/a&gt;.&lt;/li&gt;
&lt;li&gt;&lt;a href=&quot;https://www.npmjs.com/package/mixpanel-browser&quot;&gt;mixpanel-browser&lt;/a&gt;. The official Mixpanel JavaScript Library is a set of methods attached to a global mixpanel object intended to be used by websites wishing to send data to Mixpanel projects.&lt;/li&gt;
&lt;/ol&gt;
&lt;pre&gt;&lt;code&gt;npm install react-ab-test mixpanel-browser
&lt;/code&gt;&lt;/pre&gt;
&lt;h2&gt;Import components&lt;/h2&gt;
&lt;pre&gt;&lt;code&gt;
  Experiment,
  Variant,
  emitter,
  experimentDebugger,
} from &quot;@marvelapp/react-ab-test&quot;
&lt;/code&gt;&lt;/pre&gt;
&lt;h2&gt;Import utils&lt;/h2&gt;
&lt;p&gt;This is just some internal utils I have. You will have to replace mixPanelProjectID with your ID.&lt;/p&gt;
&lt;pre&gt;&lt;code&gt;
&lt;/code&gt;&lt;/pre&gt;
&lt;h2&gt;Initialize Mixpanel&lt;/h2&gt;
&lt;pre&gt;&lt;code&gt;mixpanel.init(mixPanelProjectID);
&lt;/code&gt;&lt;/pre&gt;
&lt;h2&gt;Enable the debugger and define variants&lt;/h2&gt;
&lt;pre&gt;&lt;code&gt;experimentDebugger.enable()
&lt;/code&gt;&lt;/pre&gt;
&lt;p&gt;&lt;img src=&quot;https://cdn.rawgit.com/pushtell/react-ab-test/master/documentation-images/debugger-animated-2.gif&quot; alt=&quot;&quot; /&gt;&lt;/p&gt;
&lt;p&gt;This is the Debugging tool. Attaches a panel to the bottom of the &lt;code&gt;&amp;lt;body&amp;gt;&lt;/code&gt; element that displays mounted experiments and enables the user to change active variants in real-time.&lt;/p&gt;
&lt;p&gt;This panel is hidden on production builds.&lt;/p&gt;
&lt;h2&gt;Create and define Variants&lt;/h2&gt;
&lt;pre&gt;&lt;code&gt;emitter.defineVariants(&quot;navigationCTAExperiment&quot;, [
  &quot;white&quot;,
  &quot;magenta&quot;,
  &quot;primary&quot;,
])
&lt;/code&gt;&lt;/pre&gt;
&lt;p&gt;Wrap components in `&lt;/p&gt;
&lt;p&gt;&amp;lt;/Experiment&amp;gt;&lt;/p&gt;
&lt;pre&gt;&lt;code&gt;
## Emit a win event

```javascript
emitter.emitWin(&quot;navigationCTAExperiment&quot;)
&lt;/code&gt;&lt;/pre&gt;
&lt;p&gt;Called when a &apos;win&apos; is emitted.&lt;/p&gt;
&lt;h2&gt;Report to your analytics provider using the emitter.&lt;/h2&gt;
&lt;pre&gt;&lt;code&gt;emitter.addWinListener(function(experimentName, variantName) {
  console.log(
    `Variant ${variantName} of experiment ${experimentName} was clicked`
  )

  /* Track in Mixpanel */
  mixpanel.track(experimentName + &quot; &quot; + variantName, {
    name: experimentName,
    variant: variantName,
  })

  /* Track in Google Analytics */
  logGAEvent(
    `Experiment ${experimentName}`,
    &quot;click&quot;,
    `Variant ${variantName} was clicked`
  )
})
&lt;/code&gt;&lt;/pre&gt;
&lt;h2&gt;Experiment&lt;/h2&gt;
&lt;p&gt;The localStorage item is saved like this.&lt;/p&gt;
&lt;p&gt;&lt;img src=&quot;https://res.cloudinary.com/urre/image/upload/v1636621803/screenshots/iqocfwzikoailyacnfhu.jpg&quot; alt=&quot;&quot; /&gt;&lt;/p&gt;
&lt;h2&gt;Mixpanel&lt;/h2&gt;
&lt;p&gt;Once setup is done you can follow the tests in your reporting provider of choice.&lt;/p&gt;
&lt;p&gt;&amp;lt;img
src=&quot;https://res.cloudinary.com/urre/image/upload/v1636800337/ab-test_rq3wmt.jpg&quot;
loading=&quot;lazy&quot;
alt=&quot;Mixpanel&quot;
class=&quot;img-wide&quot;/&amp;gt;&lt;/p&gt;
</content:encoded></item><item><title>Serve Json From a Gatsby Site Using Contentful</title><link>https://urre.me/writing/gatsby-json-file/</link><guid isPermaLink="true">https://urre.me/writing/gatsby-json-file/</guid><description>Serve JSON data from a Gatsby site.</description><pubDate>Mon, 08 Nov 2021 00:00:00 GMT</pubDate><content:encoded>&lt;p&gt;&lt;img src=&quot;https://res.cloudinary.com/urre/image/upload/v1636888853/Serve_JSON_from_a_Gatsby_site_using_Contentful_fidf4v.svg&quot; alt=&quot;Serve JSON from a Gatsby site using Contentful&quot; /&gt;&lt;/p&gt;
&lt;p&gt;We recently had the need to serve a JSON file from the website to be consumed by another project. Very simple, but it needed to be possible to create the content from our CMS Contentful and also automatically be served from the website when the site has been built.&lt;/p&gt;
&lt;p&gt;Let&apos;s get started!&lt;/p&gt;
&lt;h2&gt;What’s involved?&lt;/h2&gt;
&lt;ol&gt;
&lt;li&gt;The content type on Contentful&lt;/li&gt;
&lt;li&gt;The content&lt;/li&gt;
&lt;li&gt;Fetching of the data&lt;/li&gt;
&lt;li&gt;Creating a JSON file&lt;/li&gt;
&lt;li&gt;Building the site&lt;/li&gt;
&lt;/ol&gt;
&lt;h2&gt;Create a content model on Contentful&lt;/h2&gt;
&lt;p&gt;Not covered in this post. But a standard Content type with relevant fields.&lt;/p&gt;
&lt;h2&gt;Fetch the data from Contentful&lt;/h2&gt;
&lt;p&gt;In &lt;code&gt;gatsby-node.js&lt;/code&gt; we add the code to fetch the data from Contentful, and then create the JSON file.&lt;/p&gt;
&lt;pre&gt;&lt;code&gt;exports.onPostBuild = async ({ graphql, reporter }) =&amp;gt; {
&lt;/code&gt;&lt;/pre&gt;
&lt;p&gt;The &lt;code&gt;onPostBuild&lt;/code&gt; Node API runs after the build has been completed. It is the last extension point called after all other parts of the build process are complete. So this is what we want to use&lt;/p&gt;
&lt;p&gt;To get the data we use a &lt;a href=&quot;https://www.gatsbyjs.com/docs/graphql/&quot;&gt;graphql query&lt;/a&gt;.&lt;/p&gt;
&lt;pre&gt;&lt;code&gt;await graphql(`
    {
      notifications: allNotifications {
        edges {
          node {
            id
            title
            description
            link
          }
        }
      }
    }
  `).then(result =&amp;gt; {
    const notifications = result.data.notifications.edges.map(
      ({ node }) =&amp;gt; node
    )
    const data = []

    notifications.map(notification =&amp;gt; {
        const notificationData = {
          id: notification.id,
          title: notification.title,
          description: notification.description,
          link: notification.link
        }

        data.push(notificationData)
        reporter.info(
          `Creating a notification: ${notification.title} in notifications.json`
        )
      }
    })
		...
&lt;/code&gt;&lt;/pre&gt;
&lt;p&gt;Code in the file &lt;code&gt;gatsby-node.js&lt;/code&gt; is run once in the process of building your site. You can use its APIs to create pages dynamically, add data into GraphQL, or respond to events during the build lifecycle.&lt;/p&gt;
&lt;p&gt;Read more about &lt;a href=&quot;https://www.gatsbyjs.com/docs/reference/config-files/gatsby-node/&quot;&gt;Gatsby Node APIs&lt;/a&gt;&lt;/p&gt;
&lt;h2&gt;Create the JSON File&lt;/h2&gt;
&lt;pre&gt;&lt;code&gt;fs.writeFileSync(`public/notifications.json`, JSON.stringify(data))
...
&lt;/code&gt;&lt;/pre&gt;
&lt;p&gt;Note: We need to use the &lt;code&gt;fs&lt;/code&gt; module in &lt;code&gt;gatsby-node.js&lt;/code&gt; to create a JSON file.&lt;/p&gt;
&lt;p&gt;Then we save the file in the &lt;code&gt;public&lt;/code&gt; folder.&lt;/p&gt;
&lt;pre&gt;&lt;code&gt;[
  {
    id: &quot;ce36f966-1588-5b30-9cb3-58ed43bca553&quot;,
    title: &quot;Lorem ipsum dolor sit&quot;,
    description: &quot;Lorem ipsum dolor sit amet, consectetur adipiscing elit. Vivamus quis eros elit. &quot;,
    link: &quot;https://example.com/cool-page/&quot;
  },
  {
    id: &quot;ee45ca7a-3216-5fe5-853b-1d0918dad0b4&quot;,
    title: &quot;Lorem ipsum dolor sit&quot;,
    description: &quot;Lorem ipsum dolor sit amet, consectetur adipiscing elit. Vivamus quis eros elit. &quot;,
    link: &quot;https://example.com/cool-page/&quot;
  }
]
&lt;/code&gt;&lt;/pre&gt;
&lt;p&gt;The JSON file will look like this.&lt;/p&gt;
&lt;h2&gt;Update the site when new content has been added&lt;/h2&gt;
&lt;p&gt;We have an automated process with &lt;a href=&quot;https://www.contentful.com/developers/docs/tutorials/general/automate-site-builds-with-webhooks/&quot;&gt;webhooks&lt;/a&gt; that will be triggered when we publish or unpublish content in our Contentful space. The webhook triggers an automatic Pull Requst in our CI that builds and publish the site.&lt;/p&gt;
&lt;h3&gt;How to access the data?&lt;/h3&gt;
&lt;p&gt;Simple, the file will be served from &lt;code&gt;example.com/notifications.json&lt;/code&gt; so just start making requests.&lt;/p&gt;
&lt;p&gt;That’s all there is to it!&lt;/p&gt;
</content:encoded></item><item><title>Dynamic Open Graph Images</title><link>https://urre.me/writing/dynamic-open-graph-images/</link><guid isPermaLink="true">https://urre.me/writing/dynamic-open-graph-images/</guid><description>Optimize your content for social sharing.</description><pubDate>Tue, 22 Dec 2020 00:00:00 GMT</pubDate><content:encoded>&lt;p&gt;You make awesome content. For that content to reach its desired effect of attracting readers or customers, it needs to be shared. A great way to display your content is to use &lt;a href=&quot;https://ogp.me/&quot;&gt;Open Graph Protocol&lt;/a&gt;. Open graph tags are very useful and if you use them right, it can optimize your content for social sharing.&lt;/p&gt;
&lt;h2&gt;What are Open Graphic Meta Tags?&lt;/h2&gt;
&lt;p&gt;Open Graph meta tags allow you to control what content shows up when a webpage is shared across major social networks such as Facebook, Twitter, and LinkedIn. Aside from social media, hundreds of other content sharing tools (e.g., messenger tools such as Slack) use these tags. You can control how the title, site name, image, and descriptions are displayed. Think of it as a short intro to your content. It needs to be captivating enough for a viewer to like it or click into it.&lt;/p&gt;
&lt;p&gt;You can put a &lt;code&gt;&amp;lt;meta&amp;gt;&lt;/code&gt; tag in the &lt;code&gt;&amp;lt;head&amp;gt;&lt;/code&gt; of a webpage to define this data. It looks like this:&lt;/p&gt;
&lt;pre&gt;&lt;code&gt;&amp;lt;head&amp;gt;
&amp;lt;!-- Facebook Open Graph Image --&amp;gt;
&amp;lt;meta property=&quot;og:image&quot; content=&quot;example.jpg&quot;/&amp;gt;
&amp;lt;meta property=&quot;og:image:height&quot; content=&quot;600&quot;/&amp;gt;
&amp;lt;meta property=&quot;og:image:width&quot; content=&quot;1200&quot;/&amp;gt;

&amp;lt;!-- Twitter Card Image --&amp;gt;
&amp;lt;meta property=&quot;twitter:image&quot; content=&quot;example.jpg&quot;/&amp;gt;
&amp;lt;meta name=&quot;twitter:card&quot; content=&quot;summary_large_image&quot;/&amp;gt;
&amp;lt;meta name=&quot;twitter:image:alt&quot; content=&quot;Example&quot;/&amp;gt;
&amp;lt;/head&amp;gt;
&lt;/code&gt;&lt;/pre&gt;
&lt;p&gt;Note: You must use JPG or PNG for Open Graph images. SVG doesn&apos;t work.&lt;/p&gt;
&lt;h2&gt;An example&lt;/h2&gt;
&lt;p&gt;I run a small music blog called &lt;a href=&quot;https://jazztips.se&quot;&gt;Jazztips&lt;/a&gt;. All content is written in Markdown and then compiled to a static site and deployed to &lt;a href=&quot;https://www.netlify.com/&quot;&gt;Netlify&lt;/a&gt;. The posts are then published on Twitter and Facebook automatically via &lt;a href=&quot;https://ifttt.com/home&quot;&gt;IFTTT&lt;/a&gt;.&lt;/p&gt;
&lt;p&gt;&amp;lt;figure class=&quot;img-wide&quot;&amp;gt;
&amp;lt;img src=&quot;https://res.cloudinary.com/urre/image/upload/v1608554435/screenshots/ajypxf035pgcb8zi3ugz.jpg&quot; class=&quot;img-wide img-border&quot; alt=&quot;&quot;/&amp;gt;
&amp;lt;figcaption class=&quot;figcaption figcaption-arrow&quot;&amp;gt;The &amp;lt;a href=&quot;https://jazztips.se/for-jimmy-wes-and-oliver/&quot;&amp;gt;start page&amp;lt;/a&amp;gt;&amp;lt;/figcaption&amp;gt;
&amp;lt;/figure&amp;gt;&lt;/p&gt;
&lt;p&gt;&amp;lt;figure class=&quot;img-wide&quot;&amp;gt;
&amp;lt;img src=&quot;https://res.cloudinary.com/urre/image/upload/v1608554492/screenshots/xhvj1aepxyvw8eab1sgw.jpg&quot; class=&quot;img-wide img-border&quot; alt=&quot;&quot;/&amp;gt;
&amp;lt;figcaption class=&quot;figcaption figcaption-arrow&quot;&amp;gt;Single posts &amp;lt;a href=&quot;https://jazztips.se/for-jimmy-wes-and-oliver/&quot;&amp;gt;pages&amp;lt;/a&amp;gt;&amp;lt;/figcaption&amp;gt;
&amp;lt;/figure&amp;gt;&lt;/p&gt;
&lt;h3&gt;The default card style&lt;/h3&gt;
&lt;p&gt;This is what the default sharing card looks like, with the record cover as the Open Graph image. It definitely works, but let&apos;s make it better.&lt;/p&gt;
&lt;p&gt;&amp;lt;figure class=&quot;img-wide&quot;&amp;gt;
&amp;lt;img src=&quot;https://res.cloudinary.com/urre/image/upload/v1608543163/screenshots/zhdsvfslahk6wmtywemo.jpg&quot; alt=&quot;&quot;/&amp;gt;
&amp;lt;/figure&amp;gt;&lt;/p&gt;
&lt;h2&gt;How to generate a great card image with text&lt;/h2&gt;
&lt;p&gt;It takes a long time and a lot of manual work to create unique images for every post. And different posts would require different imags and different text. Otherwise it wouldn&apos;t stand out very much when it was shared.&lt;/p&gt;
&lt;h2&gt;Using Canvas to create an image&lt;/h2&gt;
&lt;p&gt;The HTML &lt;code&gt;&amp;lt;canvas&amp;gt;&lt;/code&gt; element can be used to draw graphics on a web page. With a Node.js script we can read the frontmatter (artist, title etc) and then generate an image. The example below are a bit simplified.&lt;/p&gt;
&lt;h3&gt;Select file Read front matter (YML)&lt;/h3&gt;
&lt;p&gt;The Markdown frontmatter looks like this:&lt;/p&gt;
&lt;pre&gt;&lt;code&gt;title: For Jimmy, Wes and Oliver
artist: Christian McBride Big Band
image:  https://res.cloudinary.com/urre/image/upload/w_600,h_600/v1606915632/screenshots/fghrcq1z1j4pk3sgyp2l.png
&lt;/code&gt;&lt;/pre&gt;
&lt;p&gt;Below is a shortened version of the script &lt;code&gt;ogimage.js&lt;/code&gt;&lt;/p&gt;
&lt;pre&gt;&lt;code&gt;const fileFrontmatter = fs.readFileSync(`../_posts/my-example-post.md`, &apos;utf8&apos;)
const fileData = fm(fileFrontmatter)
&lt;/code&gt;&lt;/pre&gt;
&lt;p&gt;The &lt;a href=&quot;https://www.npmjs.com/package/front-matter&quot;&gt;front-matter&lt;/a&gt; package is used here to extract all the YML data.&lt;/p&gt;
&lt;h3&gt;Create a canvas and load the image&lt;/h3&gt;
&lt;pre&gt;&lt;code&gt;// Now load image into the canvas and add text
loadImage(fileData.attributes.image).then((image) =&amp;gt; {

// Just some settings
const width = 1200
const height = 630
let fontSize = 64
let lineHeight = fontSize * 1.3975
let textArtistY = 120
let textTitleY = textArtistY + 220

// Init the HTML Canvas
const canvas = createCanvas(width, height)
const context = canvas.getContext(&apos;2d&apos;)

// Fill with a light green background color
context.fillStyle = &apos;#bdfbd5&apos;
context.fillRect(0, 0, canvas.width, canvas.height)

// Add the image to the Canvas
context.drawImage(image, 40, 50, 600, 600)
...
&lt;/code&gt;&lt;/pre&gt;
&lt;h3&gt;Create a JPG image&lt;/h3&gt;
&lt;p&gt;Let&apos;s do a test to see what the output is.&lt;/p&gt;
&lt;pre&gt;&lt;code&gt;const buffer = canvas.toBuffer(&apos;image/jpeg&apos;)
fs.writeFileSync(&apos;./temp.jpg&apos;, buffer)
&lt;/code&gt;&lt;/pre&gt;
&lt;p&gt;If we open up this image we can see the result.&lt;/p&gt;
&lt;p&gt;&amp;lt;figure class=&quot;img-wide&quot;&amp;gt;
&amp;lt;img src=&quot;https://res.cloudinary.com/urre/image/upload/v1608548988/u2uqj3znyc61jk81htcb.jpg&quot; alt=&quot;&quot;/&amp;gt;
&amp;lt;figcaption class=&quot;figcaption figcaption-arrow&quot;&amp;gt;Ok, that looks good. Now lets add the text.&amp;lt;/figcaption&amp;gt;
&amp;lt;/figure&amp;gt;&lt;/p&gt;
&lt;h2&gt;Add text&lt;/h2&gt;
&lt;h3&gt;Use a custom font&lt;/h3&gt;
&lt;p&gt;Since I use &lt;a href=&quot;https://fonts.google.com/specimen/Spectral&quot;&gt;Spectral&lt;/a&gt; (designed by &lt;a href=&quot;https://www.productiontype.com/&quot;&gt;Production Type&lt;/a&gt;) I&apos;d like to use this font to follow the design of the website.&lt;/p&gt;
&lt;pre&gt;&lt;code&gt;registerFont(&apos;./spectral/Spectral-Light.ttf&apos;, {
  family: &apos;Spectral&apos;,
})
&lt;/code&gt;&lt;/pre&gt;
&lt;h3&gt;Draw the white background behind the text&lt;/h3&gt;
&lt;pre&gt;&lt;code&gt;context.fillStyle = &apos;#fff&apos;
context.fillRect(550, 90, 700, 500)
&lt;/code&gt;&lt;/pre&gt;
&lt;h3&gt;Add the text&lt;/h3&gt;
&lt;pre&gt;&lt;code&gt;// Font settings
context.font = `normal ${fontSize}pt Spectral`
context.textAlign = &apos;left&apos;
context.textBaseline = &apos;top&apos;
&lt;/code&gt;&lt;/pre&gt;
&lt;p&gt;To add the text to the Canvas, the syntax is &lt;code&gt;context.fillText(&quot;Our title here&quot;, 10, 50);&lt;/code&gt;. However, our text can vary in length and we will need to wrap it nicely to fit our canvas boundaries. I&apos;m using a simple helper method to wrap long titles. Also, controlling the line height is not as easy as you would expect compared to CSS.&lt;/p&gt;
&lt;pre&gt;&lt;code&gt;const wrapText = (context, text, x, y, maxWidth, lineHeight) =&amp;gt; {
	var words = text.split(&apos; &apos;)
	var line = &apos;&apos;

	for (var n = 0; n &amp;lt; words.length; n++) {
		var testLine = line + words[n] + &apos; &apos;
		var metrics = context.measureText(testLine)
		var testWidth = metrics.width
		if (testWidth &amp;gt; maxWidth &amp;amp;&amp;amp; n &amp;gt; 0) {
			context.fillText(line, x, y)
			line = words[n] + &apos; &apos;
			y += lineHeight
		} else {
			line = testLine
		}
	}
	context.fillText(line, x, y)
}
&lt;/code&gt;&lt;/pre&gt;
&lt;p&gt;Now I can add &lt;code&gt;Artist&lt;/code&gt; and &lt;code&gt;Title&lt;/code&gt; next to the record cover:&lt;/p&gt;
&lt;pre&gt;&lt;code&gt;context.fillStyle = &apos;#000&apos;
wrapText(context,`${fileData.attributes.artist}`,640, textArtistY, 510, lineHeight)
wrapText(context,`”${fileData.attributes.title}”`,640, textTitleY, 510, lineHeight)
&lt;/code&gt;&lt;/pre&gt;
&lt;p&gt;&amp;lt;figure class=&quot;img-wide&quot;&amp;gt;
&amp;lt;img src=&quot;https://res.cloudinary.com/urre/image/upload/v1608551416/ordjaos4h7wylkpypqua.jpg&quot; alt=&quot;&quot;/&amp;gt;
&amp;lt;figcaption class=&quot;figcaption figcaption-arrow&quot;&amp;gt;Nice! Let&apos;s do some more art direction&amp;lt;/figcaption&amp;gt;
&amp;lt;/figure&amp;gt;&lt;/p&gt;
&lt;h2&gt;Add the green logo circle&lt;/h2&gt;
&lt;p&gt;Just for some more art direction.&lt;/p&gt;
&lt;pre&gt;&lt;code&gt;context.fillStyle = &apos;#68d391&apos;
context.beginPath()
context.arc(1080, 100, 50, 0, 2 * Math.PI)
context.fill()
&lt;/code&gt;&lt;/pre&gt;
&lt;p&gt;&amp;lt;figure class=&quot;img-wide&quot;&amp;gt;
&amp;lt;img src=&quot;https://res.cloudinary.com/urre/image/upload/v1608541949/lpmwqw4wh7xvhm7i5dvf.jpg&quot; alt=&quot;&quot;/&amp;gt;
&amp;lt;figcaption class=&quot;figcaption figcaption-arrow&quot;&amp;gt;Perfect!&amp;lt;/figcaption&amp;gt;
&amp;lt;/figure&amp;gt;&lt;/p&gt;
&lt;h2&gt;Upload to Cloudinary&lt;/h2&gt;
&lt;p&gt;I store and deliver all my media assets using &lt;a href=&quot;https://cloudinary.com/&quot;&gt;Cloudinary&lt;/a&gt;. So lets do the following:&lt;/p&gt;
&lt;ol&gt;
&lt;li&gt;Upload the image to Cloudinary&lt;/li&gt;
&lt;li&gt;Write the HTTPS image link back to the Markdown file as frontmatter.&lt;/li&gt;
&lt;/ol&gt;
&lt;pre&gt;&lt;code&gt;title: For Jimmy, Wes and Oliver
artist: Christian McBride Big Band
image:  https://res.cloudinary.com/urre/image/upload/w_600,h_600/v1606915632/screenshots/fghrcq1z1j4pk3sgyp2l.png
ogimage:  NEW IMAGE URL HERE
&lt;/code&gt;&lt;/pre&gt;
&lt;pre&gt;&lt;code&gt;
// Load .env file
require(&apos;dotenv&apos;).config()

// Setup Cloudinary uploader
cloudinary.config({
	cloud_name: process.env.CLOUDNAME,
	api_key: process.env.APIKEY,
	api_secret: process.env.APISECRET,
})

const newImage = cloudinary.v2.uploader.upload(
	&apos;./temp.jpg&apos;,
	function (error, result) {
		insertLine(`../_posts/${filename.file}`)
			.content(`ogimage: ${result.secure_url}`) // Create YML variable
			.at(9) // At line 9 in my case
			.then(function (err) {
				log(`${chalk.green(`✔️ Inserted ogimage front matter`)}`)
			})
	}
)
&lt;/code&gt;&lt;/pre&gt;
&lt;p&gt;Some npm packages used here are: &lt;a href=&quot;https://www.npmjs.com/package/chalk&quot;&gt;chalk&lt;/a&gt;, &lt;a href=&quot;https://www.npmjs.com/package/insert-line&quot;&gt;insertLine&lt;/a&gt; and &lt;a href=&quot;https://www.npmjs.com/package/cloudinary&quot;&gt;cloudinary&lt;/a&gt;.&lt;/p&gt;
&lt;h2&gt;Testing&lt;/h2&gt;
&lt;p&gt;If you want to see what your posts will look like on Twitter without actually tweeting it, you can test it using &lt;a href=&quot;https://cards-dev.twitter.com/validator&quot;&gt;Twitter&apos;s Card Validator&lt;/a&gt;.
&lt;a href=&quot;http://debug.iframely.com/?uri=https%3A%2F%2Fjazztips.se%2Ffor-jimmy-wes-and-oliver%2F&quot;&gt;iframely&lt;/a&gt; and &lt;a href=&quot;https://developers.facebook.com/tools/debug/&quot;&gt;Facebook Debugger&lt;/a&gt; are also great tools I recommend.&lt;/p&gt;
&lt;p&gt;&amp;lt;figure class=&quot;img-wide&quot;&amp;gt;
&amp;lt;img src=&quot;https://res.cloudinary.com/urre/image/upload/v1608555930/screenshots/egswbncykut4rpssheok.jpg&quot; class=&quot;img-wide img-border&quot; alt=&quot;&quot;/&amp;gt;
&amp;lt;figcaption class=&quot;figcaption figcaption-arrow&quot;&amp;gt;Always check how the content looks before sharing.&amp;lt;/figcaption&amp;gt;
&amp;lt;/figure&amp;gt;&lt;/p&gt;
&lt;h2&gt;Automation&lt;/h2&gt;
&lt;p&gt;There are a lot of possibilities here. You can:&lt;/p&gt;
&lt;ul&gt;
&lt;li&gt;Use it in a standalone script and go through all your posts and bulk create dynamic images.&lt;/li&gt;
&lt;li&gt;Run as a script in your CI/CD pipelines, check for missing OG images in posts.&lt;/li&gt;
&lt;li&gt;Use it like a CLI, passing path to a markdown file.&lt;/li&gt;
&lt;/ul&gt;
&lt;p&gt;It&apos;s up to you. I currently have a script that checks the latest modified post. If that doesn&apos;t have an OG image, I create one.&lt;/p&gt;
&lt;h2&gt;Done!&lt;/h2&gt;
&lt;p&gt;Now our sharing image looks way better!&lt;/p&gt;
&lt;p&gt;&amp;lt;figure class=&quot;img-wide&quot;&amp;gt;
&amp;lt;img src=&quot;https://res.cloudinary.com/urre/image/upload/v1608555464/screenshots/nitfkjmcmjgkuhjj4pm5.jpg&quot; class=&quot;img-wide img-border&quot; alt=&quot;&quot;/&amp;gt;
&amp;lt;figcaption class=&quot;figcaption figcaption-arrow&quot;&amp;gt;On Twitter&amp;lt;/figcaption&amp;gt;
&amp;lt;/figure&amp;gt;&lt;/p&gt;
&lt;p&gt;&amp;lt;figure class=&quot;img-wide&quot;&amp;gt;
&amp;lt;img src=&quot;https://res.cloudinary.com/urre/image/upload/v1608561814/screenshots/dkrhv0jaxfpn6tokn2r4.jpg&quot; class=&quot;img-wide img-border&quot; alt=&quot;&quot;/&amp;gt;
&amp;lt;figcaption class=&quot;figcaption figcaption-arrow&quot;&amp;gt;On Slack&amp;lt;/figcaption&amp;gt;
&amp;lt;/figure&amp;gt;&lt;/p&gt;
&lt;p&gt;I hope this post will help you make better sharing images. It is a really nice addition to help content stand out from the crowd!&lt;/p&gt;
</content:encoded></item><item><title>20 Useful Npm Tips and Tricks</title><link>https://urre.me/writing/npm-tips/</link><guid isPermaLink="true">https://urre.me/writing/npm-tips/</guid><description>Helpful tips and tricks for your day-to-day workflow.</description><pubDate>Mon, 23 Nov 2020 00:00:00 GMT</pubDate><content:encoded>&lt;h2&gt;Shortcuts&lt;/h2&gt;
&lt;p&gt;Save time typing&lt;/p&gt;
&lt;ul&gt;
&lt;li&gt;&lt;code&gt;npm i&lt;/code&gt; - is a shortcut for &lt;code&gt;npm install&lt;/code&gt;&lt;/li&gt;
&lt;li&gt;&lt;code&gt;npm t&lt;/code&gt; - is a shortcut for &lt;code&gt;npm test&lt;/code&gt;&lt;/li&gt;
&lt;li&gt;&lt;code&gt;-g&lt;/code&gt; - to save a global dependency&lt;/li&gt;
&lt;li&gt;&lt;code&gt;-D&lt;/code&gt;- to save as development dependency:&lt;code&gt;npm install packagename --save-dev&lt;/code&gt;&lt;/li&gt;
&lt;/ul&gt;
&lt;h2&gt;Info&lt;/h2&gt;
&lt;pre&gt;&lt;code&gt;npm info webpack dist-tags

{
  latest: &apos;5.6.0&apos;,
  legacy: &apos;1.15.0&apos;,
  &apos;webpack-2&apos;: &apos;2.7.0&apos;,
  next: &apos;5.0.0-rc.6&apos;,
  &apos;webpack-3&apos;: &apos;3.12.0&apos;,
  &apos;webpack-4&apos;: &apos;4.44.2&apos;
}

&lt;/code&gt;&lt;/pre&gt;
&lt;p&gt;What version of a package is the latest.&lt;/p&gt;
&lt;h2&gt;npm ci&lt;/h2&gt;
&lt;p&gt;&lt;code&gt;npm ci&lt;/code&gt; bypasses a package’s &lt;code&gt;package.json&lt;/code&gt; to install modules from a package’s lockfile. This ensures reproducible builds - you are getting exactly what you expect on every install. Providing a consistent and fast experience for developers using CI/CD in their workflow.&lt;/p&gt;
&lt;p&gt;&lt;a href=&quot;https://blog.npmjs.org/post/171556855892/introducing-npm-ci-for-faster-more-reliable&quot;&gt;npm ci&lt;/a&gt;&lt;/p&gt;
&lt;h2&gt;Tagged version&lt;/h2&gt;
&lt;pre&gt;&lt;code&gt;npm install some-package@next
&lt;/code&gt;&lt;/pre&gt;
&lt;p&gt;To install not the &quot;latest&quot; version, but the version tagged by &quot;next&quot;&lt;/p&gt;
&lt;h2&gt;Version shortcuts&lt;/h2&gt;
&lt;pre&gt;&lt;code&gt;// 1.0.0
npm version patch
// 1.0.1
npm version minor
// 1.1.0
npm version major
// 2.0.0
&lt;/code&gt;&lt;/pre&gt;
&lt;p&gt;To increase the version.&lt;/p&gt;
&lt;h2&gt;pre- and post- hooks&lt;/h2&gt;
&lt;p&gt;Special lifecycle scripts which can be used to run scripts automatically in sequence.&lt;/p&gt;
&lt;pre&gt;&lt;code&gt;{
  &quot;scripts&quot;: {
    &quot;pretest&quot;: &quot;eslint .&quot;,
    &quot;test&quot;: &quot;jest&quot;
  },
}
&lt;/code&gt;&lt;/pre&gt;
&lt;p&gt;&lt;a href=&quot;https://docs.npmjs.com/cli/v6/using-npm/scripts&quot;&gt;npm docs → scripts&lt;/a&gt;&lt;/p&gt;
&lt;h2&gt;List installed packages&lt;/h2&gt;
&lt;pre&gt;&lt;code&gt;npm list
&lt;/code&gt;&lt;/pre&gt;
&lt;p&gt;List packages&lt;/p&gt;
&lt;pre&gt;&lt;code&gt;npm list -g
&lt;/code&gt;&lt;/pre&gt;
&lt;p&gt;List packages installed globally&lt;/p&gt;
&lt;h2&gt;Check outdated packages&lt;/h2&gt;
&lt;pre&gt;&lt;code&gt;npm outdated

Package                             Current  Wanted  Latest  Location
@babel/core                           7.4.0  7.12.8  7.12.8  projectname
@babel/preset-env                     7.4.2  7.12.7  7.12.7  projectname

&lt;/code&gt;&lt;/pre&gt;
&lt;h2&gt;Test your own packages locally&lt;/h2&gt;
&lt;pre&gt;&lt;code&gt;npm link ...
&lt;/code&gt;&lt;/pre&gt;
&lt;p&gt;Develop node modules locally using &lt;code&gt;npm link&lt;/code&gt;. It enables us to develop our modules and test them in our projects seamlessly.&lt;/p&gt;
&lt;ul&gt;
&lt;li&gt;&lt;a href=&quot;https://medium.com/dailyjs/how-to-use-npm-link-7375b6219557&quot;&gt;Understanding npm-link&lt;/a&gt;&lt;/li&gt;
&lt;li&gt;&lt;a href=&quot;https://www.deadcoderising.com/how-to-smoothly-develop-node-modules-locally-using-npm-link/&quot;&gt;How to smoothly develop node modules locally using npm link&lt;/a&gt;&lt;/li&gt;
&lt;/ul&gt;
&lt;h2&gt;Silent&lt;/h2&gt;
&lt;p&gt;The &lt;code&gt;–silent&lt;/code&gt; option reduces the output in the Terminal.&lt;/p&gt;
&lt;pre&gt;&lt;code&gt;{
	&quot;scripts&quot;: {
		&quot;something&quot;: &quot;npm run something --silent&quot;
	}
}
&lt;/code&gt;&lt;/pre&gt;
&lt;h2&gt;nls&lt;/h2&gt;
&lt;p&gt;Missing inspector for npm packages.&lt;/p&gt;
&lt;pre&gt;&lt;code&gt;nls                     List available npm scripts
nls deps                List dependencies table (d for short)
nls view &amp;lt;prop-path&amp;gt;    Extract info from package.json (v for short)
nls read &amp;lt;package-name&amp;gt; Print readme file from a dependency (r for short)
nls why &amp;lt;package-name&amp;gt;  Identify why a package has been installed (w for short)
&lt;/code&gt;&lt;/pre&gt;
&lt;p&gt;Example:&lt;/p&gt;
&lt;pre&gt;&lt;code&gt;npx nls why @babel/core
Who required @babel/core: tools &amp;gt; @babel/core@7.12.3
&lt;/code&gt;&lt;/pre&gt;
&lt;p&gt;&lt;a href=&quot;https://www.npmjs.com/package/nls&quot;&gt;nls&lt;/a&gt;&lt;/p&gt;
&lt;h3&gt;Node Task List&lt;/h3&gt;
&lt;p&gt;Interactive CLI tool that lists and run &lt;code&gt;package.json&lt;/code&gt; scripts.&lt;/p&gt;
&lt;p&gt;&lt;img src=&quot;https://camo.githubusercontent.com/d609d01cf3dae89ecbc09bb7116a123eb7c889bceba9138b89a86de37893f577/68747470733a2f2f72757961646f726e6f2e6769746875622e696f2f7376672d64656d6f732f6e746c2f6578616d706c65732f696e74726f2e737667&quot; alt=&quot;&quot; /&gt;&lt;/p&gt;
&lt;p&gt;&lt;a href=&quot;https://github.com/ruyadorno/ntl&quot;&gt;ntl&lt;/a&gt;&lt;/p&gt;
&lt;h3&gt;Run all&lt;/h3&gt;
&lt;p&gt;Instead of:&lt;/p&gt;
&lt;pre&gt;&lt;code&gt;npm run clean &amp;amp;&amp;amp; npm run build:css &amp;amp;&amp;amp; npm run build:js &amp;amp;&amp;amp; npm run build:html
&lt;/code&gt;&lt;/pre&gt;
&lt;p&gt;Do:&lt;/p&gt;
&lt;pre&gt;&lt;code&gt;npm-run-all clean build:*
&lt;/code&gt;&lt;/pre&gt;
&lt;p&gt;&lt;a href=&quot;https://github.com/mysticatea/npm-run-all&quot;&gt;npm-run-all&lt;/a&gt;&lt;/p&gt;
&lt;h2&gt;Initialize package&lt;/h2&gt;
&lt;pre&gt;&lt;code&gt;npm init
&lt;/code&gt;&lt;/pre&gt;
&lt;pre&gt;&lt;code&gt;npm init -y
&lt;/code&gt;&lt;/pre&gt;
&lt;p&gt;Use &lt;code&gt;-y&lt;/code&gt; to to automatically generate your package.&lt;/p&gt;
&lt;pre&gt;&lt;code&gt;npm config set init-license MIT
&lt;/code&gt;&lt;/pre&gt;
&lt;p&gt;Tip: Set config to change for example the default license generated by &lt;code&gt;npm init -y&lt;/code&gt;&lt;/p&gt;
&lt;h2&gt;Scan for vulnerabilities&lt;/h2&gt;
&lt;pre&gt;&lt;code&gt;npm audit
&lt;/code&gt;&lt;/pre&gt;
&lt;p&gt;Scan your app for vulnerabilities:&lt;/p&gt;
&lt;pre&gt;&lt;code&gt;npm audit fix
&lt;/code&gt;&lt;/pre&gt;
&lt;p&gt;Scan your project for vulnerabilities and automatically install any compatible updates to vulnerable dependencies:&lt;/p&gt;
&lt;p&gt;&lt;a href=&quot;https://docs.npmjs.com/cli/v6/commands/npm-audit&quot;&gt;npm-audit&lt;/a&gt;&lt;/p&gt;
&lt;h2&gt;npx&lt;/h2&gt;
&lt;p&gt;Since npm 5.2.0, npm comes with a tool called &lt;code&gt;npx&lt;/code&gt;. It executes a script from your dependencies as node executable.&lt;/p&gt;
&lt;ul&gt;
&lt;li&gt;npm - the package manager&lt;/li&gt;
&lt;li&gt;npx - the package &lt;strong&gt;runner&lt;/strong&gt;&lt;/li&gt;
&lt;/ul&gt;
&lt;p&gt;&lt;a href=&quot;https://www.freecodecamp.org/news/npm-vs-npx-whats-the-difference/&quot;&gt;npm vs npx — What’s the Difference?&lt;/a&gt;&lt;/p&gt;
&lt;h2&gt;The prefix flag&lt;/h2&gt;
&lt;pre&gt;&lt;code&gt;npm start --prefix path/to/your/folder
&lt;/code&gt;&lt;/pre&gt;
&lt;p&gt;Use the &lt;code&gt;--prefix&lt;/code&gt; flag to specify the path:&lt;/p&gt;
&lt;h2&gt;npm doctor&lt;/h2&gt;
&lt;p&gt;Check your environments&lt;/p&gt;
&lt;pre&gt;&lt;code&gt;npm doctor
&lt;/code&gt;&lt;/pre&gt;
&lt;h3&gt;npm-pack&lt;/h3&gt;
&lt;pre&gt;&lt;code&gt;npm pack --dry-run
&lt;/code&gt;&lt;/pre&gt;
&lt;p&gt;Shows which files would be packed when publishing your package to npm.&lt;/p&gt;
&lt;p&gt;&lt;a href=&quot;https://docs.npmjs.com/cli/v6/commands/npm-pack&quot;&gt;npm-pack&lt;/a&gt;&lt;/p&gt;
&lt;h2&gt;How to write npm&lt;/h2&gt;
&lt;p&gt;TL;DR; don&apos;t put it in all caps ever. npm is never capitalized officially.&lt;/p&gt;
</content:encoded></item><item><title>Scheduled Posts Using GitHub Actions and Netlify</title><link>https://urre.me/writing/scheduled-posts/</link><guid isPermaLink="true">https://urre.me/writing/scheduled-posts/</guid><description>Only publish when the time is right</description><pubDate>Tue, 17 Nov 2020 00:00:00 GMT</pubDate><content:encoded>&lt;p&gt;A traditional CMS handles scheduling posts easily. Static site builders may not have the same features built in, but be able to schedule a post is still important.&lt;/p&gt;
&lt;p&gt;There are plenty of ways of doing it of course. We have all the modern tools to achieve it. I use &lt;a href=&quot;https://vercel.com/home&quot;&gt;Vercel&lt;/a&gt; for most of my side projects (&lt;a href=&quot;https://vercel.com/docs/more/deploy-hooks&quot;&gt;Read about Vercel Deploy Hooks&lt;/a&gt;), but for a recent use case I needed to schedule music tips on my site &lt;a href=&quot;https://jazztips.se/&quot;&gt;Jazztips&lt;/a&gt; which is hosted on &lt;a href=&quot;https://www.netlify.com/&quot;&gt;Netlify&lt;/a&gt;&lt;/p&gt;
&lt;p&gt;Let&apos;s jump right into it.&lt;/p&gt;
&lt;h2&gt;Setup a build hook in Netlify&lt;/h2&gt;
&lt;p&gt;Visit Site settings → Build &amp;amp; deploy → Build hooks&lt;/p&gt;
&lt;p&gt;&lt;img src=&quot;https://res.cloudinary.com/urre/image/upload/v1605687636/screenshots/iu0ub2fk9iozyiqidy09.png&quot; alt=&quot;Build hooks&quot; /&gt;&lt;/p&gt;
&lt;h2&gt;Setup a webhook on GitHub&lt;/h2&gt;
&lt;p&gt;&lt;img src=&quot;https://res.cloudinary.com/urre/image/upload/v1605687695/screenshots/e5gmhc6vmnjvclgaapij.png&quot; alt=&quot;Setup a web hook on GitHub&quot; /&gt;&lt;/p&gt;
&lt;p&gt;&amp;lt;img src=&quot;https://res.cloudinary.com/urre/image/upload/v1605687735/screenshots/godi6rtio3rrfv8bfkys.jpg&quot; class=&quot;img-border&quot; alt=&quot;Setup a web hook on GitHub&quot; /&amp;gt;&lt;/p&gt;
&lt;p&gt;Select which events that should trigger the hook&lt;/p&gt;
&lt;p&gt;&amp;lt;img src=&quot;https://res.cloudinary.com/urre/image/upload/v1605687746/screenshots/d0kw9b2jq9caunh0jifc.jpg&quot; class=&quot;img-border&quot; alt=&quot;Setup a web hook on GitHub&quot; /&amp;gt;&lt;/p&gt;
&lt;h3&gt;Store the build hook as a GitHub secret&lt;/h3&gt;
&lt;p&gt;&amp;lt;img src=&quot;https://res.cloudinary.com/urre/image/upload/v1605687986/screenshots/ldlcldxtlrvkacbwqon2.jpg&quot; class=&quot;img-border&quot; alt=&quot;GitHub secret&quot; /&amp;gt;&lt;/p&gt;
&lt;h3&gt;Create a GitHub Workflow&lt;/h3&gt;
&lt;ul&gt;
&lt;li&gt;Create a folder &lt;code&gt;.GitHub/workflows&lt;/code&gt;&lt;/li&gt;
&lt;li&gt;Inside, create a file &lt;code&gt;netlify.yml&lt;/code&gt;&lt;/li&gt;
&lt;/ul&gt;
&lt;pre&gt;&lt;code&gt;name: Netlify Deploy

on:
  schedule:
  - cron: &quot;0 13 * * *&quot;

jobs:
  build:
    runs-on: ubuntu-latest
    steps:
    - name: Trigger Netlify Hook
      run: curl -X POST ${{ secrets.NETLIFY_BUILD_URL }}
&lt;/code&gt;&lt;/pre&gt;
&lt;p&gt;Select desired time interval e.g. &quot;Every day at 1pm&quot; (or similar). In the cURL command we use the &lt;code&gt;NETLIFY_BUILD_URL&lt;/code&gt; secret created earlier.&lt;/p&gt;
&lt;h2&gt;Gatsby, Jekyll or [insert static site builder/CMS of choice here]&lt;/h2&gt;
&lt;p&gt;For &lt;a href=&quot;https://jazztips.se/&quot;&gt;Jazztips&lt;/a&gt; I use Jekyll. Set &lt;code&gt;future: false&lt;/code&gt; in &lt;code&gt;config.yml&lt;/code&gt;. Posts with future dates in the front matter &lt;code&gt;date: 2020-XX-XX&lt;/code&gt; will only publish when the time is right 👍.&lt;/p&gt;
&lt;p&gt;👉 Worth noting here is that some modern headless CMS has this built in their UIs.&lt;/p&gt;
&lt;h3&gt;Using Merge Schedule GitHub Action&lt;/h3&gt;
&lt;p&gt;Another option is this handy GitHub Action called &lt;a href=&quot;https://GitHub.com/marketplace/actions/merge-schedule&quot;&gt;Merge Schedule&lt;/a&gt;. It allows for mergeing pull requests on a scheduled day.&lt;/p&gt;
&lt;p&gt;&lt;a href=&quot;https://GitHub.com/marketplace/actions/merge-schedule&quot;&gt;Create this YML file&lt;/a&gt;&lt;/p&gt;
&lt;p&gt;We can now schedule a merge by creating a pull request description with just one line:&lt;/p&gt;
&lt;pre&gt;&lt;code&gt;/schedule YYYY-MM-DD
&lt;/code&gt;&lt;/pre&gt;
&lt;p&gt;This will now schedule the pull request merge at YYY-MM-DD&lt;/p&gt;
&lt;h2&gt;Done!&lt;/h2&gt;
&lt;p&gt;Now you can see the &quot;Daily cron job&quot; beeing triggered the hook in your deploy logs. Make sure to setup Deploy Notifiations also to get notified when a deploy request is accepted/rejected/pending.&lt;/p&gt;
&lt;p&gt;&amp;lt;img src=&quot;https://res.cloudinary.com/urre/image/upload/v1605686430/screenshots/loiriq0vaw3fr2cn9fr0.jpg&quot; class=&quot;img-border&quot; alt=&quot;Netlify deploy logs&quot;/&amp;gt;&lt;/p&gt;
&lt;h3&gt;More great options&lt;/h3&gt;
&lt;ul&gt;
&lt;li&gt;The &lt;a href=&quot;https://GitHub.com/serverless/post-scheduler&quot;&gt;post scheduler&lt;/a&gt; is a serverless project that gives static site owners the ability to schedule posts (or other site content). It works with any static site setup (Jekyll, Hugo, Phenomic, Gatsby etc.)&lt;/li&gt;
&lt;li&gt;&lt;a href=&quot;https://vercel.com/docs/serverless-functions/introduction&quot;&gt;Vercel Serverless Functions&lt;/a&gt;&lt;/li&gt;
&lt;li&gt;&lt;a href=&quot;https://zapier.com/help/create/customize/schedule-zaps-to-run-at-specific-intervals&quot;&gt;Zapier: Schedule Zaps to run at specific intervals&lt;/a&gt;&lt;/li&gt;
&lt;/ul&gt;
</content:encoded></item><item><title>Docker Compose and Jekyll</title><link>https://urre.me/writing/jekyll-and-docker-compose/</link><guid isPermaLink="true">https://urre.me/writing/jekyll-and-docker-compose/</guid><description>Use Jekyll without installing Ruby</description><pubDate>Mon, 27 Apr 2020 00:00:00 GMT</pubDate><content:encoded>&lt;p&gt;But, my plan is to migrate to &lt;a href=&quot;https://www.gatsbyjs.org/&quot;&gt;Gatsby&lt;/a&gt; and &lt;a href=&quot;https://mdxjs.com/&quot;&gt;MDX&lt;/a&gt; pretty soon. But in the meantime, it does the job. Recently i switched to a new computer, and this time I didn&apos;t want to install Ruby since I don&apos;t use it for anything else nowadays. In the past I&apos;ve used &lt;a href=&quot;https://github.com/rbenv/rbenv&quot;&gt;Rbenv&lt;/a&gt; for managing a local Ruby installation which is great, but i wanted to use &lt;a href=&quot;https://docs.docker.com/compose/&quot;&gt;Docker Compose&lt;/a&gt; this time. I am fine installing Ruby if it’s isolated in a container.&lt;/p&gt;
&lt;p&gt;So, lets use &lt;a href=&quot;https://docs.docker.com/compose/&quot;&gt;Docker Compose&lt;/a&gt; to handle the container.&lt;/p&gt;
&lt;h2&gt;Option 1: Simple and easy&lt;/h2&gt;
&lt;p&gt;The following &lt;code&gt;docker-compose.yml&lt;/code&gt; file will do the job.&lt;/p&gt;
&lt;pre&gt;&lt;code&gt;version: &apos;3&apos;
services:
  jekyll:
      image: jekyll/jekyll:3.8
      environment:
        - JEKYLL_ENV=development
      command: bundle exec jekyll serve --watch --incremental --config _config-dev.yml --host 0.0.0.0
      ports:
          - 4000:4000
      volumes:
          - .:/srv/jekyll:cached
          - ./vendor/bundle:/usr/local/bundle:cached
&lt;/code&gt;&lt;/pre&gt;
&lt;h3&gt;The notes&lt;/h3&gt;
&lt;ul&gt;
&lt;li&gt;Using the default Jekyll Docker image&lt;/li&gt;
&lt;li&gt;Using &lt;a href=&quot;https://bundler.io/&quot;&gt;Bundler&lt;/a&gt; to start Jekyll.&lt;/li&gt;
&lt;li&gt;Specify a separate config file for development&lt;/li&gt;
&lt;li&gt;Use cached volumes for performance&lt;/li&gt;
&lt;li&gt;To make Jekyll available outside localhost, use &lt;code&gt;--host=0.0.0.0&lt;/code&gt;&lt;/li&gt;
&lt;/ul&gt;
&lt;p&gt;✅ Now all we have to do is run &lt;code&gt;docker-compose up -d&lt;/code&gt; and head over to &lt;a href=&quot;http://localhost:4000&quot;&gt;http://localhost:4000&lt;/a&gt;&lt;/p&gt;
&lt;h2&gt;Option 2: Custom nginx service and HTTPS&lt;/h2&gt;
&lt;h3&gt;The notes&lt;/h3&gt;
&lt;p&gt;The &lt;code&gt;docker-compose.yml&lt;/code&gt;&lt;/p&gt;
&lt;pre&gt;&lt;code&gt;version: &apos;3&apos;

services:
  jekyllbuild:
    build:
      context: .
      args:
        build_command: &quot;bundle exec jekyll serve --watch --drafts --incremental --config _config-dev.yml&quot;
    volumes:
      - &quot;.:/srv/jekyll&quot;
    ports:
      - 4000:4000
  nginx:
    image: nginx
    volumes:
      - &quot;.:/var/www/public&quot;
      - &quot;./nginx/nginx.conf:/etc/nginx/nginx.conf&quot;
      - &quot;./nginx/html/404.html:/usr/share/nginx/html/404.html&quot;
      - ./certs:/etc/certs
    ports:
      - 80:80
      - 443:443
&lt;/code&gt;&lt;/pre&gt;
&lt;p&gt;In this example I use a separate nginx service and exposing ports 80 and 443. As a bonus we can now use HTTPS by creating a cert for localhost:&lt;/p&gt;
&lt;pre&gt;&lt;code&gt;brew install mkcert
mkcert -install
mkcert localhost --ca-key --ca-cert (generates SSL certs, move them to ./certs)
&lt;/code&gt;&lt;/pre&gt;
&lt;p&gt;The &lt;code&gt;Dockerfile&lt;/code&gt;&lt;/p&gt;
&lt;pre&gt;&lt;code&gt;FROM jekyll/jekyll:latest

ARG build_command
ENV BUILD_COMMAND ${build_command}

RUN bundle install

CMD ${BUILD_COMMAND}

&lt;/code&gt;&lt;/pre&gt;
&lt;p&gt;✅ Again, just run &lt;code&gt;docker-compose up -d&lt;/code&gt; and head over to &lt;a href=&quot;https://localhost&quot;&gt;https://localhost&lt;/a&gt;&lt;/p&gt;
</content:encoded></item><item><title>Reusable Components in a Private Npm Registry</title><link>https://urre.me/writing/private-npm/</link><guid isPermaLink="true">https://urre.me/writing/private-npm/</guid><description>Standardize and/or reutilize some pieces of code.</description><pubDate>Sat, 25 Apr 2020 00:00:00 GMT</pubDate><content:encoded>&lt;p&gt;So you need to create private npm packages? It&apos;s great when you don&apos;t want to rely on git submodules for example, or just want to standardize and/or reutilize some pieces of code. It can be UI plugins, css utilities or other reusable components, used in multiple projects across different projects.&lt;/p&gt;
&lt;p&gt;There is a number of different options, you can of course get yourself a private &lt;a href=&quot;https://www.npmjs.com&quot;&gt;npm organization&lt;/a&gt; — which costs US$ 7 per user per month. Another option is to use &lt;a href=&quot;https://verdaccio.org/&quot;&gt;Verdaccio&lt;/a&gt;.&lt;/p&gt;
&lt;p&gt;At work we have a private npm registry on &lt;a href=&quot;https://www.sonatype.com/product-nexus-repository&quot;&gt;Nexus&lt;/a&gt;. Since we alread have other private repos up there, we keep the private npm modules in the same place. I won&apos;t go into the details on &lt;a href=&quot;https://help.sonatype.com/repomanager3/formats/npm-registry&quot;&gt;how to setup the registry&lt;/a&gt;, but more on how to use it and to publish packages.&lt;/p&gt;
&lt;blockquote&gt;
&lt;p&gt;We also have a proxy repository pointing to the official npm registry in our Nexus account.&lt;/p&gt;
&lt;/blockquote&gt;
&lt;h2&gt;Setup&lt;/h2&gt;
&lt;h3&gt;Authenticate with the private npm registry&lt;/h3&gt;
&lt;pre&gt;&lt;code&gt;npm login --registry https://nexus.coolcompanyio.net/repository/coolcompany-npm-registry/
&lt;/code&gt;&lt;/pre&gt;
&lt;h3&gt;Authenticate with the proxied npm registry&lt;/h3&gt;
&lt;pre&gt;&lt;code&gt;npm login --registry https://nexus.coolcompanyio.net/repository/npm-registry/
&lt;/code&gt;&lt;/pre&gt;
&lt;p&gt;This will update your &lt;code&gt;~/.npmrc&lt;/code&gt; with the authTokens. For example:&lt;/p&gt;
&lt;pre&gt;&lt;code&gt;//registry.npmjs.org/:_authToken=XXXXXX
//nexus.coolcompanyio.net/repository/coolcompany-npm-registry/:_authToken=NpmToken.XXXXX
//nexus.coolcompanyio.net/repository/npm-registry/:_authToken=NpmToken.XXXXX
&lt;/code&gt;&lt;/pre&gt;
&lt;h2&gt;In your project&lt;/h2&gt;
&lt;p&gt;Create a local &lt;code&gt;.npmrc&lt;/code&gt; in the project root&lt;/p&gt;
&lt;pre&gt;&lt;code&gt;@coolcompany:registry=https://nexus.coolcompanyio.net/repository/coolcompany-npm-registry/
registry=https://nexus.coolcompanyio.net/repository/npm-registry/
&lt;/code&gt;&lt;/pre&gt;
&lt;h2&gt;Install package&lt;/h2&gt;
&lt;h3&gt;Install package as a dependency&lt;/h3&gt;
&lt;pre&gt;&lt;code&gt;npm install @coolcompany/coolcompany-coolplugin
&lt;/code&gt;&lt;/pre&gt;
&lt;h3&gt;Install package (here as a devDependency)&lt;/h3&gt;
&lt;pre&gt;&lt;code&gt;npm install -D @coolcompany/coolcompany-coolplugin
&lt;/code&gt;&lt;/pre&gt;
&lt;p&gt;Of course, you can also add an entry directly in &lt;code&gt;package.json&lt;/code&gt; like this:&lt;/p&gt;
&lt;pre&gt;&lt;code&gt;  &quot;devDependencies&quot;: {
    &quot;@coolcompany/coolcompany-coolplugin&quot;: &quot;^0.1.0&quot;
  },
	...
&lt;/code&gt;&lt;/pre&gt;
&lt;p&gt;And then do &lt;code&gt;npm install&lt;/code&gt;&lt;/p&gt;
&lt;h2&gt;Publish a package&lt;/h2&gt;
&lt;h3&gt;Configure your repo&lt;/h3&gt;
&lt;h4&gt;Create a &lt;code&gt;.npmrc&lt;/code&gt; in the project root&lt;/h4&gt;
&lt;pre&gt;&lt;code&gt;@coolcompany:registry=https://nexus.coolcompanyio.net/repository/coolcompany-npm-registry/
registry=https://nexus.coolcompanyio.net/repository/npm-registry/
&lt;/code&gt;&lt;/pre&gt;
&lt;p&gt;Scoped Packages is a way to group related npm packages together, much like namespaces.&lt;/p&gt;
&lt;h3&gt;Create a package.json&lt;/h3&gt;
&lt;p&gt;In your repo, create a &lt;code&gt;package.json&lt;/code&gt; if you already didn&apos;t have one.&lt;/p&gt;
&lt;pre&gt;&lt;code&gt;npm init
&lt;/code&gt;&lt;/pre&gt;
&lt;h3&gt;Set a name&lt;/h3&gt;
&lt;pre&gt;&lt;code&gt;&quot;name&quot;: &quot;@coolcompany/coolcompany-coolplugin&quot;,
&lt;/code&gt;&lt;/pre&gt;
&lt;h3&gt;Set the registry URL&lt;/h3&gt;
&lt;pre&gt;&lt;code&gt;...
&quot;publishConfig&quot;: {
    &quot;registry&quot;: &quot;https://nexus.coolcompanyio.net/repository/coolcompany-npm-registry/&quot;
},
&lt;/code&gt;&lt;/pre&gt;
&lt;p&gt;We need to specify this URL to publish the package.&lt;/p&gt;
&lt;h2&gt;Publish&lt;/h2&gt;
&lt;pre&gt;&lt;code&gt;npm publish
&lt;/code&gt;&lt;/pre&gt;
&lt;p&gt;&lt;img src=&quot;https://res.cloudinary.com/urre/image/upload/v1588016997/shotsnapp-1588016962.491_pslqxl.jpg&quot; alt=&quot;Screenshot&quot; /&gt;&lt;/p&gt;
&lt;p&gt;Now the package is now uploaded in Nexus&lt;/p&gt;
&lt;h2&gt;Update a package&lt;/h2&gt;
&lt;pre&gt;&lt;code&gt;npm version 0.2.0
npm publish
&lt;/code&gt;&lt;/pre&gt;
&lt;p&gt;Run this in a package directory to bump the version and write the new data back to &lt;code&gt;package.json&lt;/code&gt; and &lt;code&gt;package-lock.json&lt;/code&gt;&lt;/p&gt;
&lt;p&gt;Great! the package is published and can now be installed using:&lt;/p&gt;
&lt;pre&gt;&lt;code&gt;npm install @coolcompany/coolcompany-coolplugin
&lt;/code&gt;&lt;/pre&gt;
</content:encoded></item><item><title>Merge Images Side by Side</title><link>https://urre.me/writing/merge-images/</link><guid isPermaLink="true">https://urre.me/writing/merge-images/</guid><description>Merging two images with a bash function</description><pubDate>Tue, 03 Sep 2019 00:00:00 GMT</pubDate><content:encoded>&lt;p&gt;I share a lot of screenshots for example in Slack. Pretty often I need to show before/after iterations, with or without annotations.&lt;/p&gt;
&lt;p&gt;I recently made a little bash function that resides in my dotfiles to merge two images together, side by side.&lt;/p&gt;
&lt;h3&gt;Function&lt;/h3&gt;
&lt;pre&gt;&lt;code&gt;#!/usr/bin/env bash

# Merge two images side by side, then open in Preview
function mont() {
  montage -background &apos;#336699&apos; -geometry 100% ~/desktop/&quot;$1&quot; ~/desktop/&quot;$2&quot; ~/desktop/merged.png;
  open -a Preview ~/desktop/merged.png
}
&lt;/code&gt;&lt;/pre&gt;
&lt;p&gt;&lt;a href=&quot;http://www.imagemagick.org/script/montage.php&quot;&gt;Montage&lt;/a&gt; is a part of ImageMagick. Install it using &lt;code&gt;brew install imagemagick&lt;/code&gt;&lt;/p&gt;
&lt;h3&gt;Usage&lt;/h3&gt;
&lt;h4&gt;Example images&lt;/h4&gt;
&lt;p&gt;&amp;lt;img style=&quot;max-width: 500px&quot; src=&quot;https://res.cloudinary.com/urre/image/upload/v1567538601/google1_cbovup.png&quot;/&amp;gt;&lt;/p&gt;
&lt;p&gt;image.png&lt;/p&gt;
&lt;p&gt;&amp;lt;img style=&quot;max-width: 500px&quot; src=&quot;https://res.cloudinary.com/urre/image/upload/v1567538601/google2_ewzout.png&quot;/&amp;gt;&lt;/p&gt;
&lt;p&gt;image2.png&lt;/p&gt;
&lt;pre&gt;&lt;code&gt;mont image.png image2.png
&lt;/code&gt;&lt;/pre&gt;
&lt;p&gt;I do this from &lt;code&gt;~/desktop&lt;/code&gt;&lt;/p&gt;
&lt;h3&gt;Result&lt;/h3&gt;
&lt;p&gt;A new image &lt;code&gt;merged.png&lt;/code&gt; is created and opened in Preview. Convenient for adding annotations.&lt;/p&gt;
&lt;p&gt;&lt;img src=&quot;https://res.cloudinary.com/urre/image/upload/v1567663156/screenshots/oiylope1lmendvzmikr1.jpg&quot; alt=&quot;&quot; /&gt;&lt;/p&gt;
&lt;p&gt;&amp;lt;video controls&amp;gt;&lt;/p&gt;
&lt;pre&gt;&lt;code&gt;&amp;lt;source src=&quot;https://res.cloudinary.com/urre/video/upload/v1567573475/montnew_cctnqn.mp4&quot;
        type=&quot;video/mp4&quot; /&amp;gt;

Sorry, your browser doesn&apos;t support embedded videos.
&lt;/code&gt;&lt;/pre&gt;
&lt;p&gt;&amp;lt;/video&amp;gt;&lt;/p&gt;
</content:encoded></item><item><title>Optimize Images</title><link>https://urre.me/writing/optimize-images/</link><guid isPermaLink="true">https://urre.me/writing/optimize-images/</guid><description>Tools and commands for optimizing images.</description><pubDate>Sun, 28 Jul 2019 00:00:00 GMT</pubDate><content:encoded>&lt;p&gt;We recently made some optimizations in our resources library. There were a lot of unoptimized images, adding extra weight. After a while this piles up and adds upp to quite a few megabytes of images files. In addition to optimizations, it is important to carefully choose which format to use. Use SVG for vector based graphics, and JPG for (nearly) everything else. The use of a CDN is of course also very good to speed up delivery in different regions.&lt;/p&gt;
&lt;p&gt;This is a quick post about some tools and commands for optimizing images.&lt;/p&gt;
&lt;h2&gt;File and folder sizes&lt;/h2&gt;
&lt;p&gt;Some commands to quickly locate and collect info about image sizes.&lt;/p&gt;
&lt;p&gt;Find all svg images in the current folder&lt;/p&gt;
&lt;pre&gt;&lt;code&gt;find . -type f | grep &apos;.svg&apos;
&lt;/code&gt;&lt;/pre&gt;
&lt;p&gt;Get total size of all .svg images in the current folder&lt;/p&gt;
&lt;pre&gt;&lt;code&gt;find . -type f -name &apos;*.svg&apos; -exec du -ch {} + | grep total$
1,7M    total
&lt;/code&gt;&lt;/pre&gt;
&lt;p&gt;If you want to check the size of a folder:&lt;/p&gt;
&lt;pre&gt;&lt;code&gt;du -sh  images/
(6.3 M)
&lt;/code&gt;&lt;/pre&gt;
&lt;h2&gt;Optimize SVG images&lt;/h2&gt;
&lt;p&gt;I&apos;m using &lt;a href=&quot;https://github.com/svg/svgo&quot;&gt;SVG Optimizer&lt;/a&gt;, a Nodej.s-based tool for optimizing SVG vector graphics files.&lt;/p&gt;
&lt;p&gt;Install SVGO&lt;/p&gt;
&lt;pre&gt;&lt;code&gt;npm install -g svgo
&lt;/code&gt;&lt;/pre&gt;
&lt;pre&gt;&lt;code&gt;svgo *.svg
&lt;/code&gt;&lt;/pre&gt;
&lt;p&gt;Output:&lt;/p&gt;
&lt;pre&gt;&lt;code&gt;logo.svg:
Done in 28 ms!
17.751 KiB - 40.4% = 10.58 KiB

illustration.svg:
Done in 42 ms!
17.136 KiB - 5.6% = 16.168 KiB

badge.svg:
Done in 36 ms!
38.621 KiB - 56.8% = 16.702 KiB
&lt;/code&gt;&lt;/pre&gt;
&lt;h2&gt;Optimize jpg images&lt;/h2&gt;
&lt;p&gt;Install imageoptim-cli&lt;/p&gt;
&lt;pre&gt;&lt;code&gt;npm i -g imageoptim-cli
&lt;/code&gt;&lt;/pre&gt;
&lt;p&gt;I&apos;m using imageoptim together with jpgmini (jpgmini or jpgmini light has to be &lt;a href=&quot;https://apps.apple.com/us/app/jpegmini-lite/id525742250&quot;&gt;installed&lt;/a&gt;)&lt;/p&gt;
&lt;pre&gt;&lt;code&gt;imageoptim --jpegmini --quality 50-75 &apos;**/*.jpg&apos;
&lt;/code&gt;&lt;/pre&gt;
&lt;p&gt;Output:&lt;/p&gt;
&lt;pre&gt;&lt;code&gt;✓ house.jpg was: 9.78kB now: 7.46kB saving: 2.32kB (23.73%)
✓ cat.jpg was: 437kB now: 397kB saving: 40kB (9.16%)
...
✓ TOTAL was: 12.97MB now: 5.83MB saving: 7.14MB (44.94%)
✓ Finished
&lt;/code&gt;&lt;/pre&gt;
&lt;h2&gt;Optimize png images&lt;/h2&gt;
&lt;p&gt;Image Optim automates &lt;a href=&quot;http://imageoptim.com/&quot;&gt;ImageOptim&lt;/a&gt;, &lt;a href=&quot;http://pngmini.com/&quot;&gt;ImageAlpha&lt;/a&gt;, and &lt;a href=&quot;http://jpegmini.com/mac&quot;&gt;JPEGmini&lt;/a&gt; for Mac to make batch optimisation of images part of your automated build process.&lt;/p&gt;
&lt;p&gt;Install imageoptim-cli&lt;/p&gt;
&lt;pre&gt;&lt;code&gt;npm i -g imageoptim-cli
&lt;/code&gt;&lt;/pre&gt;
&lt;p&gt;Optimize png images in our current folder&lt;/p&gt;
&lt;pre&gt;&lt;code&gt;imageoptim --imagealpha &apos;**/*.png&apos;
&lt;/code&gt;&lt;/pre&gt;
&lt;p&gt;Output:&lt;/p&gt;
&lt;pre&gt;&lt;code&gt;-&amp;gt;  imageoptim --imagealpha &apos;diamonds.png&apos;
i Running ImageAlpha...
i Running ImageOptim...
✓ diamonds.png was: 45.2kB now: 19.9kB saving: 25.3kB (55.94%)
✓ TOTAL was: 45.2kB now: 19.9kB saving: 25.3kB (55.94%)
✓ Finished
&lt;/code&gt;&lt;/pre&gt;
&lt;h3&gt;Resize&lt;/h3&gt;
&lt;p&gt;If you have large png images that need to be resized to a smaller size or ratio, we can batch resize them.&lt;/p&gt;
&lt;p&gt;Use &lt;a href=&quot;https://imagemagick.org/script/mogrify.php&quot;&gt;Mogrify&lt;/a&gt; from &lt;a href=&quot;https://imagemagick.org&quot;&gt;ImageMagick&lt;/a&gt; to resize all png images in the current folder (and subfolders) to 1280px. This also preserves the aspect ratio.&lt;/p&gt;
&lt;pre&gt;&lt;code&gt;find . -name &apos;*.png&apos; -execdir mogrify -format png -resize 1280\&amp;gt; {} \;
&lt;/code&gt;&lt;/pre&gt;
&lt;h2&gt;WebP&lt;/h2&gt;
&lt;h3&gt;WebP?&lt;/h3&gt;
&lt;p&gt;WebP is a modern image format developed by Google, that provides superior lossless and lossy compression for images on the web. Using WebP, webmasters and web developers can create smaller, richer images that &lt;a href=&quot;https://developers.google.com/speed/webp/&quot;&gt;make the web faster&lt;/a&gt;.&lt;/p&gt;
&lt;p&gt;Let&apos;s use the official cwebp encoder.&lt;/p&gt;
&lt;pre&gt;&lt;code&gt;brew install webp
&lt;/code&gt;&lt;/pre&gt;
&lt;pre&gt;&lt;code&gt;cwebp -q 75 diamonds.png -o output.webp
&lt;/code&gt;&lt;/pre&gt;
&lt;p&gt;This command takes a PNG and outputs it to lossy WebP by way of the -o parameter. By default, the encoder outputs lossy WebP images, and the quality of the output can be set from 0 to 100 via the -q parameter. The default lossy quality setting is 75.&lt;/p&gt;
&lt;p&gt;Output:&lt;/p&gt;
&lt;pre&gt;&lt;code&gt;Saving file &apos;output.webp&apos;
File:      diamonds.png
Dimension: 1200 x 1200
Output:    4520 bytes Y-U-V-All-PSNR 55.80 99.00 99.00   57.57 dB
           (0.03 bpp)
block count:  intra4:        461  (8.20%)
              intra16:      5164  (91.80%)
              skipped:      4450  (79.11%)
bytes used:  header:             57  (1.3%)
             mode-partition:   2806  (62.1%)
 Residuals bytes  |segment 1|segment 2|segment 3|segment 4|  total
    macroblocks:  |       0%|       0%|       0%|      100%|    5625
      quantizer:  |      36 |      36 |      33 |      26 |
   filter level:  |      11 |       8 |       6 |       4 |
&lt;/code&gt;&lt;/pre&gt;
&lt;p&gt;We can also use alpha transparency using the &lt;code&gt;-alpha_q&lt;/code&gt; option:&lt;/p&gt;
&lt;pre&gt;&lt;code&gt;cwebp -q 75 -alpha_q 10 source.png -o output.webp
&lt;/code&gt;&lt;/pre&gt;
&lt;h2&gt;Update 8 May 2024&lt;/h2&gt;
&lt;p&gt;These are more great tools you should check out:&lt;/p&gt;
&lt;ul&gt;
&lt;li&gt;&lt;a href=&quot;https://www.websiteplanet.com/webtools/imagecompressor/&quot;&gt;image Compressor&lt;/a&gt;&lt;/li&gt;
&lt;li&gt;&lt;a href=&quot;https://jakearchibald.github.io/svgomg/&quot;&gt;SVGOMG&lt;/a&gt;&lt;/li&gt;
&lt;li&gt;&lt;a href=&quot;https://squoosh.app/&quot;&gt;Sqoosh&lt;/a&gt;&lt;/li&gt;
&lt;/ul&gt;
&lt;p&gt;Happy optimizations!&lt;/p&gt;
</content:encoded></item><item><title>Local WordPress Development With Docker and Docker Compose Part 3</title><link>https://urre.me/writing/docker-wordpress-part-3/</link><guid isPermaLink="true">https://urre.me/writing/docker-wordpress-part-3/</guid><description>Custom Dockerfile and automated builds on Docker Hub</description><pubDate>Fri, 12 Jul 2019 00:00:00 GMT</pubDate><content:encoded>&lt;p&gt;In this series: &lt;a href=&quot;https://urre.me/writings/docker-for-local-wordpress-development&quot;&gt;Part 1&lt;/a&gt;, &lt;a href=&quot;https://urre.me/writings/docker-for-local-wordpress-development-part-2/&quot;&gt;Part 2&lt;/a&gt;&lt;/p&gt;
&lt;p&gt;In my &lt;a href=&quot;https://urre.me/writings/docker-for-local-wordpress-development-part-2/&quot;&gt;previous post&lt;/a&gt; i went through tips and tricks to help you run a smooth WordPress app using Docker-compose.&lt;/p&gt;
&lt;p&gt;For this part I&apos;ll show you how you can use your own Dockerfile with an existing or own&lt;/p&gt;
&lt;h2&gt;Dockerfile&lt;/h2&gt;
&lt;p&gt;Docker can build images automatically by reading the instructions from a Dockerfile. A Dockerfile is a text document that contains all the commands a user could call on the command line to assemble an image. Using docker build users can create an automated build that executes several command-line instructions in succession.&lt;/p&gt;
&lt;p&gt;With a &lt;code&gt;Dockerfile&lt;/code&gt; you can extend an existing Docker image, for example like in &lt;a href=&quot;https://urre.me/writings/docker-for-local-wordpress-development/&quot;&gt;Part 1&lt;/a&gt;. You can also install extra packages of your choice, and of course much more.&lt;/p&gt;
&lt;p&gt;Let&apos;s create our own &lt;code&gt;Dockerfile&lt;/code&gt;:&lt;/p&gt;
&lt;pre&gt;&lt;code&gt;FROM urre/wordpress-nginx-docker-compose-image

# Install WP-CLI
RUN curl -o /bin/wp-cli.phar https://raw.githubusercontent.com/wp-cli/builds/gh-pages/phar/wp-cli.phar
RUN chmod +x /bin/wp-cli.phar
RUN cd /bin &amp;amp;&amp;amp; mv wp-cli.phar wp
&lt;/code&gt;&lt;/pre&gt;
&lt;p&gt;I&apos;m using my own docker image &lt;a href=&quot;https://github.com/urre/wordpress-nginx-docker-compose-image&quot;&gt;urre/wordpress-nginx-docker-compose-image&lt;/a&gt; image. A slightly modified &lt;a href=&quot;https://github.com/docker-library/wordpress/blob/master/php7.2/fpm/Dockerfile&quot;&gt;wordpress:php7.2-fpm&lt;/a&gt; with the only difference that it doesn&apos;t download WordPress core files. We do that with Composer ourself.&lt;/p&gt;
&lt;p&gt;If we want to build the image we can simply use: &lt;code&gt;docker build .&lt;/code&gt;&lt;/p&gt;
&lt;h2&gt;Let Compose build from Dockerfile&lt;/h2&gt;
&lt;p&gt;Update &lt;code&gt;docker-compose.yml&lt;/code&gt; to build from our &lt;code&gt;Dockerfile&lt;/code&gt;&lt;/p&gt;
&lt;pre&gt;&lt;code&gt;  wordpress:
    build:
      context: .
      dockerfile: Dockerfile
    container_name: myapp-wordpress
    ...
&lt;/code&gt;&lt;/pre&gt;
&lt;p&gt;Update our wordpress service with the build section above.&lt;/p&gt;
&lt;h2&gt;Start&lt;/h2&gt;
&lt;p&gt;Start things up like before&lt;/p&gt;
&lt;pre&gt;&lt;code&gt;docker-compose up -d
&lt;/code&gt;&lt;/pre&gt;
&lt;blockquote&gt;
&lt;p&gt;When making changes to the Dockerfile : Use docker-compose up -d --force-recreate --build&lt;/p&gt;
&lt;/blockquote&gt;
&lt;p&gt;💥 Done!&lt;/p&gt;
&lt;h3&gt;Extra: Set up Automated Builds using GitHub and Docker Hub&lt;/h3&gt;
&lt;p&gt;Docker Hub can &lt;a href=&quot;https://docs.docker.com/docker-hub/builds/&quot;&gt;automatically build&lt;/a&gt; images from source code in an external repository and automatically push the built image to your Docker repositories.&lt;/p&gt;
&lt;ol&gt;
&lt;li&gt;Create a DockerHub repository. Again, I use the public, but in production, you should only do private ones.&lt;/li&gt;
&lt;li&gt;Under the Builds tab, ceate Automated Builds and select the code repository service (GitHub ) where the image’s source code is stored.&lt;/li&gt;
&lt;li&gt;Configure the Automated Build to your needs&lt;/li&gt;
&lt;/ol&gt;
&lt;p&gt;&lt;img src=&quot;https://res.cloudinary.com/urre/image/upload/v1562915557/screenshots/z1ylwltxowbfiolidwrl.png&quot; alt=&quot;&quot; /&gt;&lt;/p&gt;
&lt;p&gt;Overview page&lt;/p&gt;
&lt;p&gt;&lt;img src=&quot;https://res.cloudinary.com/urre/image/upload/v1562915823/screenshots/mbmhwhacrmpwrpngr7ij.png&quot; alt=&quot;&quot; /&gt;&lt;/p&gt;
&lt;p&gt;Recent builds&lt;/p&gt;
&lt;p&gt;Let me know if you have any questions!&lt;/p&gt;
&lt;ul&gt;
&lt;li&gt;&lt;a href=&quot;https://urre.me/writings/docker-for-local-wordpress-development/&quot;&gt;Part 1&lt;/a&gt;&lt;/li&gt;
&lt;li&gt;&lt;a href=&quot;https://urre.me/writings/docker-for-local-wordpress-development-part-2/&quot;&gt;Part 2&lt;/a&gt;&lt;/li&gt;
&lt;/ul&gt;
&lt;p&gt;&lt;a href=&quot;https://github.com/urre/wordpress-nginx-docker-compose&quot;&gt;Example repo&lt;/a&gt;&lt;/p&gt;
</content:encoded></item><item><title>Local WordPress Development With Docker and Docker Compose Part 2</title><link>https://urre.me/writing/docker-wordpress-2/</link><guid isPermaLink="true">https://urre.me/writing/docker-wordpress-2/</guid><description>Tooling, tips and tricks</description><pubDate>Fri, 25 Jan 2019 00:00:00 GMT</pubDate><content:encoded>&lt;p&gt;In my &lt;a href=&quot;https://urre.me/writings/docker-for-local-wordpress-development/&quot;&gt;previous post&lt;/a&gt; i went through some basics on how to get started with WordPress and Docker Compose
This time I&apos;ll continue with some tooling and tips and tricks that will make your setup work better.&lt;/p&gt;
&lt;h2&gt;Use extra tools and packages&lt;/h2&gt;
&lt;p&gt;Often you would want to use additional packages not installed in the base docker image.&lt;/p&gt;
&lt;p&gt;Create &lt;code&gt;Dockerfile&lt;/code&gt;, extend the base image and install our needed tools, for example &lt;a href=&quot;https://wp-cli.org/&quot;&gt;WP-CLI&lt;/a&gt;&lt;/p&gt;
&lt;pre&gt;&lt;code&gt;FROM wordpress:php7.2-fpm

# Install wp-cli
RUN curl -o /bin/wp-cli.phar https://raw.githubusercontent.com/wp-cli/builds/gh-pages/phar/wp-cli.phar
RUN chmod +x /bin/wp-cli.phar
RUN cd /bin &amp;amp;&amp;amp; mv wp-cli.phar wp

# Install sockets for PHP
RUN docker-php-ext-install sockets
&lt;/code&gt;&lt;/pre&gt;
&lt;p&gt;Modify our &lt;code&gt;docker-compose.yml&lt;/code&gt; to build or container.&lt;/p&gt;
&lt;pre&gt;&lt;code&gt;  wordpress:
    build:
      context: .
      dockerfile: Dockerfile
    container_name: myapp-wordpress
&lt;/code&gt;&lt;/pre&gt;
&lt;blockquote&gt;
&lt;p&gt;Use &lt;code&gt;docker-compose up -d --force-recreate --build&lt;/code&gt; when you make changes to the &lt;code&gt;Dockerfile&lt;/code&gt;&lt;/p&gt;
&lt;/blockquote&gt;
&lt;h2&gt;php.ini&lt;/h2&gt;
&lt;p&gt;Often you want change the defaults for some &lt;code&gt;php.ini&lt;/code&gt; directives you can set to configure your PHP setup. for example &lt;code&gt;upload_max_filesize&lt;/code&gt; to allow larger uploads in wp-admin.&lt;/p&gt;
&lt;p&gt;Create &lt;code&gt;config/php.ini&lt;/code&gt; and add:&lt;/p&gt;
&lt;pre&gt;&lt;code&gt;file_uploads = On
memory_limit = 512M
upload_max_filesize = 128M
post_max_size = 128M
max_execution_time = 600
client_max_body_size =  128M
&lt;/code&gt;&lt;/pre&gt;
&lt;p&gt;In our WordPress service in &lt;code&gt;docker-compose.yml&lt;/code&gt; mount a volume&lt;/p&gt;
&lt;pre&gt;&lt;code&gt;    volumes:
      - ./config/php.ini:/usr/local/etc/php/conf.d/php.ini
&lt;/code&gt;&lt;/pre&gt;
&lt;h2&gt;Cache volumes&lt;/h2&gt;
&lt;p&gt;To improve the file performance, you can add &lt;code&gt;:cached&lt;/code&gt; flags to your volumes.
I’m only using them on larger mounts. Don’t put them on databases, because you want realtime data.&lt;/p&gt;
&lt;pre&gt;&lt;code&gt;    volumes:
      - ./src:/var/www/html:rw,cached
&lt;/code&gt;&lt;/pre&gt;
&lt;p&gt;&lt;a href=&quot;https://docs.docker.com/docker-for-mac/osxfs-caching/&quot;&gt;Read more&lt;/a&gt;&lt;/p&gt;
&lt;h2&gt;Serve missing media from the production server&lt;/h2&gt;
&lt;p&gt;This is a nice little nginx tip.&lt;/p&gt;
&lt;p&gt;When working on a website locally, it can become quite tedious to pull down all media from a production environment. Often I&apos;d like to have a copy of the production database locally, but just an empty or tiny &lt;code&gt;uploads&lt;/code&gt; folder. At all depends on what kind if site you&apos;re working on of course.&lt;/p&gt;
&lt;p&gt;Using this nginx location directives we can display live site images in our development site.&lt;/p&gt;
&lt;p&gt;Edit our &lt;code&gt;nginx/wordpress_ssl.conf&lt;/code&gt;&lt;/p&gt;
&lt;pre&gt;&lt;code&gt;    location ~* \.(png|jpe?g)$ {
        expires 24h;
        log_not_found off;
        try_files $uri $uri/ @production;
    }

    location @production {
        resolver 8.8.8.8;
        proxy_pass https://mydomain.com/$uri;

    }
&lt;/code&gt;&lt;/pre&gt;
&lt;p&gt;&lt;a href=&quot;https://rzen.net/serve-missing-media-production-apache-nginx/&quot;&gt;Read more&lt;/a&gt;&lt;/p&gt;
&lt;p&gt;Let me know if you have any questions!
Also checkout &lt;a href=&quot;https://urre.me/writings/docker-for-local-wordpress-development/&quot;&gt;Part 1&lt;/a&gt; and my &lt;a href=&quot;https://github.com/urre/wordpress-nginx-docker-compose&quot;&gt;example repo&lt;/a&gt;&lt;/p&gt;
</content:encoded></item><item><title>The Self-Updating Website</title><link>https://urre.me/writing/the-self-updating-website/</link><guid isPermaLink="true">https://urre.me/writing/the-self-updating-website/</guid><description>Automate everything with Circle CI, Google Drive and Now</description><pubDate>Thu, 10 Jan 2019 00:00:00 GMT</pubDate><content:encoded>&lt;p&gt;I have this website called &lt;a href=&quot;https://chockpress.now.sh/&quot;&gt;Chockpress&lt;/a&gt;, a silly project that scrapes and picks out chocking headlines from Swedish evening news.
The scraper is built using &lt;a href=&quot;https://nodejs.org&quot;&gt;Node.js&lt;/a&gt;, the website itself is built using &lt;a href=&quot;https://reactjs.org/&quot;&gt;React&lt;/a&gt; and is hosted on &lt;a href=&quot;https://zeit.co/now&quot;&gt;Now&lt;/a&gt;.&lt;/p&gt;
&lt;p&gt;I already had a pretty good workflow for deploying the site, but wanted to automate more things.&lt;/p&gt;
&lt;h2&gt;🤖 Automate all the things&lt;/h2&gt;
&lt;p&gt;Desired result:&lt;/p&gt;
&lt;ul&gt;
&lt;li&gt;Get fresh new content&lt;/li&gt;
&lt;li&gt;Build the website&lt;/li&gt;
&lt;li&gt;Deploy the website&lt;/li&gt;
&lt;li&gt;Add data to a Google Sheet&lt;/li&gt;
&lt;li&gt;Schedule this to run every day&lt;/li&gt;
&lt;/ul&gt;
&lt;h2&gt;Circle CI&lt;/h2&gt;
&lt;p&gt;Circle is my platform of choice for continuous integration and delivery.&lt;/p&gt;
&lt;h3&gt;Configuring our build and deployment&lt;/h3&gt;
&lt;p&gt;First we create&lt;code&gt;.circleci/config.yml&lt;/code&gt; and start adding the configuration. We want to use a prebuild docker container for Node.js. &lt;a href=&quot;https://circleci.com/docs/2.0/configuration-reference/&quot;&gt;Read more about Configuring CircleCI&lt;/a&gt;&lt;/p&gt;
&lt;pre&gt;&lt;code&gt;version: 2
jobs:
  build:
    docker:
      - image: circleci/node:10
&lt;/code&gt;&lt;/pre&gt;
&lt;h2&gt;Install dependencies&lt;/h2&gt;
&lt;p&gt;We use dependency caching to make jobs faster on CircleCI by reusing the data from previous jobs. Using &lt;code&gt;restore_cache&lt;/code&gt; and &lt;code&gt;save_cache&lt;/code&gt; we can specify a key to find a cache  corresponding to a specific &lt;code&gt;package-lock.json&lt;/code&gt; checksum.  More about &lt;a href=&quot;https://circleci.com/docs/2.0/caching/&quot;&gt;caching&lt;/a&gt;&lt;/p&gt;
&lt;pre&gt;&lt;code&gt;working_directory: ~/repo

steps:
    - checkout

    - restore_cache:
        keys:
        - dependency-cache-{{ checksum &quot;package.json&quot; }}
        - dependency-cache-
    - run:
        name: Install dependencies
        command: npm install

    - save_cache:
        key: dependency-cache-{{ checksum &quot;package.json&quot; }}
        paths:
        - node_modules
&lt;/code&gt;&lt;/pre&gt;
&lt;h3&gt;Get new data&lt;/h3&gt;
&lt;p&gt;A couple of npm scripts handle the data scraping. See the full CircleCI config for more info.&lt;/p&gt;
&lt;h3&gt;Deploy&lt;/h3&gt;
&lt;p&gt;First setup our &lt;code&gt;NOW_TOKEN&lt;/code&gt; as a environment variable on Circle CI. Then we run npx for executing the &lt;code&gt;now&lt;/code&gt; cli. Using the &lt;code&gt;-t&lt;/code&gt; option we can specify our token.&lt;/p&gt;
&lt;h4&gt;now.json&lt;/h4&gt;
&lt;p&gt;We can also define options to the now client by keeping a &lt;code&gt;now.json&lt;/code&gt; file in our root project. Among other things we can cale our deployment in a region, in my case using &lt;a href=&quot;https://bru.zeit.co/&quot;&gt;bru&lt;/a&gt;, (Brussels, Belgium). We can also define what files should be deployed.&lt;/p&gt;
&lt;pre&gt;&lt;code&gt;{
	&quot;name&quot;: &quot;chockpress&quot;,
	&quot;alias&quot;: &quot;chockpress&quot;,
	&quot;version&quot;: 2,
	&quot;regions&quot;: [&quot;bru&quot;],
	&quot;files&quot;: [&quot;build&quot;]
}
&lt;/code&gt;&lt;/pre&gt;
&lt;p&gt;in our CircleCI config:&lt;/p&gt;
&lt;pre&gt;&lt;code&gt;- run:
    name: Deploy on Zeit now
    command: npx now -t ${NOW_TOKEN} ./build -A ../now.json
&lt;/code&gt;&lt;/pre&gt;
&lt;h3&gt;Alias our deployment&lt;/h3&gt;
&lt;p&gt;Every time we run &lt;code&gt;now&lt;/code&gt; the app is deployed to a unique url. Now has this concept of immutability that has many advantages, including the option of testing multiple releases at the same time, multiple developers working on different parts of an app, rollbacks, and more. These URLs are ideal for development and staging, but not ideal for end users.&lt;/p&gt;
&lt;p&gt;​Now aliases have two purposes: Giving your deployment a friendly and memorable name and Updating deployments with zero downtime.&lt;/p&gt;
&lt;pre&gt;&lt;code&gt;- run:
    name: Alias domain chockpress.now.sh
    command: npx now -t ${NOW_TOKEN} alias chockpress
&lt;/code&gt;&lt;/pre&gt;
&lt;blockquote&gt;
&lt;p&gt;To remove old deployments we can use &lt;code&gt;now rm chockpress --safe --yes&lt;/code&gt;. To list all instances of our app use: &lt;code&gt;now ls chockpress&lt;/code&gt;. &lt;a href=&quot;https://flaviocopes.com/zeit-now/&quot;&gt;Read more about using Now&lt;/a&gt;&lt;/p&gt;
&lt;/blockquote&gt;
&lt;h3&gt;Save data to a Google Sheet&lt;/h3&gt;
&lt;p&gt;I&apos;m keeping all the scraped headings in a Google Sheet using the Google Drive API. For authentication we can either download the &lt;code&gt;credentials.json&lt;/code&gt; or use ENV variables like this:&lt;/p&gt;
&lt;pre&gt;&lt;code&gt;GOOGLE_SHEET_ID=&quot;XXX&quot;
GOOGLE_PRIVATE_KEY=&quot;XXX&quot;
GOOGLE_CLIENT_EMAIL=&quot;XXX&quot;
&lt;/code&gt;&lt;/pre&gt;
&lt;p&gt;We also must share our Sheet with the Google IAM project email address. Click Share, add the email and grant access.&lt;/p&gt;
&lt;p&gt;&lt;img src=&quot;https://res.cloudinary.com/urre/image/upload/v1547402840/gmj6tsp6cy6q2jkbrt5r.png&quot; alt=&quot;&quot; /&gt;&lt;/p&gt;
&lt;p&gt;We can now start populate our sheet. A simplified example:&lt;/p&gt;
&lt;pre&gt;&lt;code&gt;
const doc = new GoogleSpreadsheet(process.env.GOOGLE_SHEET_ID)

var creds_json = {
    client_email: process.env.GOOGLE_CLIENT_EMAIL,
    private_key: process.env.GOOGLE_PRIVATE_KEY
}

doc.useServiceAccountAuth(creds_json, step)
...

/* Loop our data and add new rows using the doc.addRow method */

doc.addRow( 1,
    {
        heading: data[key].title.trim(),
        source: source,
        url: data[key][&apos;url&apos;]
    },

    ...

&lt;/code&gt;&lt;/pre&gt;
&lt;p&gt;Success!&lt;/p&gt;
&lt;p&gt;&lt;img src=&quot;https://res.cloudinary.com/urre/image/upload/v1547398959/drive_gpvgdt.png&quot; alt=&quot;&quot; /&gt;&lt;/p&gt;
&lt;p&gt;Setup as a npm script and add to our job:&lt;/p&gt;
&lt;pre&gt;&lt;code&gt;- run:
    name: Save data to Google Sheet
    command: npm run save
&lt;/code&gt;&lt;/pre&gt;
&lt;h2&gt;Scheduling builds using workflows&lt;/h2&gt;
&lt;p&gt;A &lt;a href=&quot;https://circleci.com/docs/2.0/workflows/&quot;&gt;workflow&lt;/a&gt; is a set of rules for defining a collection of jobs and their run order. You can do all sorts of things, in my case i wanted two strategies, a regular commit workflow for pushing changes, and a daily workflow updating the website every day at 14.00.&lt;/p&gt;
&lt;pre&gt;&lt;code&gt;workflows:
  version: 2
  commit-workflow:
    jobs:
      - build
  daily-workflow:
    triggers:
      - schedule:
          cron: &apos;0 14 * * *&apos;
          filters:
            branches:
              only:
                - dev
    jobs:
      - build
&lt;/code&gt;&lt;/pre&gt;
&lt;h3&gt;&lt;a href=&quot;https://github.com/urre/chock.press/blob/dev/.circleci/config.yml&quot;&gt; 📄 See my complete Circle CI config here&lt;/a&gt;&lt;/h3&gt;
&lt;h2&gt;Kick things off&lt;/h2&gt;
&lt;p&gt;After checking in changes, the CircleCI build should kick off nicely.&lt;/p&gt;
&lt;p&gt;&lt;img src=&quot;https://res.cloudinary.com/urre/image/upload/v1547202460/hva3uf995ywjmrvywv4u.png&quot; alt=&quot;&quot; /&gt;&lt;/p&gt;
&lt;h3&gt;Slack notice&lt;/h3&gt;
&lt;p&gt;Using the CircleCI build notifications in Slack helps stay up-to-date with the latest build status.&lt;/p&gt;
&lt;p&gt;&lt;img src=&quot;https://res.cloudinary.com/urre/image/upload/v1547202106/j8pte1u8jvug2qcnbmuj.png&quot; alt=&quot;Slack&quot; /&gt;&lt;/p&gt;
&lt;h2&gt;Summary&lt;/h2&gt;
&lt;p&gt;🚀 Success! We have a self updating &lt;a href=&quot;https://chockpress.now.sh/&quot;&gt;website&lt;/a&gt; with a fully automated process.&lt;/p&gt;
&lt;p&gt;&lt;img src=&quot;https://res.cloudinary.com/urre/image/upload/v1547208311/chockpress_es9l9l.jpg&quot; alt=&quot;&quot; /&gt;&lt;/p&gt;
</content:encoded></item><item><title>Local WordPress Development With Docker and Docker Compose</title><link>https://urre.me/writing/docker-wordpress/</link><guid isPermaLink="true">https://urre.me/writing/docker-wordpress/</guid><description>Set up a modern WordPress development environment using Docker and Docker Compose</description><pubDate>Fri, 07 Dec 2018 00:00:00 GMT</pubDate><content:encoded>&lt;p&gt;Setting up a local environment for working with WordPress, or any development project can be time consuming. That typically means setting up a web server, a database, and support for all the languages/tools you’ll need. The problem is that installing this can get tricky, and they may not play nice with each other.&lt;/p&gt;
&lt;p&gt;During the years i&apos;ve been using everything from just running built in web server on my Mac, then switched over to using MAMP and then virtual machines using Vagrant. &lt;a href=&quot;https://github.com/Varying-Vagrant-Vagrants/VVV&quot;&gt;VVV&lt;/a&gt;, an open source Vagrant configuration for developing with WordPress is a good tool that we still use for some projects. Also, &lt;a href=&quot;https://roots.io/trellis/&quot;&gt;Trellis&lt;/a&gt; from &lt;a href=&quot;https://roots.io/&quot;&gt;Roots&lt;/a&gt; is another great tool for keeping development environments in sync between development, staging and producion servers.&lt;/p&gt;
&lt;p&gt;&amp;lt;figure class=&quot;center&quot;&amp;gt;
&amp;lt;img src=&quot;https://res.cloudinary.com/urre/image/upload/v1544186085/docker_bem4hv.svg&quot; role=&quot;presentation&quot; alt=&quot;Docker&quot; /&amp;gt;
&amp;lt;/figure&amp;gt;&lt;/p&gt;
&lt;p&gt;But now it is 2018. I wanted something lighter and fast. Docker was the right choice.&lt;/p&gt;
&lt;h2&gt;Why Docker?&lt;/h2&gt;
&lt;ul&gt;
&lt;li&gt;Create containers with isolated development environments.&lt;/li&gt;
&lt;li&gt;Use fewer resources than with VMs.&lt;/li&gt;
&lt;li&gt;Share your containers to make collaborations easier.&lt;/li&gt;
&lt;/ul&gt;
&lt;p&gt;Once you get your head around this idea of having “containers” and how to “link” those containers, you’ll find out how easy is to build your own developing (or production) environment with docker.&lt;/p&gt;
&lt;h2&gt;Docker and WordPress&lt;/h2&gt;
&lt;p&gt;To run WordPress locally we need this to get started:&lt;/p&gt;
&lt;ul&gt;
&lt;li&gt;PHP&lt;/li&gt;
&lt;li&gt;MySql&lt;/li&gt;
&lt;li&gt;Nginx&lt;/li&gt;
&lt;li&gt;Composer for dependency management (when using Bedrock)&lt;/li&gt;
&lt;/ul&gt;
&lt;blockquote&gt;
&lt;p&gt;Additional tools such as WP-CLI is also convenient to have. More about that later.&lt;/p&gt;
&lt;/blockquote&gt;
&lt;h2&gt;Setup a local domain and create a self signed certificate&lt;/h2&gt;
&lt;p&gt;We want to use a local domain ex &lt;code&gt;mywebsite.local&lt;/code&gt; and also use a self signed cert for use https in our application. I often have a little &lt;code&gt;cli&lt;/code&gt; folder in the project root with some scripts to get started.&lt;/p&gt;
&lt;p&gt;If you like, use my scripts in my &lt;a href=&quot;https://github.com/urre/wordpress-nginx-docker-compose&quot;&gt;starter repo&lt;/a&gt;&lt;/p&gt;
&lt;p&gt;Use the scripts like this:&lt;/p&gt;
&lt;ol&gt;
&lt;li&gt;Create a SSL cert in &lt;code&gt;./certs&lt;/code&gt; using &lt;code&gt;cd cli &amp;amp;&amp;amp; ./create-cert.sh&lt;/code&gt;&lt;/li&gt;
&lt;li&gt;Trust the cert in macOS Keychain using &lt;code&gt;cd cli &amp;amp;&amp;amp; ./trust-cert.sh&lt;/code&gt;&lt;/li&gt;
&lt;li&gt;Setup vhost in &lt;code&gt;/etc/hosts&lt;/code&gt; using &lt;code&gt;cd cli &amp;amp;&amp;amp; ./setup-hosts-file.sh&lt;/code&gt;&lt;/li&gt;
&lt;/ol&gt;
&lt;h2&gt;Docker Compose&lt;/h2&gt;
&lt;p&gt;I&apos;m going to use a tool called &lt;a href=&quot;https://docs.docker.com/compose/&quot;&gt;Docker Compose&lt;/a&gt; which enables you to configure the services you want your container to have and set them up all at once.&lt;/p&gt;
&lt;p&gt;Create a file called &lt;code&gt;docker-compose.yml&lt;/code&gt; in your project root.&lt;/p&gt;
&lt;p&gt;There is a bunch of things to cover here, so let&apos;s break it down:&lt;/p&gt;
&lt;h3&gt;Nginx&lt;/h3&gt;
&lt;p&gt;Nginx (NGiИX) is our web server of choice.&lt;/p&gt;
&lt;pre&gt;&lt;code&gt;  nginx:
    image: nginx:latest
    container_name: mywebsite-nginx
    ports:
      - &apos;80:80&apos;
      - &apos;443:443&apos;
    volumes:
      - ./nginx:/etc/nginx/conf.d
      - ./src:/var/www/html:rw,cached
      - ./certs:/etc/certs
    depends_on:
      - wordpress
    restart: always
&lt;/code&gt;&lt;/pre&gt;
&lt;p&gt;Notes:&lt;/p&gt;
&lt;ul&gt;
&lt;li&gt;Use the &lt;a href=&quot;https://hub.docker.com/_/nginx/&quot;&gt;nginx image&lt;/a&gt; from Docker Hub.&lt;/li&gt;
&lt;li&gt;We are listening on both port 80 for http and 443 for https. More about setting up a local ssl cert later.&lt;/li&gt;
&lt;li&gt;Use three volumes. 1. Load a custom nginx configuration. 2. Mount our &lt;code&gt;src&lt;/code&gt; folder in &lt;code&gt;/var/www/html&lt;/code&gt; and 3. Use local ssl-certs from &lt;code&gt;./certs&lt;/code&gt;&lt;/li&gt;
&lt;/ul&gt;
&lt;blockquote&gt;
&lt;p&gt;I&apos;m using caching for our volumes to increase the performance&lt;/p&gt;
&lt;/blockquote&gt;
&lt;h4&gt;Nginx configuration&lt;/h4&gt;
&lt;p&gt;In &lt;code&gt;./nginx&lt;/code&gt; we also want to add our configuration. Very much just standard, and pointing to our certs.&lt;/p&gt;
&lt;p&gt;Create the file &lt;code&gt;wordpress_ssl.conf&lt;/code&gt; and add &lt;a href=&quot;https://github.com/urre/wordpress-nginx-docker-compose/blob/master/nginx/wordpress_ssl.conf&quot;&gt;this config&lt;/a&gt;&lt;/p&gt;
&lt;blockquote&gt;
&lt;p&gt;Note: Since we use Bedrock, the web root is &lt;code&gt;/var/www/html/web&lt;/code&gt;&lt;/p&gt;
&lt;/blockquote&gt;
&lt;h3&gt;Database&lt;/h3&gt;
&lt;p&gt;The database service is simple, just using the standard &lt;a href=&quot;https://hub.docker.com/_/mariadb/&quot;&gt;mariadb image&lt;/a&gt; and set some environment variables for password and database name.&lt;/p&gt;
&lt;pre&gt;&lt;code&gt;  mysql:
    image: mariadb
    container_name: mywebsite-mysql
    environment:
      - MYSQL_ROOT_PASSWORD=password
      - MYSQL_DATABASE=mywebsite
    restart: always
    ports:
      - &apos;3306:3306&apos;
&lt;/code&gt;&lt;/pre&gt;
&lt;h3&gt;WordPress&lt;/h3&gt;
&lt;p&gt;Our WordPress service configuration in this example is using the &lt;a href=&quot;https://hub.docker.com/_/wordpress/&quot;&gt;wordpress-php7.2-fpm&lt;/a&gt;.&lt;/p&gt;
&lt;pre&gt;&lt;code&gt;  wordpress:
    image: wordpress:php7.2-fpm
    container_name: mywebsite-wordpress
    volumes:
      - ./src:/var/www/html:rw,cached
    environment:
      - WORDPRESS_DB_NAME=mywebsite
      - WORDPRESS_TABLE_PREFIX=wp_
      - WORDPRESS_DB_HOST=mysql
      - WORDPRESS_DB_PASSWORD=password
    depends_on:
      - mysql
    restart: always
&lt;/code&gt;&lt;/pre&gt;
&lt;blockquote&gt;
&lt;p&gt;Note: Although the default WordPress files will be downloaded in &lt;code&gt;./src&lt;/code&gt; when running docker-compose up, I&apos;m ignoring them in git and will be using the Bedrock structure. If you are not using Bedrock, just use the defaults.&lt;/p&gt;
&lt;/blockquote&gt;
&lt;h3&gt;Composer&lt;/h3&gt;
&lt;p&gt;I use &lt;a href=&quot;https://roots.io/bedrock/&quot;&gt;Bedrock&lt;/a&gt; for all WordPress projects, it&apos;s a modern WordPress structure/setup using development tools, easier configuration, and an improved folder structure. Bedrock also offers enhanced security with isolated web root to limit access to non-web files and more secure passwords through wp-password-bcrypt.&lt;/p&gt;
&lt;p&gt;Since we use Bedrock we need Composer to manage our WordPress installation and plugins with Composer, a PHP dependency manager. Composer will make development more reliable, help with team collaboration, and it helps maintain a better Git repository.&lt;/p&gt;
&lt;p&gt;We set &lt;code&gt;working_dir&lt;/code&gt; to &lt;code&gt;/var/www/html&lt;/code&gt; where our WordPress installation is located.&lt;/p&gt;
&lt;pre&gt;&lt;code&gt;  composer:
    image: composer/composer
    container_name: mywebsite-composer
    working_dir: /var/www/html
    restart: &apos;no&apos;
    volumes:
      - ./src:/var/www/html:rw,cached
&lt;/code&gt;&lt;/pre&gt;
&lt;h3&gt;Full compose file&lt;/h3&gt;
&lt;p&gt;Here is the full &lt;code&gt;docker-compose.yml&lt;/code&gt; file:&lt;/p&gt;
&lt;pre&gt;&lt;code&gt;version: &apos;3.6&apos;
services:
  nginx:
    image: nginx:latest
    container_name: mywebsite-nginx
    ports:
      - &apos;80:80&apos;
      - &apos;443:443&apos;
    volumes:
      - ./nginx:/etc/nginx/conf.d
      - ./src:/var/www/html:rw,cached
      - ./certs:/etc/certs
    depends_on:
      - wordpress
    restart: always

  mysql:
    image: mariadb
    container_name: mywebsite-mysql
    environment:
      - MYSQL_ROOT_PASSWORD=password
      - MYSQL_DATABASE=mywebsite
    restart: always
    ports:
      - &apos;3306:3306&apos;

  wordpress:
    image: wordpress:php7.2-fpm
    container_name: mywebsite-wordpress
    volumes:
      - ./src:/var/www/html:rw,cached
    environment:
      - WORDPRESS_DB_NAME=mywebsite
      - WORDPRESS_TABLE_PREFIX=wp_
      - WORDPRESS_DB_HOST=mysql
      - WORDPRESS_DB_PASSWORD=password
    depends_on:
      - mysql
    restart: always

  composer:
    image: composer/composer
    container_name: mywebsite-composer
    working_dir: /var/www/html
    restart: &apos;no&apos;
    volumes:
      - ./src:/var/www/html:rw,cached

&lt;/code&gt;&lt;/pre&gt;
&lt;h2&gt;WordPress configuration&lt;/h2&gt;
&lt;p&gt;All our source code should be placed inside &lt;code&gt;src&lt;/code&gt; folder. Add an existing project or initialize a new Bedrock project.&lt;/p&gt;
&lt;h3&gt;Environment configuration&lt;/h3&gt;
&lt;p&gt;Edit &lt;code&gt;.env&lt;/code&gt; file and setup our credentials&lt;/p&gt;
&lt;pre&gt;&lt;code&gt;DB_NAME=mywebsite
DB_USER=root
DB_HOST=mysql:3306
WP_HOME=https://mywebsite.local
DB_PASSWORD=password
WP_SITEURL=${WP_HOME}/wp
WP_ENV=development
...
&lt;/code&gt;&lt;/pre&gt;
&lt;h3&gt;Install extra packages and tools&lt;/h3&gt;
&lt;p&gt;Sometimes we need to use tools not installed in the standard Docker images. We can create our own Dockerfile, build it and use in Docker Compose.&lt;/p&gt;
&lt;p&gt;Create a &lt;code&gt;Dockerfile&lt;/code&gt; in our project root. Extend the base image and add your own tools.&lt;/p&gt;
&lt;p&gt;Example:&lt;/p&gt;
&lt;pre&gt;&lt;code&gt;FROM wordpress:php7.2-fpm

# Install sockets for PHP
RUN docker-php-ext-install sockets

# Install wp-cli
RUN curl -O https://raw.githubusercontent.com/wp-cli/builds/gh-pages/phar/wp-cli.phar
RUN chmod +x wp-cli.phar
RUN mv wp-cli.phar /usr/local/bin/wp
&lt;/code&gt;&lt;/pre&gt;
&lt;p&gt;In our &lt;code&gt;docker-compose.yml&lt;/code&gt;, modify the WordPress service a bit:&lt;/p&gt;
&lt;pre&gt;&lt;code&gt;  wordpress:
    build:
      context: .
      dockerfile: Dockerfile
    container_name: mywebsite-wordpress

    ...
&lt;/code&gt;&lt;/pre&gt;
&lt;blockquote&gt;
&lt;p&gt;When we make changes in our Dockerfile we can use &lt;code&gt;docker-compose up -d --force-recreate --build&lt;/code&gt; to build our container again if we change something.&lt;/p&gt;
&lt;/blockquote&gt;
&lt;h3&gt;Install WordPress and plugins&lt;/h3&gt;
&lt;p&gt;Install new plugins with Composer, like this:&lt;/p&gt;
&lt;pre&gt;&lt;code&gt;cd src
composer install
&lt;/code&gt;&lt;/pre&gt;
&lt;p&gt;or&lt;/p&gt;
&lt;pre&gt;&lt;code&gt;docker-compose run composer require wpackagist-plugin/wordpress-seo
&lt;/code&gt;&lt;/pre&gt;
&lt;h3&gt;Update WordPress and plugins&lt;/h3&gt;
&lt;pre&gt;&lt;code&gt;cd src
composer update
&lt;/code&gt;&lt;/pre&gt;
&lt;p&gt;or&lt;/p&gt;
&lt;pre&gt;&lt;code&gt;docker-compose run composer update
&lt;/code&gt;&lt;/pre&gt;
&lt;h4&gt;Create a new Bedrock project&lt;/h4&gt;
&lt;p&gt;If don&apos;t have an existing &lt;code&gt;composer.json&lt;/code&gt; file you can initialize a Bedrock project like this:&lt;/p&gt;
&lt;pre&gt;&lt;code&gt;docker-compose run composer create-project roots/bedrock .
&lt;/code&gt;&lt;/pre&gt;
&lt;h2&gt;Start&lt;/h2&gt;
&lt;pre&gt;&lt;code&gt;docker-compose up -d
&lt;/code&gt;&lt;/pre&gt;
&lt;p&gt;You can now browse to &lt;a href=&quot;https://mywebsite.local&quot;&gt;https://mywebsite.local&lt;/a&gt; and see your WordPress installation dialog!&lt;/p&gt;
&lt;p&gt;&lt;img src=&quot;https://res.cloudinary.com/urre/image/upload/v1544185917/o4wdorp76gwdfx6iatfh.png&quot; alt=&quot;Screenshot&quot; /&gt;&lt;/p&gt;
&lt;h2&gt;Useful Docker and Docker Compose Commands&lt;/h2&gt;
&lt;p&gt;List Docker containers&lt;/p&gt;
&lt;pre&gt;&lt;code&gt;docker ps
&lt;/code&gt;&lt;/pre&gt;
&lt;p&gt;List Docker images&lt;/p&gt;
&lt;pre&gt;&lt;code&gt;docker image ls
&lt;/code&gt;&lt;/pre&gt;
&lt;p&gt;List compose containers&lt;/p&gt;
&lt;pre&gt;&lt;code&gt;docker-compose ps
&lt;/code&gt;&lt;/pre&gt;
&lt;p&gt;Stop&lt;/p&gt;
&lt;pre&gt;&lt;code&gt;docker-compose stop
&lt;/code&gt;&lt;/pre&gt;
&lt;p&gt;Down (stop and remove)&lt;/p&gt;
&lt;pre&gt;&lt;code&gt;docker-compose down
&lt;/code&gt;&lt;/pre&gt;
&lt;p&gt;Cleanup&lt;/p&gt;
&lt;pre&gt;&lt;code&gt;docker-compose rm -v
&lt;/code&gt;&lt;/pre&gt;
&lt;h2&gt;Summary&lt;/h2&gt;
&lt;p&gt;There you go 😊&lt;/p&gt;
&lt;p&gt;We have created a modern local WordPress development environment with Docker Compose. Checkout my &lt;a href=&quot;https://github.com/urre/wordpress-nginx-docker-compose&quot;&gt;demo repo on Github&lt;/a&gt;.&lt;/p&gt;
&lt;p&gt;Let me know if you have any questions!&lt;/p&gt;
</content:encoded></item><item><title>WordPress Coding Standards as Part of Your CI Strategy</title><link>https://urre.me/writing/wordpress-coding-standards-ci/</link><guid isPermaLink="true">https://urre.me/writing/wordpress-coding-standards-ci/</guid><description>Ship your code with confidence.</description><pubDate>Tue, 09 Jan 2018 00:00:00 GMT</pubDate><content:encoded>&lt;p&gt;It is always a good thing to follow a certain coding style when writing code. WordPress is unfortunately ripe for spaghetti coding, aka doing whatever you want. It doesn&apos;t follow any strict object oriented approach and doesn’t use an MVC pattern. But you can still write good code if you stick to certain rules and conventions.&lt;/p&gt;
&lt;h2&gt;Why you need to apply WordPress coding standards to your codebase&lt;/h2&gt;
&lt;ul&gt;
&lt;li&gt;
&lt;p&gt;Avoid your codebase becoming a big mess. If there are no standards applied to your code, then it can quickly become a big mess. Especially when there is more developers working on the same code. If they’re not kept in check, things escalate fast.&lt;/p&gt;
&lt;/li&gt;
&lt;li&gt;
&lt;p&gt;Best practices. It is beneficial to the community when everyone is adopting the same practices when writing code.&lt;/p&gt;
&lt;/li&gt;
&lt;li&gt;
&lt;p&gt;Security. Code standards should include checks to make sure that the code is securely written. It’s easy to forget a nonce on a form or to output a variable that is not escaped. WordPress coding standards define how to write secure code and should be strictly enforced.&lt;/p&gt;
&lt;/li&gt;
&lt;li&gt;
&lt;p&gt;Documented code is much easier to read and understand. Your code standards should enforce documentation of classes, methods, variables etc. Having documented code is again a win for everyone as the code becomes much clearer when trying to add to it or refactor it.&lt;/p&gt;
&lt;/li&gt;
&lt;/ul&gt;
&lt;p&gt;There are coding standards for PHP, Html, JavaScript and Accessibility. Read all about it in the &lt;a href=&quot;https://make.wordpress.org/core/handbook/best-practices/coding-standards/&quot;&gt;code handbook&lt;/a&gt;.&lt;/p&gt;
&lt;h2&gt;PHPCS and WPCS&lt;/h2&gt;
&lt;p&gt;&lt;a href=&quot;%5BWPCS%5D(https://github.com/WordPress-Coding-Standards/WordPress-Coding-Standards)&quot;&gt;The WordPress Coding Standards&lt;/a&gt; project is a whole set of &lt;a href=&quot;https://github.com/squizlabs/PHP_CodeSniffer&quot;&gt;PHPCS (PHP_CodeSniffer)&lt;/a&gt; rules to make sure your code written for WordPress follows the outlined conventions.&lt;/p&gt;
&lt;h3&gt;Install and setup&lt;/h3&gt;
&lt;p&gt;Since we&apos;re using the excellent &lt;a href=&quot;https://roots.io/bedrock/&quot;&gt;Bedrock&lt;/a&gt; that uses &lt;a href=&quot;https://getcomposer.org/&quot;&gt;Composer&lt;/a&gt; for dependency management, let&apos;s install phpcs and wpcs like this:&lt;/p&gt;
&lt;h4&gt;PHPCS&lt;/h4&gt;
&lt;p&gt;Bedrock already comes with phpcs, so your composer file should look like this.&lt;/p&gt;
&lt;pre&gt;&lt;code&gt;&quot;require-dev&quot;: {
    &quot;squizlabs/php_codesniffer&quot;: &quot;^3.0.2&quot;
}
&lt;/code&gt;&lt;/pre&gt;
&lt;h4&gt;WPCS&lt;/h4&gt;
&lt;h5&gt;Install the Standards using:&lt;/h5&gt;
&lt;pre&gt;&lt;code&gt;composer require wp-coding-standards/wpcs
&lt;/code&gt;&lt;/pre&gt;
&lt;p&gt;This will add wpcs to your &lt;code&gt;composer.json&lt;/code&gt; file&lt;/p&gt;
&lt;pre&gt;&lt;code&gt;&quot;require&quot;: {
    &quot;wp-coding-standards/wpcs&quot;: &quot;^0.14.0&quot;,
}
&lt;/code&gt;&lt;/pre&gt;
&lt;h5&gt;Set paths to the standards using composer scripts:&lt;/h5&gt;
&lt;p&gt;This will set paths when doing both &lt;code&gt;composer install&lt;/code&gt; and &lt;code&gt;composer update&lt;/code&gt;&lt;/p&gt;
&lt;pre&gt;&lt;code&gt;&quot;scripts&quot;: {
    &quot;post-install-cmd&quot;: &quot;./vendor/bin/phpcs --config-set installed_paths vendor/wp-coding-standards/wpcs&quot;,
    &quot;post-update-cmd&quot; : &quot;./vendor/bin/phpcs --config-set installed_paths vendor/wp-coding-standards/wpcs&quot;,
}
&lt;/code&gt;&lt;/pre&gt;
&lt;p&gt;Make sure your setup is correct by running &lt;code&gt;phpcs -i&lt;/code&gt; from your project root&lt;/p&gt;
&lt;pre&gt;&lt;code&gt;The installed coding standards are PEAR, PHPCS, Zend, PSR2, MySource, Squiz, PSR1, WordPress-VIP, WordPress, WordPress-Extra, WordPress-Docs and WordPress-Core
&lt;/code&gt;&lt;/pre&gt;
&lt;p&gt;If everything went well, the WordPress coding standards should be listed &lt;code&gt;(WordPress, WordPress-Extra, WordPress-Docs and WordPress-Core)&lt;/code&gt;&lt;/p&gt;
&lt;h2&gt;Test&lt;/h2&gt;
&lt;p&gt;Now that we have the Standards installed, lets setup a test command. Add this to your Composer scripts:&lt;/p&gt;
&lt;pre&gt;&lt;code&gt;&quot;scripts&quot;: {
    &quot;post-install-cmd&quot;: &quot;./vendor/bin/phpcs --config-set installed_paths vendor/wp-coding-standards/wpcs&quot;,
    &quot;post-update-cmd&quot; : &quot;./vendor/bin/phpcs --config-set installed_paths vendor/wp-coding-standards/wpcs&quot;,
    &quot;test&quot;: [
        &quot;phpcs --report=full --colors -p --standard=web/app/themes/mytheme/codesniffer-ruleset.xml --ignore=*/vendor/*,*/node_modules/* web/app/themes/mytheme/ --extensions=php&quot;
    ]
}
&lt;/code&gt;&lt;/pre&gt;
&lt;ul&gt;
&lt;li&gt;Note 1: You can also just use &lt;code&gt;--standard=WordPress&lt;/code&gt;. I&apos;m using a custom ruleset that extends the WordPress standard. Red more here: &lt;a href=&quot;https://github.com/squizlabs/PHP_CodeSniffer/wiki/Annotated-ruleset.xml&quot;&gt;Annotated ruleset&lt;/a&gt;&lt;/li&gt;
&lt;li&gt;Note 2: I&apos;m only testing the theme in this example.&lt;/li&gt;
&lt;li&gt;Note 3: The &lt;code&gt;--colors&lt;/code&gt; will display the logs in a nice colorful way, the &lt;code&gt;-p&lt;/code&gt; will show progress&lt;/li&gt;
&lt;/ul&gt;
&lt;h3&gt;Running&lt;/h3&gt;
&lt;pre&gt;&lt;code&gt;composer test
&lt;/code&gt;&lt;/pre&gt;
&lt;h4&gt;Example output:&lt;/h4&gt;
&lt;pre&gt;&lt;code&gt;FILE: ...rojects/myproject/myfile.php
----------------------------------------------------------------------
FOUND 4 ERRORS AFFECTING 4 LINES
----------------------------------------------------------------------
34 | ERROR | [x] Expected 1 spaces before closing bracket; 0 found
36 | ERROR | All output should be run through an escaping function
    |      | (see the Security sections in the WordPress Developer
    |      | Handbooks), found &apos;$image_src&apos;.
90 | ERROR | [x] String &quot;Create a Configuration File&quot; does not require
    |        double quotes; use single quotes instead
63 | ERROR | [ ] Missing wp_unslash() before sanitization.
----------------------------------------------------------------------
&lt;/code&gt;&lt;/pre&gt;
&lt;h2&gt;From within your editor&lt;/h2&gt;
&lt;p&gt;I use &lt;a href=&quot;https://code.visualstudio.com/&quot;&gt;VS Code&lt;/a&gt; and have the phpcs extension installed. Errors and warning show up in the problems tab. Simple as that. There is packages for most &lt;a href=&quot;https://github.com/WordPress-Coding-Standards/WordPress-Coding-Standards#using-phpcs-and-wpcs-from-within-your-ide&quot;&gt;editors and IDs&lt;/a&gt;&lt;/p&gt;
&lt;p&gt;Example output:&lt;/p&gt;
&lt;p&gt;&lt;img src=&quot;https://res.cloudinary.com/urre/image/upload/v1516103053/j4d9nrdsw3px7r5t5yu5.png&quot; alt=&quot;VS Code&quot; /&gt;&lt;/p&gt;
&lt;p&gt;Note: When using a composer based workflow VS Code will pick up settings from the root. If your setup is different you can fine tune some &lt;a href=&quot;https://marketplace.visualstudio.com/items?itemName=ikappas.phpcs&quot;&gt;configuration options&lt;/a&gt;&lt;/p&gt;
&lt;h2&gt;As part of your CI strategy&lt;/h2&gt;
&lt;p&gt;When using Continuous Integration we can automatically check if the code you are writing follows the coding standards for every commit that get pushed to the repo.&lt;/p&gt;
&lt;p&gt;Codeship is our main workhorse when it comes to Contious Integration and Deployment, in some projects we also use Bitbucket Pipelines and Travis.&lt;/p&gt;
&lt;h2&gt;Codeship setup&lt;/h2&gt;
&lt;p&gt;Switch to the tests tab &lt;code&gt;https://app.codeship.com/projects/XXXXX/tests/edit&lt;/code&gt;.&lt;/p&gt;
&lt;p&gt;&lt;img src=&quot;https://res.cloudinary.com/urre/image/upload/v1515760948/e4okq3wmmm6s1rmp5h8o.png&quot; alt=&quot;Tests&quot; /&gt;&lt;/p&gt;
&lt;h3&gt;Setup Commands&lt;/h3&gt;
&lt;pre&gt;&lt;code&gt;phpenv local 7.2
composer install --prefer-source --no-interaction
&lt;/code&gt;&lt;/pre&gt;
&lt;h3&gt;Test commands&lt;/h3&gt;
&lt;pre&gt;&lt;code&gt;composer test
&lt;/code&gt;&lt;/pre&gt;
&lt;p&gt;If you code doesn&apos;t meet the standards you will see the full report in the Codeship test log, and well...Codeship tests will fail 😞&lt;/p&gt;
&lt;p&gt;&lt;img src=&quot;https://res.cloudinary.com/urre/image/upload/v1515765390/surfxuutu9reqjnzuvzg.png&quot; alt=&quot;Fail&quot; /&gt;&lt;/p&gt;
&lt;h2&gt;Conclusion&lt;/h2&gt;
&lt;p&gt;Consistency is key. Our Editors of course help us a lot, we have linters, formatters and other tools that help us keeping the code style consistent. I recommend taking this a step further and get this in your CI workflow to make sure of that and let you focus on writing your best code.&lt;/p&gt;
&lt;p&gt;&lt;img src=&quot;https://res.cloudinary.com/urre/image/upload/v1515765478/ffqly1cn2iqqczybkxcs.png&quot; alt=&quot;Success&quot; /&gt;&lt;/p&gt;
&lt;p&gt;Happy Coding!&lt;/p&gt;
</content:encoded></item><item><title>Use Data From Google Drive in Static Websites</title><link>https://urre.me/writing/use-data-from-google-drive-in-static-websites/</link><guid isPermaLink="true">https://urre.me/writing/use-data-from-google-drive-in-static-websites/</guid><description>Sometimes you work with a client that just have some simple content that needs to be updated; like a news feed/some list/table-data, maybe already created in a Google Spreadsheet. What if you could use that data on a Jekyll website? Well, of course you can. Let&apos;s do this.</description><pubDate>Fri, 21 Apr 2017 00:00:00 GMT</pubDate><content:encoded>&lt;p&gt;Sometimes you work with a client that just have some simple content that needs to be updated; like a news feed/some list/table-data, maybe already created in a Google Spreadsheet. What if you could use that data on a Jekyll website? Well, of course you can. Let&apos;s do this.&lt;/p&gt;
&lt;h2&gt;The Google Drive API&lt;/h2&gt;
&lt;p&gt;First, head over to The &lt;a href=&quot;https://console.developers.google.com/iam-admin&quot;&gt;IAM-admin&lt;/a&gt; in Google Developers API Console. The API Console lets you discover and use Google APIs, such as Google Drive, Maps and YouTube...&lt;/p&gt;
&lt;h3&gt;Create a new project&lt;/h3&gt;
&lt;p&gt;&lt;img src=&quot;https://res.cloudinary.com/urre/image/upload/v1489762042/dzx6ogghabgukh33orkb.png&quot; alt=&quot;&quot; /&gt;&lt;/p&gt;
&lt;p&gt;&lt;img src=&quot;https://res.cloudinary.com/urre/image/upload/v1489762311/h5g5ueppesnnaktfbmjl.png&quot; alt=&quot;&quot; /&gt;&lt;/p&gt;
&lt;h3&gt;Enable the Google Drive API&lt;/h3&gt;
&lt;p&gt;&lt;img src=&quot;https://res.cloudinary.com/urre/image/upload/v1489762223/o1mqoplpq3t6xxh1aamu.png&quot; alt=&quot;&quot; /&gt;&lt;/p&gt;
&lt;p&gt;&lt;img src=&quot;https://res.cloudinary.com/urre/image/upload/v1489762361/bbydalb03nqilb4s2z7f.png&quot; alt=&quot;&quot; /&gt;&lt;/p&gt;
&lt;h3&gt;Create credentials&lt;/h3&gt;
&lt;p&gt;Click &quot;Create credentials&quot; to get started.&lt;/p&gt;
&lt;p&gt;&lt;img src=&quot;https://res.cloudinary.com/urre/image/upload/v1489762397/fg82vddb3hymg0asmpcg.png&quot; alt=&quot;&quot; /&gt;&lt;/p&gt;
&lt;p&gt;Select what kind of kind of credentials you need, we need to select the Google Drive API from node.js.&lt;/p&gt;
&lt;p&gt;&lt;img src=&quot;https://res.cloudinary.com/urre/image/upload/v1489762433/ctpogpih0xdbaweiwfld.png&quot; alt=&quot;&quot; /&gt;&lt;/p&gt;
&lt;h3&gt;Create a service account&lt;/h3&gt;
&lt;ul&gt;
&lt;li&gt;Select an account name, with the Owner role.&lt;/li&gt;
&lt;li&gt;Select a name, whatever you like.&lt;/li&gt;
&lt;li&gt;Choose the JSON Key Type, we will be using this in your Jekyll site.&lt;/li&gt;
&lt;/ul&gt;
&lt;p&gt;&lt;img src=&quot;https://res.cloudinary.com/urre/image/upload/v1489762517/abadk05vknxh5rjsznql.png&quot; alt=&quot;&quot; /&gt;&lt;/p&gt;
&lt;p&gt;The JSON file will be downloaded to your computer. Place this in the root of your Jekyll project.&lt;/p&gt;
&lt;blockquote&gt;
&lt;p&gt;Remember to not version control this file.&lt;/p&gt;
&lt;/blockquote&gt;
&lt;p&gt;&lt;img src=&quot;https://res.cloudinary.com/urre/image/upload/v1489762662/zfdxf93crryq5tx0apax.png&quot; alt=&quot;&quot; /&gt;&lt;/p&gt;
&lt;h3&gt;The service account ID&lt;/h3&gt;
&lt;blockquote&gt;
&lt;p&gt;Important Note: Your project now has a service account. It also has an unique email address. Write this down, we will use it later.&lt;/p&gt;
&lt;/blockquote&gt;
&lt;p&gt;The email address looks like this:&lt;/p&gt;
&lt;pre&gt;&lt;code&gt;XXXXXX@ascendant-hub-YYYYYYY.iam.gserviceaccount.com
&lt;/code&gt;&lt;/pre&gt;
&lt;p&gt;&lt;img src=&quot;https://res.cloudinary.com/urre/image/upload/v1489762912/gc1k1p5dgx1xx0mpn4li.png&quot; alt=&quot;&quot; /&gt;&lt;/p&gt;
&lt;h2&gt;Create a Google Spreedsheet&lt;/h2&gt;
&lt;p&gt;Go to Google Drive and create a new Spreedsheet. Or if you already have a spreadsheet with some content, open that up.&lt;/p&gt;
&lt;p&gt;&lt;img src=&quot;https://res.cloudinary.com/urre/image/upload/v1489763017/u0vzzgwcjanewusx0n9l.png&quot; alt=&quot;&quot; /&gt;&lt;/p&gt;
&lt;h3&gt;Add content&lt;/h3&gt;
&lt;p&gt;&lt;img src=&quot;https://res.cloudinary.com/urre/image/upload/v1492772787/e5sculsvi6y48mleu1pf.png&quot; alt=&quot;&quot; /&gt;&lt;/p&gt;
&lt;h3&gt;Share the spreadsheet with your IAM user.&lt;/h3&gt;
&lt;p&gt;Remember the email address you wrote down before? Yep, now is time to use it. Share the spreadsheet with this email address.&lt;/p&gt;
&lt;p&gt;&lt;img src=&quot;https://res.cloudinary.com/urre/image/upload/v1489763174/vqg1wxzhr8pdlvvydkak.png&quot; alt=&quot;&quot; /&gt;&lt;/p&gt;
&lt;p&gt;Also, of course share the spreadsheet to everyone else that is going to manage the content. 👨‍ 👩‍&lt;/p&gt;
&lt;h2&gt;Go get that data in to our website&lt;/h2&gt;
&lt;p&gt;Next up, we will create our script to fetch the data from our Spreadsheet.&lt;/p&gt;
&lt;blockquote&gt;
&lt;p&gt;I am using Jekyll in this example, but you can use any static site generator of choice, or together with a JavaScript framework like React, Vue.js etc. Just save data as JSON instead of YAML.&lt;/p&gt;
&lt;/blockquote&gt;
&lt;h3&gt;Setup&lt;/h3&gt;
&lt;p&gt;We are going to write a Node.js script for connecting to your spreadsheet, and saving data as markdown. First things first we need to install the google spreadsheet module, and some helpers.&lt;/p&gt;
&lt;pre&gt;&lt;code&gt;npm i -D google-spreadsheet async babel-cli babel-preset-es2015 babel-preset-stage-0
&lt;/code&gt;&lt;/pre&gt;
&lt;p&gt;Create a &lt;code&gt;.babelrc&lt;/code&gt; file&lt;/p&gt;
&lt;pre&gt;&lt;code&gt;{
  &quot;presets&quot;: [&quot;es2015&quot;, &quot;stage-0&quot;]
}
&lt;/code&gt;&lt;/pre&gt;
&lt;h3&gt;Create the script&lt;/h3&gt;
&lt;p&gt;First, import libraries&lt;/p&gt;
&lt;pre&gt;&lt;code&gt;


&lt;/code&gt;&lt;/pre&gt;
&lt;p&gt;First, create a reference to our document and our sheet.&lt;/p&gt;
&lt;pre&gt;&lt;code&gt;const doc = new GoogleSpreadsheet(
	// Using our example spreadsheet: https://docs.google.com/spreadsheets/d/1o_NWrDsVNSVU1jViexKQi08aI6h76fXrMIcvbT9faoM/edit#gid=0
  &quot;1o_NWrDsVNSVU1jViexKQi08aI6h76fXrMIcvbT9faoM&quot;
);
let sheet;
&lt;/code&gt;&lt;/pre&gt;
&lt;p&gt;Then we want to do this:&lt;/p&gt;
&lt;ol&gt;
&lt;li&gt;Connect to our spreadsheet&lt;/li&gt;
&lt;li&gt;Get data&lt;/li&gt;
&lt;li&gt;Save as YAML in a Jekyll data file (you could also save as regular posts)&lt;/li&gt;
&lt;/ol&gt;
&lt;pre&gt;&lt;code&gt;async.series([function setAuth(step) {
  const creds = require(&quot;./newproject-20015697d7f6.json&quot;);
  doc.useServiceAccountAuth(creds, step);
}, function getInfoAndWorksheets(step) {
  doc.getInfo((err, info) =&amp;gt; {
    console.log(
      &quot;Loaded spreadsheet: &quot; + info.title + &quot; by &quot; + info.author.email
    );
    // Using the first sheet
    sheet = info.worksheets[0];
    console.log(
      &quot;sheet 1: &quot; + sheet.title + &quot; &quot; + sheet.rowCount + &quot;x&quot; + sheet.colCount
    );
    step();
  });
}, function getStuff(step) {
  sheet.getRows(
    {
      offset: 1,
      limit: 20,
      orderby: &quot;col1&quot;
    }, function(err, rows) {
      console.log(&quot;Read &quot; + rows.length + &quot; rows&quot;);
      // Clean posts.yml
      fs.truncate(&quot;./_data/posts.yml&quot;, 0, () =&amp;gt; {
      });
      // Save rows as items in the YAML file
      for (let row of rows) {
        fs.appendFile(
          &quot;./_data/posts.yml&quot;,
          &quot;- date: &quot; +
          row.date +
          &quot;\n\x20\x20&quot; +
          &quot;title: &quot; +
          row.title +
          &quot;\n\x20\x20&quot; +
          &quot;content: &quot; +
          row.content +
          &quot;\n\n&quot;,
          err =&amp;gt; {
          }
        );
      }
    }
  );
}
]);
&lt;/code&gt;&lt;/pre&gt;
&lt;p&gt;Create a NPM script for running our script&lt;/p&gt;
&lt;pre&gt;&lt;code&gt;&quot;scripts&quot;: {
  &quot;getdata&quot;: &quot;babel-node getdata.js&quot;
},
&lt;/code&gt;&lt;/pre&gt;
&lt;p&gt;And then:&lt;/p&gt;
&lt;pre&gt;&lt;code&gt;npm run getdata
&lt;/code&gt;&lt;/pre&gt;
&lt;h2&gt;Render data in a template&lt;/h2&gt;
&lt;p&gt;Now we have a file with all our data in &lt;code&gt;_data/posts.yml&lt;/code&gt;.&lt;/p&gt;
&lt;p&gt;&lt;img src=&quot;https://res.cloudinary.com/urre/image/upload/v1492773492/ppqjxmitm44hvfjyvrwf.png&quot; alt=&quot;&quot; /&gt;&lt;/p&gt;
&lt;p&gt;We can now render the posts in a template:&lt;/p&gt;
&lt;pre&gt;&lt;code&gt;&amp;lt;ul&amp;gt;
    {% for post in site.data.posts %}
    &amp;lt;li&amp;gt;
        &amp;lt;h2&amp;gt;{{ post.title }}&amp;lt;/h2&amp;gt;
        &amp;lt;time datetime=&quot;{{ post.date | date_to_xmlschema }}&quot;&amp;gt;{{ post.date | date: &quot;%B %d, %Y&quot; }}&amp;lt;/time&amp;gt;
        &amp;lt;p&amp;gt;{{ post.content }}&amp;lt;/p&amp;gt;
    &amp;lt;/li&amp;gt;
    {% endfor %}
&amp;lt;/ul&amp;gt;
&lt;/code&gt;&lt;/pre&gt;
&lt;blockquote&gt;
&lt;p&gt;Note: Of course if you need custom urls, just save in &lt;code&gt;_posts&lt;/code&gt; instead and add the corresponding YAML variables, like permalink, date etc.&lt;/p&gt;
&lt;/blockquote&gt;
&lt;p&gt;Great success!&lt;/p&gt;
&lt;p&gt;&lt;img src=&quot;https://res.cloudinary.com/urre/image/upload/v1492777038/mu7mlhaihmqzczbljvcy.png&quot; alt=&quot;&quot; /&gt;&lt;/p&gt;
</content:encoded></item><item><title>Instant Jekyll Search</title><link>https://urre.me/writing/instant-jekyll-search/</link><guid isPermaLink="true">https://urre.me/writing/instant-jekyll-search/</guid><description>In this walkthrough I will show you how to make an simple but fast and instant search for your website. I will be using just Vanilla JavaScript with some ES6.</description><pubDate>Fri, 24 Feb 2017 00:00:00 GMT</pubDate><content:encoded>&lt;p&gt;Adding search functionality to Jekyll (or whatever static site generator you are using) is not hard or complicated. In this walkthrough I will show you how to make an simple but fast and instant search for your website. I will be using just Vanilla JavaScript with some ES6.&lt;/p&gt;
&lt;p&gt;I have been using the excellent &lt;a href=&quot;http://lunrjs.com/&quot;&gt;lunr.js&lt;/a&gt; lately, a blazing-fast simple full text search engine for client side applications. It is designed to be small, yet full featured, enabling you to provide a great search experience without the need for external, server side, search services. Think &lt;a href=&quot;http://lucene.apache.org/solr/&quot;&gt;Solr&lt;/a&gt; but way simpler.&lt;/p&gt;
&lt;p&gt;Also, an important part: lunr.js has no external dependencies.&lt;/p&gt;
&lt;h3&gt;&lt;a href=&quot;https://jazztips.se/sok/&quot;&gt;Checkout a live demo&lt;/a&gt;&lt;/h3&gt;
&lt;hr /&gt;
&lt;h2&gt;The search template&lt;/h2&gt;
&lt;p&gt;First, let&apos;s make a simple search template:&lt;/p&gt;
&lt;pre&gt;&lt;code&gt;&amp;lt;div class=&quot;container&quot;&amp;gt;
	&amp;lt;div class=&quot;columns&quot;&amp;gt;
		&amp;lt;div class=&quot;column col-6&quot;&amp;gt;
			&amp;lt;form class=&quot;searchform&quot; action=&quot;/sok&quot; method=&quot;get&quot;&amp;gt;
				&amp;lt;input type=&quot;text&quot; class=&quot;form-input searchfield&quot; placeholder=&quot;Sök album, musiker, skivbolag, taggar...&quot; autofocus&amp;gt;
				&amp;lt;input type=&quot;submit&quot; class=&quot;invisible&quot;&amp;gt;
			&amp;lt;/form&amp;gt;
		&amp;lt;/div&amp;gt;
		&amp;lt;div class=&quot;column col-6&quot;&amp;gt;
			&amp;lt;p class=&quot;searchcount text-right&quot;&amp;gt;&amp;lt;/p&amp;gt;
		&amp;lt;/div&amp;gt;
	&amp;lt;/div&amp;gt;
&amp;lt;/div&amp;gt;
&lt;/code&gt;&lt;/pre&gt;
&lt;p&gt;&amp;lt;div class=&quot;searchcontainer&quot;&amp;gt;&amp;lt;/div&amp;gt;&lt;/p&gt;
&lt;h3&gt;JSON data&lt;/h3&gt;
&lt;p&gt;Now, we need to create a data store that contains basic information about each post. We can output everything we want to be able to search for, in this case; all the details for records on Jazztips. Using the &lt;code&gt;jsonify&lt;/code&gt; filter we can safely convert data to JSON format.&lt;/p&gt;
&lt;p&gt;I am doing this on a custom Jekyll layout, that the search template uses.&lt;/p&gt;
&lt;pre&gt;&lt;code&gt;&amp;lt;script&amp;gt;
{% raw %}
window.store = [
	{% for post in site.posts %} {
		&quot;title&quot;: {{post.title | jsonify}},
		&quot;artist&quot;: {{post.artist | jsonify}},
		&quot;link&quot;: {{ post.url | jsonify }},
		&quot;label&quot;: {{ post.label | jsonify }},
		&quot;image&quot;: {{ post.image | jsonify }},
		&quot;date&quot;: {{ post.date | date: &apos;%B %-d, %Y&apos; | jsonify }},
		&quot;excerpt&quot;: {{ post.content | strip_html | truncatewords: 20 | jsonify }}
	}
	{% unless forloop.last %}, {% endunless %}
	{% endfor %}
]
{% endraw %}
&amp;lt;/script&amp;gt;
&lt;/code&gt;&lt;/pre&gt;
&lt;h2&gt;Build the index&lt;/h2&gt;
&lt;p&gt;First import Lunr and store references to our DOM elements&lt;/p&gt;
&lt;pre&gt;&lt;code&gt;

const searchform = document.querySelector(&apos;.searchform&apos;)
const searchfield = document.querySelector(&apos;.searchfield&apos;)
const resultdiv = document.querySelector(&apos;.searchcontainer&apos;)
const searchcount = document.querySelector(&apos;.searchcount&apos;)
&lt;/code&gt;&lt;/pre&gt;
&lt;p&gt;Next, give Lunr all the data so it can help us find posts. A boost tells Lunr that it should favor this field.&lt;/p&gt;
&lt;pre&gt;&lt;code&gt;let index = lunr(function() {
  this.ref(&apos;id&apos;)
  this.field(&apos;title&apos;, {boost: 10})
  this.field(&apos;artist&apos;)
  this.field(&apos;link&apos;)
  this.field(&apos;image&apos;)
  this.field(&apos;content&apos;)
  this.field(&apos;label&apos;)
  this.field(&apos;tags&apos;)
})

for (let key in window.store) {
  index.add({
    &apos;id&apos;: key,
    &apos;title&apos;: window.store[key].title,
    &apos;artist&apos;: window.store[key].artist,
    &apos;link&apos;: window.store[key].link,
    &apos;image&apos;: window.store[key].image,
    &apos;content&apos;: window.store[key].content,
    &apos;label&apos;: window.store[key].label,
    &apos;tags&apos;: window.store[key].tags,
  })
}
&lt;/code&gt;&lt;/pre&gt;
&lt;h2&gt;JavaScript search&lt;/h2&gt;
&lt;p&gt;Ok, so we have the JSON-file containing data about all our posts, and we have created the index for Lunr. What&apos;s next?&lt;/p&gt;
&lt;p&gt;Well, we need to query Lunr, match results and present this to the user.&lt;/p&gt;
&lt;p&gt;First, we listen for when the user types in the search form.&lt;/p&gt;
&lt;pre&gt;&lt;code&gt;const getTerm = function() {
  searchfield.addEventListener(&apos;keyup&apos;, function(event) {
    event.preventDefault()
    const query = this.value
    doSearch(query)
  })
}
&lt;/code&gt;&lt;/pre&gt;
&lt;p&gt;Then, we want to do the following:&lt;/p&gt;
&lt;ol&gt;
&lt;li&gt;Do the actual search in the index.&lt;/li&gt;
&lt;li&gt;Show the number of results.&lt;/li&gt;
&lt;li&gt;Update the browser url with a query parameter and display the results.&lt;/li&gt;
&lt;/ol&gt;
&lt;h3&gt;1. Do the search and show number of results&lt;/h3&gt;
&lt;pre&gt;&lt;code&gt;const doSearch = query =&amp;gt; {
  const result = index.search(query)
  resultdiv.innerHTML = &apos;&apos;
  searchcount.innerHTML = `Found ${result.length} records`
  updateUrlParameter(query)
  showResults(result)

}
&lt;/code&gt;&lt;/pre&gt;
&lt;h3&gt;2. Show the results&lt;/h3&gt;
&lt;pre&gt;&lt;code&gt;const showResults = (result) =&amp;gt; {

    for (let item of result) {
      const ref = item.ref
      const searchitem = document.createElement(&apos;div&apos;)
      searchitem.className = &apos;searchitem&apos;
      searchitem.innerHTML = `&amp;lt;div class=&apos;card&apos;&amp;gt;&amp;lt;a class=&apos;card-link&apos; href=&apos;${window.store[ref].link}&apos;&amp;gt;&amp;lt;div class=&apos;card-image&apos;&amp;gt;&amp;lt;div class=&apos;loading&apos;&amp;gt;&amp;lt;img class=&apos;b-lazy img-responsive&apos; src=&apos;${window.store[ref].image}&apos; data-src=&apos;${window.store[ref].image}&apos; alt=&apos;${window.store[ref].title}&apos;/&amp;gt;&amp;lt;/div&amp;gt;&amp;lt;/div&amp;gt;&amp;lt;div class=&apos;card-header&apos;&amp;gt;&amp;lt;h4 class=&apos;card-title&apos;&amp;gt;${window.store[ref].artist} - ${window.store[ref].title}&amp;lt;/h4&amp;gt;&amp;lt;h6 class=&apos;card-meta&apos;&amp;gt;${window.store[ref].label}&amp;lt;/h6&amp;gt;&amp;lt;/div&amp;gt;&amp;lt;/a&amp;gt;&amp;lt;/div&amp;gt;`

      resultdiv.appendChild(searchitem)

      setTimeout(() =&amp;gt; {
        bLazy.revalidate()
      }, 300)
}
&lt;/code&gt;&lt;/pre&gt;
&lt;blockquote&gt;
&lt;p&gt;Note: I am using &lt;a href=&quot;http://dinbror.dk/blog/blazy/&quot;&gt;bLazy&lt;/a&gt; for lazy loading my images, so I update blazy when results is added to the dom.&lt;/p&gt;
&lt;/blockquote&gt;
&lt;h3&gt;3. Update browser url with query parameter&lt;/h3&gt;
&lt;p&gt;&lt;img src=&quot;http://res.cloudinary.com/urre/image/upload/v1487944372/jazztips-search_tz3ov4.gif&quot; alt=&quot;&quot; /&gt;&lt;/p&gt;
&lt;p&gt;Add the search query to the browser url using HTML5 &lt;code&gt;pushState()&lt;/code&gt;&lt;/p&gt;
&lt;pre&gt;&lt;code&gt;const updateUrlParameter = (value) =&amp;gt; {
  window.history.pushState(&apos;&apos;, &apos;&apos;, `?s=${encodeURIComponent(value)}`)
}
&lt;/code&gt;&lt;/pre&gt;
&lt;h2&gt;Sharable link to search results&lt;/h2&gt;
&lt;p&gt;Also we want to be able to send a link ex: &lt;a href=&quot;https://jazztips.se/sok/?s=wayne&quot;&gt;https://jazztips.se/sok/?s=wayne&lt;/a&gt; with a search query, just grab the url query string and do a search.&lt;/p&gt;
&lt;pre&gt;&lt;code&gt;const getQuery = () =&amp;gt; {
  const parser = document.createElement(&apos;a&apos;)
  parser.href = window.location.href

  if(parser.href.includes(&apos;=&apos;)) {
    const searchquery = decodeURIComponent(parser.href.substring(parser.href.indexOf(&apos;=&apos;) + 1))
      searchfield.setAttribute(&apos;value&apos;, searchquery)

      doSearch(searchquery)
  }

}
&lt;/code&gt;&lt;/pre&gt;
&lt;h2&gt;Notes&lt;/h2&gt;
&lt;p&gt;This is a basic example, a bit simplified. You could use a template engine to avoid html in JS when you show the results. Also taking care of the the keyup event smarter using debouncing to make it more performant.&lt;/p&gt;
&lt;p&gt;Another great option is to use &lt;a&gt;Algolia&lt;/a&gt;, they have great documentation about this on &lt;a href=&quot;https://blog.algolia.com/instant-search-blog-documentation-jekyll-plugin/&quot;&gt;their blog&lt;/a&gt;&lt;/p&gt;
&lt;h3&gt;&lt;a href=&quot;https://jazztips.se/sok/&quot;&gt;Checkout a live demo&lt;/a&gt;&lt;/h3&gt;
</content:encoded></item><item><title>The Stripe Bot</title><link>https://urre.me/writing/the-stripe-bot/</link><guid isPermaLink="true">https://urre.me/writing/the-stripe-bot/</guid><description>In this post, I will walk through the steps for building the website, accepting payments via Stripe Checkout, the best payment flow, on web and mobile.</description><pubDate>Fri, 13 Jan 2017 00:00:00 GMT</pubDate><content:encoded>&lt;p&gt;Recently we launched a tiny side project called &lt;a href=&quot;https://wp-plugin-design.surge.sh/&quot;&gt;WordPress Plugin UI template&lt;/a&gt;, a simple resource with the simple goal of empowering WordPress developers &lt;a href=&quot;https://wp-plugin-design.surge.sh/faq/&quot;&gt;making beautiful banners and icons for their plugins.&lt;/a&gt;&lt;/p&gt;
&lt;p&gt;In this post, I will walk through the steps for building the website, accepting payments via &lt;a href=&quot;https://stripe.com/&quot;&gt;Stripe&lt;/a&gt; using &lt;a href=&quot;https://stripe.com/checkout&quot;&gt;Checkout&lt;/a&gt;, the best payment flow, on web and mobile.&lt;/p&gt;
&lt;p&gt;We&apos;re also going to automate some things using &lt;a href=&quot;http://zapier.com&quot;&gt;Zapier&lt;/a&gt; and the &lt;a href=&quot;https://zapier.com/blog/workflow-automation/&quot;&gt;Multi-Steps Zaps&lt;/a&gt; which they launched in 2016.&lt;/p&gt;
&lt;h2&gt;Core idea&lt;/h2&gt;
&lt;p&gt;The idea behind this little project, was to make it a bit easier for developers when submitting their plugins to the official WordPress plugin repo. Having made a bunch of plugins myself in the past, I wanted to save you from the hassle of dealing with sizes and formats.&lt;/p&gt;
&lt;p&gt;For $3 you&apos;ll get a nice vector based template file for both Sketch and Photoshop. Stop worring about pixel sizes and file formats and be productive developing your plugin instead.&lt;/p&gt;
&lt;h2&gt;Accepting payments width Stripe&lt;/h2&gt;
&lt;p&gt;Before you do anything, you will need a Stripe account. The process is fairly painless, but requires a some information, including your company details, address, and account number and IBAN for transfers to your bank account. Under account settings you will find everything you need.&lt;/p&gt;
&lt;h3&gt;API Keys&lt;/h3&gt;
&lt;p&gt;Next you need to collect your &lt;a href=&quot;https://dashboard.stripe.com/account/apikeys&quot;&gt;API keys&lt;/a&gt;.&lt;/p&gt;
&lt;p&gt;Create an &lt;code&gt;.env&lt;/code&gt; file and store your keys. Never version control API keys.&lt;/p&gt;
&lt;pre&gt;&lt;code&gt;SECRET_KEY=&quot;sk_test_XXXXXXXXXX&quot;
PUBLISHABLE_KEY=&quot;pk_test_YYYYYYYYYYYY&quot;
&lt;/code&gt;&lt;/pre&gt;
&lt;blockquote&gt;
&lt;p&gt;Stripe offers both test and live keys. Remember to switch out the correct ones when your going live!&lt;/p&gt;
&lt;/blockquote&gt;
&lt;h3&gt;Embedding Stripe Checkout&lt;/h3&gt;
&lt;p&gt;Stripe has an embeddable checkout process called &lt;a href=&quot;https://stripe.com/checkout&quot;&gt;Stripe Checkout&lt;/a&gt;. It has a beautiful look and feel for desktop, tablet, and mobile devices. A great payment flow, on web and mobile. It works within your site—customers can pay instantly, without being redirected away to complete the transaction.&lt;/p&gt;
&lt;p&gt;To get started, here is some some boilerplate to get you started. Making sure that the form submits to your own server-side code within the action attribute.&lt;/p&gt;
&lt;pre&gt;&lt;code&gt;  &amp;lt;form action=&quot;/charge.php&quot; method=&quot;POST&quot;&amp;gt;
    &amp;lt;script
    src=&quot;https://checkout.stripe.com/checkout.js&quot; class=&quot;stripe-button&quot;
    data-key=&quot;&amp;lt;?php echo $stripe[&apos;publishable_key&apos;]; ?&amp;gt;&quot;
    data-amount=&quot;300&quot;
    data-name=&quot;Urban Sanden&quot;
    data-description=&quot;Download the Wordpress Plugin UI template.&quot;
    data-image=&quot;/dist/images/logo.png&quot;
    data-locale=&quot;auto&quot;
    data-label=&quot;Download template files ($3)&quot;
    data-currency=&quot;usd&quot;&amp;gt;
  &amp;lt;/script&amp;gt;
&amp;lt;/form&amp;gt;
&lt;/code&gt;&lt;/pre&gt;
&lt;h3&gt;Completing the charge server-side&lt;/h3&gt;
&lt;p&gt;I used the &lt;a href=&quot;https://github.com/stripe/stripe-php/releases&quot;&gt;Stripe PHP library&lt;/a&gt; via Composer for this simple website, but use whatever you like. Express, Rails, Flask etc.&lt;/p&gt;
&lt;h4&gt;1.config.php. Just loading the environtment variables (API-keys.)&lt;/h4&gt;
&lt;pre&gt;&lt;code&gt;&amp;lt;?php
require(&apos;./vendor/autoload.php&apos;);

$dotenv = new Dotenv\Dotenv(__DIR__);
$dotenv-&amp;gt;load();

$stripe = array(
  &quot;secret_key&quot;      =&amp;gt; getenv(&apos;SECRET_KEY&apos;),
  &quot;publishable_key&quot; =&amp;gt; getenv(&apos;PUBLISHABLE_KEY&apos;)
);

\Stripe\Stripe::setApiKey($stripe[&apos;secret_key&apos;]);
&lt;/code&gt;&lt;/pre&gt;
&lt;h4&gt;2.charge.php&lt;/h4&gt;
&lt;pre&gt;&lt;code&gt;&amp;lt;?php
require_once(&apos;./config.php&apos;);

$email = $_POST[&apos;stripeEmail&apos;];
$token  = $_POST[&apos;stripeToken&apos;];

$charge = \Stripe\Charge::create(array(
    &apos;source&apos; =&amp;gt; $token,
    &apos;amount&apos;   =&amp;gt; 300,
    &apos;currency&apos; =&amp;gt; &apos;usd&apos;,
    &apos;metadata&apos; =&amp;gt; [&apos;email&apos; =&amp;gt; $email, &apos;sku&apos; =&amp;gt; &apos;banner-1&apos;],
    &apos;description&apos; =&amp;gt; &apos;Download the Wordpress Plugin UI template.&apos;
));

&lt;/code&gt;&lt;/pre&gt;
&lt;p&gt;The code above, plus the client side form is pretty much all you need to complete the charging process.&lt;/p&gt;
&lt;p&gt;When charge is successful you can display a Thank you message or redirecting to a special Thank You-page.&lt;/p&gt;
&lt;h2&gt;Zapier - automate all the things!&lt;/h2&gt;
&lt;p&gt;Now that we have the payment workflow going, why don&apos;t we look in to some automation.&lt;/p&gt;
&lt;p&gt;&lt;a href=&quot;https://zapier.com&quot;&gt;Zapier&lt;/a&gt; is a great service that allows hundreds of different apps to be connected, in new and interesting ways. Using a system of triggers and actions, you can build powerful custom recipes - called Zaps. The Stripe Zapier trigger workflows is based on common activities in Stripe like getting new customers, receiving a new payment, and more.&lt;/p&gt;
&lt;p&gt;Nowadays Zaps don&apos;t just stop at two steps. They can expand to as many steps that you like. &lt;a href=&quot;https://zapier.com/blog/workflow-automation/&quot;&gt;Multi-Steps Zaps&lt;/a&gt; to the rescue!&lt;/p&gt;
&lt;p&gt;As always, automating workflows is more fun!&lt;/p&gt;
&lt;h3&gt;The Zap&lt;/h3&gt;
&lt;p&gt;This is our current Zap:&lt;/p&gt;
&lt;ol&gt;
&lt;li&gt;Look for a new charge from Stripe&lt;/li&gt;
&lt;li&gt;Find the charge via its ID&lt;/li&gt;
&lt;li&gt;Send out an email using &lt;a href=&quot;https://www.sparkpost.com/&quot;&gt;Sparkpost&lt;/a&gt;&lt;/li&gt;
&lt;li&gt;Send a Slack notification&lt;/li&gt;
&lt;/ol&gt;
&lt;p&gt;&lt;img src=&quot;https://res.cloudinary.com/urre/image/upload/v1484305851/c0d1dddtv6qlcfnn02re.png&quot; alt=&quot;&quot; /&gt;&lt;/p&gt;
&lt;p&gt;&lt;img src=&quot;https://res.cloudinary.com/urre/image/upload/v1484305969/dwi8rzqyn0ysazodln1u.png&quot; alt=&quot;&quot; /&gt;&lt;/p&gt;
&lt;p&gt;&lt;img src=&quot;https://res.cloudinary.com/urre/image/upload/v1484305903/xgc1zjf7a3wkyxfnib1y.png&quot; alt=&quot;&quot; /&gt;&lt;/p&gt;
&lt;h2&gt;Email&lt;/h2&gt;
&lt;p&gt;Sparkpost is a great service for sending transactional emails. I used Sparkpost for delivering the template files. Via the Stripe Action you can also select a predesigned template for your Sparkpost account. For this I used the &lt;a href=&quot;https://github.com/leemunroe/responsive-html-email-template&quot;&gt;Really Simple Responsive HTML Email Template&lt;/a&gt;.&lt;/p&gt;
&lt;h2&gt;Slack&lt;/h2&gt;
&lt;p&gt;&lt;img src=&quot;https://res.cloudinary.com/urre/image/upload/v1484307074/m8qpjk2lc2wwyvzdise2.png&quot; alt=&quot;&quot; /&gt;&lt;/p&gt;
&lt;p&gt;The friendly Slack notification.&lt;/p&gt;
&lt;h2&gt;Website domain and hosting&lt;/h2&gt;
&lt;ul&gt;
&lt;li&gt;Domain wp-plugin.design bought from &lt;a href=&quot;https://www.namecheap.com/&quot;&gt;Namecheap&lt;/a&gt;&lt;/li&gt;
&lt;li&gt;Served on HTTP2/HTTPS via &lt;a href=&quot;https://www.cloudflare.com/a/login&quot;&gt;Cloudflare&lt;/a&gt;&lt;/li&gt;
&lt;li&gt;Hosted on a &lt;a href=&quot;https://www.digitalocean.com/&quot;&gt;Digital Ocean&lt;/a&gt; droplet. Running on &lt;a href=&quot;https://serverpilot.io/&quot;&gt;ServerPilot&lt;/a&gt;.&lt;/li&gt;
&lt;/ul&gt;
&lt;h2&gt;Final notes&lt;/h2&gt;
&lt;p&gt;Hopefully you’re now equipped with the essential steps to start accepting payments on the web using Stripe.&lt;/p&gt;
&lt;p&gt;Get the &lt;a href=&quot;https://wp-plugin-design.surge.sh/&quot;&gt;template now!&lt;/a&gt;&lt;/p&gt;
</content:encoded></item><item><title>Writing Beautiful Markdown in Sublime Text</title><link>https://urre.me/writing/writing-beautiful-markdown-in-sublime-text/</link><guid isPermaLink="true">https://urre.me/writing/writing-beautiful-markdown-in-sublime-text/</guid><description>All the benefits of having all of Sublimes tooling at your finger tips!</description><pubDate>Mon, 12 Sep 2016 00:00:00 GMT</pubDate><content:encoded>&lt;p&gt;From time to time i like to try new ways of keeping notes. New Mac apps, web apps and other tools for writing and keeping notes/writings/blog posts in sync. There are some great apps out there, like &lt;a href=&quot;https://ia.net/writer&quot;&gt;iA Writer&lt;/a&gt;, &lt;a href=&quot;http://www.typora.io/&quot;&gt;Typora&lt;/a&gt;, &lt;a href=&quot;http://25.io/mou/&quot;&gt;Mou&lt;/a&gt;, &lt;a href=&quot;http://macdown.uranusjr.com/&quot;&gt;Macdown&lt;/a&gt;.&lt;/p&gt;
&lt;p&gt;&amp;lt;div class=&quot;img-wide&quot;&amp;gt;
&amp;lt;img src=&quot;https://cloud.githubusercontent.com/assets/307676/19168445/79e89fec-8c10-11e6-9062-dd6bed794af1.png&quot;/&amp;gt;
&amp;lt;/div&amp;gt;&lt;/p&gt;
&lt;p&gt;I&apos;ve tried a shear number of great tools for this, but on my Mac I always came back to the same thing: I want to use features from my text editor. After spending a fair amount of hours in a text editor on a daily basis (I use Sublime Text) you miss all those power tools I have learned to master. If you work in a text editor all the time, why not write your blog posts, articles and notes in there aswell? It will not only speed things up, you&apos;ll write more often and enjoy it more!&lt;/p&gt;
&lt;h2&gt;Packages&lt;/h2&gt;
&lt;p&gt;To begin with, I use two packages for my Markdown Setup.&lt;/p&gt;
&lt;h3&gt;&lt;a href=&quot;https://github.com/SublimeText-Markdown/MarkdownEditing&quot;&gt;Markdown Editing&lt;/a&gt;&lt;/h3&gt;
&lt;p&gt;Support for writing GFM Markdown, Multi markdown and more.&lt;/p&gt;
&lt;h3&gt;&lt;a href=&quot;https://github.com/revolunet/sublimetext-markdown-preview&quot;&gt;Sublime Text Markdown Preview&lt;/a&gt;&lt;/h3&gt;
&lt;p&gt;Some like apps that display the preview in a split window. For me i like writing in one place and previewing in the browser. This plugin enables that, and the GFM Github preview is really neat!&lt;/p&gt;
&lt;h2&gt;Look and feel&lt;/h2&gt;
&lt;p&gt;In Sublime Text you can have different settings and look-and-feel for different languages and syntaxes.&lt;/p&gt;
&lt;pre&gt;&lt;code&gt;Preferences -&amp;gt; Settings more -&amp;gt; Syntax specific - User
&lt;/code&gt;&lt;/pre&gt;
&lt;p&gt;Here you can change a lot of stuff like settings for caret, color scheme, font settings, indendation, margin etc. This is my current setup.&lt;/p&gt;
&lt;pre&gt;&lt;code&gt;{
    &quot;auto_indent&quot;: false,
    &quot;caret_style&quot;: &quot;smooth&quot;,
    &quot;color_scheme&quot;: &quot;Packages/kermit.tmTheme&quot;,
    &quot;detect_indentation&quot;: false,
    &quot;draw_centered&quot;: true,
    &quot;extensions&quot;:
    [
        &quot;hidden&quot;
    ],
    &quot;fade_fold_buttons&quot;: false,
    &quot;fold_buttons&quot;: false,
    &quot;font_face&quot;: &quot;Nitti WM2 Light&quot;,
    &quot;font_options&quot;:
    [
        &quot;subpixel_antialias&quot;
    ],
    &quot;font_size&quot;: 20,
    &quot;gutter&quot;: true,
    &quot;highlight_line&quot;: false,
    &quot;indent_subsequent_lines&quot;: true,
    &quot;indent_to_bracket&quot;: false,
    &quot;line_numbers&quot;: false,
    &quot;line_padding_bottom&quot;: 2,
    &quot;line_padding_top&quot;: 3,
    &quot;margin&quot;: 100,
    &quot;overlay_scroll_bars&quot;: &quot;system&quot;,
    &quot;smart_indent&quot;: false,
    &quot;spell_check&quot;: false,
    &quot;tab_size&quot;: 4,
    &quot;translate_tabs_to_spaces&quot;: true,
    &quot;trim_automatic_white_space&quot;: false,
    &quot;use_tab_stops&quot;: false,
    &quot;wide_caret&quot;: true,
    &quot;word_separators&quot;: &quot;./\\()\&quot;&apos;-:,.;&amp;lt;&amp;gt;~!@#$%^&amp;amp;*|+=[]{}`~?&quot;,
    &quot;word_wrap&quot;: &quot;true&quot;,
    &quot;wrap_width&quot;: 70,
    &quot;show_minimap&quot;: false
}

&lt;/code&gt;&lt;/pre&gt;
&lt;h3&gt;Kermit - A Markdown theme&lt;/h3&gt;
&lt;p&gt;As you can see above, I&apos;m using a theme called Kermit. I&apos;ve created that myself and it&apos;s heavily inspired from &lt;a href=&quot;https://ia.net/writer&quot;&gt;iA Writer&lt;/a&gt;. It has great typography (Using Nitti),  acentered column and a nice smooth cursor.&lt;/p&gt;
&lt;p&gt;&lt;a href=&quot;https://github.com/urre/kermit&quot;&gt;Get it here&lt;/a&gt; for free!&lt;/p&gt;
&lt;h2&gt;Writing&lt;/h2&gt;
&lt;h3&gt;Command Palette goodies&lt;/h3&gt;
&lt;p&gt;Markdown Editing comes with some handy command palette shortcuts, like inserting image, Save to html, Markdown lint, Markdown cheat sheet and more.&lt;/p&gt;
&lt;p&gt;And of course, you have all the benefits of having all of Sublimes tooling at your finger tips!&lt;/p&gt;
&lt;h2&gt;Syncing&lt;/h2&gt;
&lt;p&gt;I&apos;m using Dropbox. Create a project file &lt;code&gt;writings.sublime-project&lt;/code&gt; in the same folder as you keep your markdown files. Mine looks like this.&lt;/p&gt;
&lt;pre&gt;&lt;code&gt;{
    &quot;folders&quot;:
    [
        {
            &quot;path&quot;: &quot;/Users/urbansanden/Dropbox/Writing&quot;
        }
    ]
}
&lt;/code&gt;&lt;/pre&gt;
&lt;h2&gt;On my phone&lt;/h2&gt;
&lt;p&gt;I use the &lt;a href=&quot;https://ia.net/writer/&quot;&gt;iA Writer&lt;/a&gt; iOS app. A no-brainer.&lt;/p&gt;
</content:encoded></item><item><title>Jekyll on Amazon S3 Part 2</title><link>https://urre.me/writing/jekyll-aws-2/</link><guid isPermaLink="true">https://urre.me/writing/jekyll-aws-2/</guid><description>Custom domain and Cloudfront CDN</description><pubDate>Thu, 04 Jun 2015 00:00:00 GMT</pubDate><content:encoded>&lt;p&gt;Back in march I wrote a &lt;a href=&quot;http://blogg.urre.me/post/deploya-jekyll-s3/&quot;&gt;post&lt;/a&gt; about setting up a Jekyll site on Amazon S3. I covered:&lt;/p&gt;
&lt;ul&gt;
&lt;li&gt;Setting up a Amazon S3 bucket for static hosting on &lt;a href=&quot;https://aws.amazon.com/&quot;&gt;Amazon Web Services&lt;/a&gt;&lt;/li&gt;
&lt;li&gt;Setting up permissions and connect Bucket and &lt;a href=&quot;https://console.aws.amazon.com/iam&quot;&gt;IAM&lt;/a&gt;&lt;/li&gt;
&lt;li&gt;Setting up permissions and to handle API keys&lt;/li&gt;
&lt;li&gt;Use &lt;a href=&quot;https://github.com/ixti/jekyll-assets&quot;&gt;Jekyll-assets&lt;/a&gt; for fingerprinted assets&lt;/li&gt;
&lt;li&gt;Use &lt;a href=&quot;https://github.com/laurilehmijoki/s3_website&quot;&gt;s3_website&lt;/a&gt; for deploying to Amazon S3&lt;/li&gt;
&lt;/ul&gt;
&lt;h3&gt;In this post I&apos;m going to continue with&lt;/h3&gt;
&lt;p&gt;&lt;img src=&quot;/images/cloudfront-route53.png&quot; alt=&quot;&quot; /&gt;&lt;/p&gt;
&lt;ul&gt;
&lt;li&gt;Use &lt;a href=&quot;http://aws.amazon.com/cloudfront/&quot;&gt;Amazon CloudFront&lt;/a&gt; as a &lt;a href=&quot;http://en.wikipedia.org/wiki/Content_delivery_network&quot;&gt;CDN&lt;/a&gt;&lt;/li&gt;
&lt;li&gt;Use your custom domain with &lt;a href=&quot;http://aws.amazon.com/route53/&quot;&gt;Route 53&lt;/a&gt;&lt;/li&gt;
&lt;/ul&gt;
&lt;blockquote&gt;
&lt;p&gt;Amazon S3 is already fast as it is, but while S3 is mainly a storage service you can use CloudFront to serve on top of your bucket and deliver contents at a much higher speed with lower latency.&lt;/p&gt;
&lt;/blockquote&gt;
&lt;h2&gt;Custom domain&lt;/h2&gt;
&lt;p&gt;In this example i will use &lt;a href=&quot;http://aws.amazon.com/route53/&quot;&gt;Route 53&lt;/a&gt;, Amazons DNS service. You don&apos;t need to, but if you want to use a naked domain (Apex), using example.com without www, you will have to.&lt;/p&gt;
&lt;h3&gt;Setup a Hosted Zone&lt;/h3&gt;
&lt;p&gt;Click Hosted Zones and Create Hosted Zone:&lt;/p&gt;
&lt;p&gt;&lt;img src=&quot;/images/screenshot-2015-06-04_12-33-23.png&quot; alt=&quot;&quot; /&gt;&lt;/p&gt;
&lt;p&gt;Enter your domain name&lt;/p&gt;
&lt;p&gt;&lt;img src=&quot;/images/screenshot-2015-06-04_13-44-43.png&quot; alt=&quot;&quot; /&gt;&lt;/p&gt;
&lt;p&gt;Make a note of the NS servers for your domain. You will need them later.&lt;/p&gt;
&lt;h3&gt;Point your domain to Route 53&lt;/h3&gt;
&lt;blockquote&gt;
&lt;p&gt;In my example i change the name servers and use Route 53 for all my records. You don&apos;t have to, if your have records for other things, like email.&lt;/p&gt;
&lt;/blockquote&gt;
&lt;p&gt;Change the name servers. This is what it look like at Loopia DNS:&lt;/p&gt;
&lt;p&gt;&lt;img src=&quot;/images/screenshot-2015-06-04_13-55-09.png&quot; alt=&quot;&quot; /&gt;&lt;/p&gt;
&lt;h2&gt;Configure Cloudfront&lt;/h2&gt;
&lt;h3&gt;Create distribution&lt;/h3&gt;
&lt;p&gt;Login to the AWS console, open up Cloudfront and click &quot;Create distribution&quot;. Choose &quot;Web&quot; and &quot;Get started&quot;.&lt;/p&gt;
&lt;p&gt;Under Origin Domain name, paste your S3 endpoint:&lt;/p&gt;
&lt;p&gt;&amp;lt;pre&amp;gt;&amp;lt;code&amp;gt;
example.com.s3-website-us-east-1.amazonaws.com
&amp;lt;/code&amp;gt;&amp;lt;/pre&amp;gt;&lt;/p&gt;
&lt;p&gt;&lt;img src=&quot;/images/screenshot-2015-06-04_14-02-08.png&quot; alt=&quot;&quot; /&gt;&lt;/p&gt;
&lt;p&gt;For everything else just keep it like AWS suggests, with the exception of &quot;Forward Query String&quot;. If you like to invalidate assets with a query string: &lt;code&gt;screen.css?version=2&lt;/code&gt;. I recommend using &lt;a href=&quot;https://github.com/ixti/jekyll-assets&quot;&gt;Jekyll Assets&lt;/a&gt; that creates versioned assets like: &lt;code&gt;app-908e25fa5b62f54.css&lt;/code&gt;.&lt;/p&gt;
&lt;h3&gt;Settings&lt;/h3&gt;
&lt;p&gt;&lt;img src=&quot;/images/screenshot-2015-06-04_14-05-34.png&quot; alt=&quot;&quot; /&gt;&lt;/p&gt;
&lt;p&gt;Type your domain under CNAMEs and use &lt;code&gt;index.html&lt;/code&gt; as Default Root Object.&lt;/p&gt;
&lt;p&gt;Copy your Cloudfront address, it looks like this: &lt;code&gt;bvtbnxdmn65sio.cloudfront.net&lt;/code&gt;&lt;/p&gt;
&lt;blockquote&gt;
&lt;p&gt;If everything works, you should now see the same thing on your domain &lt;code&gt;example.com&lt;/code&gt; as on your Cloudfront address. Only now it will load much faster!&lt;/p&gt;
&lt;/blockquote&gt;
&lt;h2&gt;Connect your Cloudfront distribution with your domain name&lt;/h2&gt;
&lt;p&gt;Login to &lt;a href=&quot;http://aws.amazon.com/route53/&quot;&gt;Route 53&lt;/a&gt; again.&lt;/p&gt;
&lt;ul&gt;
&lt;li&gt;Click &quot;Create Record Set&quot;&lt;/li&gt;
&lt;li&gt;Leave the “Name” field blank. &quot;Type&quot; should be &quot;A - IPv4 address&quot;.&lt;/li&gt;
&lt;li&gt;Choose &quot;Yes&quot; for Alias&lt;/li&gt;
&lt;li&gt;Choose your CloudFront distribution as &quot;Alias target&quot;.&lt;/li&gt;
&lt;li&gt;Leave &quot;Routing Policy&quot; as &quot;Simple&quot;&lt;/li&gt;
&lt;/ul&gt;
&lt;p&gt;Grab a coffee. When the DNS cache has fully refreshed and you haven&apos;t made any misstakes you now have your Jekyll-sajt on Amazon S3, using Cloudfront as CDN and with your custom domain.&lt;/p&gt;
&lt;h2&gt;Congratulations!&lt;/h2&gt;
&lt;p&gt;You now have a website that costs almost nothing to host and loads faster than most websites!&lt;/p&gt;
&lt;blockquote&gt;
&lt;p&gt;The &lt;code&gt;s3_website&lt;/code&gt; gem don&apos;t support the latest version of the Amazon API (is i write this). So you can&apos;t use the Frankfurt &lt;code&gt;eu-central-1&lt;/code&gt; region just yet. As i wrote in the beginning, there are other tools aswell. Whatever floats your boat!&lt;/p&gt;
&lt;/blockquote&gt;
&lt;h3&gt;Links&lt;/h3&gt;
&lt;ul&gt;
&lt;li&gt;&lt;a href=&quot;http://aws.amazon.com/route53/&quot;&gt;Route 53&lt;/a&gt;&lt;/li&gt;
&lt;li&gt;&lt;a href=&quot;http://aws.amazon.com/cloudfront/&quot;&gt;Cloudfront&lt;/a&gt;&lt;/li&gt;
&lt;li&gt;&lt;a href=&quot;https://github.com/laurilehmijoki/s3_website&quot;&gt;s3_website&lt;/a&gt;&lt;/li&gt;
&lt;li&gt;&lt;a href=&quot;http://jekyllrb.com/docs/deployment-methods/&quot;&gt;Jekyll Deploy Methods&lt;/a&gt;&lt;/li&gt;
&lt;/ul&gt;
&lt;h3&gt;Next step?&lt;/h3&gt;
&lt;p&gt;Read &lt;a href=&quot;/writings/jekyll-aws-ssl/&quot;&gt;Part 2&lt;/a&gt;&lt;/p&gt;
</content:encoded></item><item><title>Jekyll on Amazon S3 Part 3</title><link>https://urre.me/writing/jekyll-aws-ssl/</link><guid isPermaLink="true">https://urre.me/writing/jekyll-aws-ssl/</guid><description>Use SSL via Cloudflare</description><pubDate>Thu, 04 Jun 2015 00:00:00 GMT</pubDate><content:encoded>&lt;p&gt;Earlier i wrote posts about deploying a Jekyll site on Amazon S3. &lt;a href=&quot;/writings/jekyll-aws/&quot;&gt;post 1&lt;/a&gt; and &lt;a href=&quot;/writings/jekyll-aws-2/&quot;&gt;post 2&lt;/a&gt;. I covered:&lt;/p&gt;
&lt;ul&gt;
&lt;li&gt;Setting up a Amazon S3 bucket for static hosting on &lt;a href=&quot;https://aws.amazon.com/&quot;&gt;Amazon Web Services&lt;/a&gt;&lt;/li&gt;
&lt;li&gt;Setting up permissions and connect Bucket and &lt;a href=&quot;https://console.aws.amazon.com/iam&quot;&gt;IAM&lt;/a&gt;&lt;/li&gt;
&lt;li&gt;Setting up permissions and to handle API keys&lt;/li&gt;
&lt;li&gt;Use &lt;a href=&quot;https://github.com/ixti/jekyll-assets&quot;&gt;Jekyll-assets&lt;/a&gt; for fingerprinted assets&lt;/li&gt;
&lt;li&gt;Use &lt;a href=&quot;https://github.com/laurilehmijoki/s3_website&quot;&gt;s3_website&lt;/a&gt; for deploying to Amazon S3&lt;/li&gt;
&lt;li&gt;Use &lt;a href=&quot;http://aws.amazon.com/cloudfront/&quot;&gt;Amazon CloudFront&lt;/a&gt; as a &lt;a href=&quot;http://en.wikipedia.org/wiki/Content_delivery_network&quot;&gt;CDN&lt;/a&gt;&lt;/li&gt;
&lt;li&gt;Use your custom domain with &lt;a href=&quot;http://aws.amazon.com/route53/&quot;&gt;Route 53&lt;/a&gt;&lt;/li&gt;
&lt;/ul&gt;
&lt;h2&gt;SSL&lt;/h2&gt;
&lt;p&gt;This time i am going to walk through some steps for getting your AWS powered Jekyll site use SSL. In this example i&apos;m using &lt;a href=&quot;https://www.cloudflare.com/&quot;&gt;CloudFlare&lt;/a&gt; free &lt;a href=&quot;https://www.cloudflare.com/ssl&quot;&gt;SSL&lt;/a&gt; together with a S3 bucket.&lt;/p&gt;
&lt;p&gt;&lt;img src=&quot;https://www.cloudflare.com/img/logo-web-badges/cf-logo-on-white-bg.svg&quot; alt=&quot;CLoudflare logo&quot; /&gt;&lt;/p&gt;
&lt;p&gt;Cloudflare now supports SSL in the free plans. This makes it very easy to activate https. You don&apos;t need to buy a certificate the regular way.&lt;/p&gt;
&lt;h3&gt;Why SSL?&lt;/h3&gt;
&lt;p&gt;There are many reasons. Here are some good reasons you should switch to HTTPS for your static site today:&lt;/p&gt;
&lt;ul&gt;
&lt;li&gt;Security: the traffic is encrypted between your users and your website&lt;/li&gt;
&lt;li&gt;Protect your users&lt;/li&gt;
&lt;li&gt;Protect your content&lt;/li&gt;
&lt;li&gt;Trust. You show the users that your website is secure using https.&lt;/li&gt;
&lt;li&gt;Better Analytics. &lt;a href=&quot;https://www.bitballoon.com/blog/2014/10/03/five-reasons-you-want-https-for-your-static-site&quot;&gt;Read this&lt;/a&gt;&lt;/li&gt;
&lt;li&gt;Better SEO. &lt;a href=&quot;http://googlewebmastercentral.blogspot.se/2014/08/https-as-ranking-signal.html&quot;&gt;https-as-ranking-signal.&lt;/a&gt;&lt;/li&gt;
&lt;/ul&gt;
&lt;h3&gt;More reading&lt;/h3&gt;
&lt;blockquote&gt;
&lt;ol&gt;
&lt;li&gt;&lt;a href=&quot;http://www.chapterthree.com/blog/why-your-site-should-be-using-https&quot;&gt;Why your site should be using HTTPS&lt;/a&gt;&lt;/li&gt;
&lt;li&gt;&lt;a href=&quot;https://levels.io/default-to-https/&quot;&gt;Now is probably the time to make HTTPS the default on all your sites and apps&lt;/a&gt;&lt;/li&gt;
&lt;li&gt;&lt;a href=&quot;https://www.bitballoon.com/blog/2014/10/03/five-reasons-you-want-https-for-your-static-site&quot;&gt;Five Reasons you want HTTPS for your Static site&lt;/a&gt;&lt;/li&gt;
&lt;li&gt;&lt;a href=&quot;https://support.google.com/adwords/answer/2580401?hl=sv&quot;&gt;Kom igång med SSL (Swedish)&lt;/a&gt;&lt;/li&gt;
&lt;/ol&gt;
&lt;/blockquote&gt;
&lt;h2&gt;Create a Amazon S3 bucket&lt;/h2&gt;
&lt;p&gt;Read &lt;a href=&quot;http://blogg.urre.me/post/deploya-jekyll-s3/&quot;&gt;my guide&lt;/a&gt; if you like. Your bucket must have the same name as your domain (mywebsite.com in this example). Copy your S3 endpoint, ex. &lt;code&gt;mywebsite.com.s3-website-us-west-2.amazonaws.com&lt;/code&gt;.&lt;/p&gt;
&lt;h3&gt;Deploy&lt;/h3&gt;
&lt;p&gt;Deploy your site to S3:&lt;/p&gt;
&lt;pre&gt;&lt;code&gt;s3_website push
&lt;/code&gt;&lt;/pre&gt;
&lt;h2&gt;Setup Cloudflare&lt;/h2&gt;
&lt;p&gt;Get an account on &lt;a href=&quot;https://www.cloudflare.com/sign-up&quot;&gt;Cloudflare&lt;/a&gt;. Add your website by clicking &quot;Add site&quot;.&lt;/p&gt;
&lt;h3&gt;Change nameservers&lt;/h3&gt;
&lt;p&gt;Change the name servers on your domain, if you have your domain on another registrar. Wait for the changes to propagate.
You&apos;ll find Cloudflares nameservers in your dashboard. They look like this:&lt;/p&gt;
&lt;pre&gt;&lt;code&gt;dan.ns.cloudflare.com
&lt;/code&gt;&lt;/pre&gt;
&lt;p&gt;and&lt;/p&gt;
&lt;pre&gt;&lt;code&gt;kara.ns.cloudflare.com
&lt;/code&gt;&lt;/pre&gt;
&lt;h3&gt;Add CNAME&lt;/h3&gt;
&lt;p&gt;Add a CNAME record that points to your S3 Bucket. Add your domain &lt;code&gt;mywebsite.com&lt;/code&gt; as Name and S3-endpoint as Value. Turn on Cloudflare by making sure the status icon is orange.&lt;/p&gt;
&lt;h3&gt;Redirect http to https&lt;/h3&gt;
&lt;p&gt;Under Page Rules, add the following URL pattern: &lt;code&gt;http://*mywebsite.com/*&lt;/code&gt;. Then turn on &quot;Always use https&quot;.&lt;/p&gt;
&lt;p&gt;If the DNS has refreshed its cache and you&apos;ve succeded in deploying your Jekyll-sajt to Amazon S3, using Cloudflare SSL.&lt;/p&gt;
&lt;h4&gt;How do i invalidate the cache?&lt;/h4&gt;
&lt;p&gt;Head over to the Cloudflare dashboard and the tab Caching -&amp;gt; Purge. Or use a cli tool like  &lt;a href=&quot;https://www.npmjs.com/package/cloudflare-cli&quot;&gt;cloudflare-cli&lt;/a&gt;&lt;/p&gt;
&lt;h4&gt;Cache Expiration?&lt;/h4&gt;
&lt;p&gt;Look under Cache -&amp;gt; Browser Cache Expiration. Your can Determine the length of time CloudFlare instructs a visitor&apos;s browser to cache files. During this period, the browser loads the files from its local cache, speeding up page loads.&lt;/p&gt;
</content:encoded></item><item><title>Jekyll for Company Websites</title><link>https://urre.me/writing/jekyll-for-company-websites/</link><guid isPermaLink="true">https://urre.me/writing/jekyll-for-company-websites/</guid><description>Go static</description><pubDate>Tue, 12 May 2015 00:00:00 GMT</pubDate><content:encoded>&lt;p&gt;Recently we made two small company websites for Blendow Group – &lt;a href=&quot;http://www.blendow.se/&quot;&gt;blendow.se&lt;/a&gt; and &lt;a href=&quot;http://www.bgpublishing.se&quot;&gt;bgpublishing.se&lt;/a&gt;. We decided to build them using &lt;a href=&quot;http://jekyllrb.com/&quot;&gt;Jekyll&lt;/a&gt; and host them on &lt;a href=&quot;https://pages.github.com/&quot;&gt;GitHub Pages&lt;/a&gt;. Since our client is pretty tech-savvy and knows their way around Markdown and HTML we could choose this solution knowing they could update and edit their sites easily themselves. Both sites also require very little change as they&apos;re basically just promoting the digital products that Blendow offers (like &lt;a href=&quot;https://www.bgplay.se&quot;&gt;BG Play&lt;/a&gt; and &lt;a href=&quot;https://www.legalcareer.se&quot;&gt;Legal Career&lt;/a&gt; that we&apos;ve previously built for them).&lt;/p&gt;
&lt;h2&gt;GitHub pages&lt;/h2&gt;
&lt;p&gt;GitHub Pages are public web pages hosted for free through &lt;a href=&quot;https://github.com/&quot;&gt;GitHub&lt;/a&gt;. In add-on to supporting regular HTML pages, GitHub pages also supports Jekyll - the simple static site generator.&lt;/p&gt;
&lt;h3&gt;The good stuff&lt;/h3&gt;
&lt;ul&gt;
&lt;li&gt;Free - Hosting a website on GitHub Pages costs nothing.&lt;/li&gt;
&lt;li&gt;Uptime - GitHub is very seldom down&lt;/li&gt;
&lt;li&gt;Speed - fast response time&lt;/li&gt;
&lt;li&gt;Backup - source code always safe in git&lt;/li&gt;
&lt;li&gt;Private repos - private repos is now supported.&lt;/li&gt;
&lt;li&gt;Fast and easy deployment&lt;/li&gt;
&lt;/ul&gt;
&lt;h3&gt;Any downsides?&lt;/h3&gt;
&lt;ul&gt;
&lt;li&gt;&lt;a href=&quot;https://pages.github.com/versions/&quot;&gt;Not all Jekyll plugins are supported&lt;/a&gt;. Such as our favorite plugin &lt;a href=&quot;https://github.com/ixti/jekyll-assets&quot;&gt;Jekyll Assets&lt;/a&gt;.&lt;/li&gt;
&lt;li&gt;SSL is not fully supported. You can use https on project pages with the &lt;code&gt;*.github.io&lt;/code&gt; domain. But you can&apos;t use a custom domain name with a fully secured HTTPS connection. At least not yet.&lt;/li&gt;
&lt;/ul&gt;
&lt;h2&gt;gh-pages branch&lt;/h2&gt;
&lt;p&gt;For serving content via GitHub Pages you need to create a branch called &lt;code&gt;gh-pages&lt;/code&gt; and set this as default.&lt;/p&gt;
&lt;p&gt;This branch will hold all of your website files.&lt;/p&gt;
&lt;h2&gt;Gulp&lt;/h2&gt;
&lt;p&gt;Of course you can just use the built-in Sass-compiler in Jekyll, but &lt;a href=&quot;http://gulpjs.com/&quot;&gt;Gulp&lt;/a&gt; is our weapon of choice when it comes to compiling assets (using for example &lt;a href=&quot;https://www.npmjs.com/package/gulp-sass&quot;&gt;gulp-sass&lt;/a&gt;, running tasks and make builds so we decided to run Jekyll as a child process in Gulp, together with &lt;a href=&quot;http://www.browsersync.io/&quot;&gt;BrowserSync&lt;/a&gt;. Which will give us file watching, CSS injecting, browser synchronization, and auto-rebuild the Jekyll site.&lt;/p&gt;
&lt;p&gt;There are two ways of running child processes in Node, &lt;a href=&quot;https://nodejs.org/api/child_process.html#child_process_child_process_spawn_command_args_options&quot;&gt;spawn&lt;/a&gt; and &lt;a href=&quot;http://nodejs.org/api/child_process.html#child_process_child_process_exec_command_options_callback&quot;&gt;exec&lt;/a&gt;. Here we are using spawn.&lt;/p&gt;
&lt;p&gt;This is the Gulp task that builds the site using the config.yml file given. (We can use separate config.yml here for dealing with dev/staging/production builds, or other things we want to be different specified as YAML front matter.&lt;/p&gt;
&lt;pre&gt;&lt;code&gt;gulp.task(&quot;jekyll-build&quot;, function (done) {
	gulp.task(&quot;jekyll- browserSync.notify(messages.jekyllBuild);
		return cp.spawn(&quot;jekyll&quot;, [&quot;build&quot;, &quot;--config&quot;, &quot;_config.yml&quot;], {stdio: &quot;inherit&quot;})
	.on(&quot;close&quot;, done);
});
&lt;/code&gt;&lt;/pre&gt;
&lt;p&gt;An example of what the &lt;code&gt;jekyll-rebuild&lt;/code&gt;, &lt;code&gt;watch&lt;/code&gt; and &lt;code&gt;default&lt;/code&gt; tasks could look like:&lt;/p&gt;
&lt;pre&gt;&lt;code&gt;gulp.task(&quot;jekyll-rebuild&quot;, [&quot;jekyll-build&quot;], function () {
    browserSync.reload();
});

gulp.task(&quot;watch&quot;, function () {
    gulp.watch(&quot;_scss/**/*.scss&quot;, [&quot;sass&quot;]);
    gulp.watch([&quot;js/app.js&quot;], [&quot;js&quot;], [&quot;bs-reload&quot;]);
    gulp.watch([&quot;index.html&quot;, &quot;_layouts/*.html&quot;, &quot;_includes/*.html&quot;, &quot;_posts/*&quot;], [&quot;jekyll-rebuild&quot;]);
});

gulp.task(&quot;default&quot;, [&quot;browser-sync&quot;, &quot;watch&quot;]);
&lt;/code&gt;&lt;/pre&gt;
&lt;p&gt;This workflow is inspired from &lt;a href=&quot;https://github.com/shakyShane/jekyll-gulp-sass-browser-sync&quot;&gt;shakyShane&lt;/a&gt;.&lt;/p&gt;
&lt;h3&gt;Development mode&lt;/h3&gt;
&lt;p&gt;We just run &lt;code&gt;$ gulp&lt;/code&gt; and fire up a browser at http://localhost:3000 and/or the external ip address provided by BrowserSync (if using the &lt;a href=&quot;http://www.browsersync.io/docs/options/#option-xip&quot;&gt;xip.io&lt;/a&gt; setting that is).&lt;/p&gt;
&lt;h2&gt;Using a custom domain&lt;/h2&gt;
&lt;p&gt;First you will need to create a new file in your GitHub repo called &lt;code&gt;CNAME&lt;/code&gt; that contains the domain name (or subdomain) that you wish to use. This file should be placed in the gh-pages branch, which we created earlier.&lt;/p&gt;
&lt;p&gt;If you want to use a root domain (such as mywebsite.se) for your website you will need to setup a new A record that points to the IP address &lt;code&gt;192.30.252.153&lt;/code&gt;.&lt;/p&gt;
&lt;p&gt;&lt;a href=&quot;https://help.github.com/articles/tips-for-configuring-an-a-record-with-your-dns-provider/&quot;&gt;Read more&lt;/a&gt;.&lt;/p&gt;
&lt;h2&gt;Deploy to GitHub pages&lt;/h2&gt;
&lt;pre&gt;&lt;code&gt;git push origin gh-pages
&lt;/code&gt;&lt;/pre&gt;
&lt;p&gt;Easy as pie!&lt;/p&gt;
&lt;h2&gt;Edit content on GitHub or Prose&lt;/h2&gt;
&lt;p&gt;For editing content Markdown and HTML files, we just edit the files in our text editor and push to GitHub. But what about our client?&lt;/p&gt;
&lt;p&gt;GitHub has a good editor for this, making this easy. Clicking the pencil icon takes us to the editor.&lt;/p&gt;
&lt;p&gt;When finished, clicking the &quot;commit changes&quot; will commit directly to the &lt;code&gt;gh-pages&lt;/code&gt; branch.&lt;/p&gt;
&lt;p&gt;&lt;a href=&quot;http://prose.io/&quot;&gt;Prose&lt;/a&gt; is another alternative – a content editor for GitHub. Prose provides a beatifully simple content authoring environment for CMS-free websites Prose has advanced support for Jekyll sites and Markdown content. Prose detects Markdown posts in Jekyll sites and provides syntax highlighting, a formatting toolbar, and draft previews in the site&apos;s full layout.&lt;/p&gt;
&lt;p&gt;Overall we&apos;re very happy with what we get by using Jekyll directly on GitHub Pages. This is not the last time we&apos;ll be using it as we&apos;re big fans of static site generators like Jekyll and Middleman.&lt;/p&gt;
&lt;p&gt;Last but not least: check out our &lt;a href=&quot;https://github.com/kollegorna/jekyll-boilerplate&quot;&gt;Jekyll boilerplate&lt;/a&gt; and &lt;a href=&quot;https://github.com/kollegorna/middleman-boilerplate&quot;&gt;Middleman boilerplate&lt;/a&gt; on GitHub.&lt;/p&gt;
</content:encoded></item><item><title>Jekyll on Amazon S3 Part 1</title><link>https://urre.me/writing/jekyll-aws-1/</link><guid isPermaLink="true">https://urre.me/writing/jekyll-aws-1/</guid><description>Deploy your static Jekyll site on Amazon S3</description><pubDate>Thu, 05 Mar 2015 00:00:00 GMT</pubDate><content:encoded>&lt;p&gt;&lt;img src=&quot;/images/awslogo.png&quot; alt=&quot;Screenshot&quot; /&gt;&lt;/p&gt;
&lt;p&gt;A little post about deploying a Jekyll site to Amazon S3. Assumes that you already have a Jekyll site working.&lt;/p&gt;
&lt;h3&gt;You will need:&lt;/h3&gt;
&lt;ul&gt;
&lt;li&gt;A &lt;a href=&quot;https://aws.amazon.com/&quot;&gt;Amazon Web Services&lt;/a&gt; account&lt;/li&gt;
&lt;li&gt;&lt;a href=&quot;http://jekyllrb.com/&quot;&gt;Jekyll&lt;/a&gt;&lt;/li&gt;
&lt;li&gt;&lt;a href=&quot;https://github.com/ixti/jekyll-assets&quot;&gt;Jekyll-assets&lt;/a&gt; (ej obligatoriskt)&lt;/li&gt;
&lt;li&gt;&lt;a href=&quot;https://github.com/laurilehmijoki/s3_website&quot;&gt;s3_website&lt;/a&gt;&lt;/li&gt;
&lt;/ul&gt;
&lt;h2&gt;Install Jekyll Assets&lt;/h2&gt;
&lt;p&gt;&lt;a href=&quot;https://github.com/ixti/jekyll-assets&quot;&gt;Jekyll Assets&lt;/a&gt; is great, it lets you do this:&lt;/p&gt;
&lt;ul&gt;
&lt;li&gt;Write Sass, Coffescript, Erb...&lt;/li&gt;
&lt;li&gt;Create dependancies between assets&lt;/li&gt;
&lt;li&gt;Concatinate, minify with your tools of choice (Uglify for example)&lt;/li&gt;
&lt;li&gt;Asset fingerprinting&lt;/li&gt;
&lt;li&gt;Gzipped versions of your assets&lt;/li&gt;
&lt;li&gt;Native support for custom vendors&lt;/li&gt;
&lt;li&gt;Autoprefixer support&lt;/li&gt;
&lt;li&gt;And moore...&lt;/li&gt;
&lt;/ul&gt;
&lt;blockquote&gt;
&lt;p&gt;In this example i&apos;m going to use finger printing, which means that &lt;code&gt;app.css&lt;/code&gt; will use &lt;code&gt;app-908e25f4bf641868d8683022a5b62f54.css&lt;/code&gt;.
For all other things i will use &lt;a href=&quot;http://gulpjs.com&quot;&gt;Gulp&lt;/a&gt; instead.&lt;/p&gt;
&lt;/blockquote&gt;
&lt;h3&gt;Use RubyGems and Bundler&lt;/h3&gt;
&lt;p&gt;Create a &lt;code&gt;Gemfile&lt;/code&gt; in your root folder, and add:&lt;/p&gt;
&lt;pre&gt;&lt;code&gt;source &apos;https://rubygems.org&apos;
gem &apos;jekyll-assets&apos;
&lt;/code&gt;&lt;/pre&gt;
&lt;h3&gt;Links&lt;/h3&gt;
&lt;p&gt;&lt;a href=&quot;https://rubygems.org/&quot;&gt;RubyGems&lt;/a&gt;
&lt;a href=&quot;http://bundler.io/&quot;&gt;Bundler&lt;/a&gt;&lt;/p&gt;
&lt;h3&gt;Install gems&lt;/h3&gt;
&lt;p&gt;Install by running &lt;code&gt;bundle install&lt;/code&gt;&lt;/p&gt;
&lt;p&gt;To use &lt;code&gt;jekyll-assets&lt;/code&gt;, create a new file called &lt;code&gt;_plugins/ext.rb&lt;/code&gt;. Add the following:&lt;/p&gt;
&lt;pre&gt;&lt;code&gt;require &apos;jekyll-assets&apos;
&lt;/code&gt;&lt;/pre&gt;
&lt;h3&gt;Configure Jekyll Assets&lt;/h3&gt;
&lt;p&gt;In your config file, add this YAML and don&apos;t forget to match your own paths.&lt;/p&gt;
&lt;pre&gt;&lt;code&gt;assets:
debug: false
sources:
  - _assets/js
  - _assets/scss
&lt;/code&gt;&lt;/pre&gt;
&lt;p&gt;Now when you include your assets, use this tags instead:&lt;/p&gt;
&lt;pre&gt;&lt;code&gt;{% raw %}
    {% stylesheet app %}
    {% javascript app %}
{% endraw %}
&lt;/code&gt;&lt;/pre&gt;
&lt;h2&gt;Build&lt;/h2&gt;
&lt;p&gt;Nothing special here, just the ordinary Jekyll buid process&lt;/p&gt;
&lt;pre&gt;&lt;code&gt;jekyll build
&lt;/code&gt;&lt;/pre&gt;
&lt;p&gt;or, for watching changes:&lt;/p&gt;
&lt;pre&gt;&lt;code&gt;jekyll serve --watch
&lt;/code&gt;&lt;/pre&gt;
&lt;h2&gt;Setup deploy settings for Amazon S3&lt;/h2&gt;
&lt;p&gt;S3 is perfect for storing static assets and static websites. There are a couple of command line tools available out there, in this example i&apos;m going to use  &lt;a href=&quot;https://github.com/laurilehmijoki/s3_website&quot;&gt;s3_website&lt;/a&gt;.&lt;/p&gt;
&lt;p&gt;Add &lt;code&gt;gem &apos;s3_website&apos;&lt;/code&gt; to your &lt;code&gt;Gemfile&lt;/code&gt; and install by running &lt;code&gt;bundle install&lt;/code&gt;.&lt;/p&gt;
&lt;h3&gt;API keys&lt;/h3&gt;
&lt;blockquote&gt;
&lt;p&gt;You will find your AWS API Keys in &lt;a href=&quot;https://console.aws.amazon.com/iam&quot;&gt;IAM - Identity and Access Management&lt;/a&gt;. Look under Users -&amp;gt; Security Credentials.&lt;/p&gt;
&lt;/blockquote&gt;
&lt;p&gt;Never version control your API Keys. Create a &lt;code&gt;.env&lt;/code&gt; file in your repo and update your ignore patterns in &lt;code&gt;.gitignore&lt;/code&gt;. Add:&lt;/p&gt;
&lt;pre&gt;&lt;code&gt;AWS_ACCESS_KEY_ID=AKFKSKSDK8DSDSMFJA
AWS_SECRET_ACCESS_KEY=0fsd0fdsf0sd9f0fs0dBKmG6BfOVPYoHs
S3_BUCKET_NAME=example-website
&lt;/code&gt;&lt;/pre&gt;
&lt;p&gt;Create &lt;code&gt;s3_website.yml&lt;/code&gt; in the root folder. This file is going to grab the keys from &lt;code&gt;.env&lt;/code&gt;.&lt;/p&gt;
&lt;pre&gt;&lt;code&gt;s3_id: &amp;lt;%= ENV[&apos;AWS_ACCESS_KEY_ID&apos;] %&amp;gt;
s3_secret: &amp;lt;%= ENV[&apos;AWS_SECRET_ACCESS_KEY&apos;] %&amp;gt;
s3_bucket: &amp;lt;%= ENV[&apos;S3_BUCKET_NAME&apos;] %&amp;gt;
&lt;/code&gt;&lt;/pre&gt;
&lt;h3&gt;Create AWS user&lt;/h3&gt;
&lt;ol&gt;
&lt;li&gt;Go to AWS console -&amp;gt; &lt;a href=&quot;https://console.aws.amazon.com/iam&quot;&gt;IAM - Identity and Access Management&lt;/a&gt;&lt;/li&gt;
&lt;li&gt;Create a user with permissions to S3 and Cloudfront.&lt;/li&gt;
&lt;/ol&gt;
&lt;h3&gt;Create bucket and turn on static hosting&lt;/h3&gt;
&lt;ol&gt;
&lt;li&gt;Create a new bucket in your region of choice&lt;/li&gt;
&lt;li&gt;Turn on static hosting. Open up Static website hosting under Permissions and check &quot;Enable Website Hosting&quot;. Add &lt;code&gt;index.html&lt;/code&gt; as Index Document&lt;/li&gt;
&lt;/ol&gt;
&lt;h3&gt;Configure Bucket permissions&lt;/h3&gt;
&lt;ol&gt;
&lt;li&gt;Give the user/users access to your bucket by clicking the Permissions tab and &quot;Add more permissions&quot;. Choose &quot;Authenticated Users&quot; and check &quot;List&quot; and &quot;Upload/Delete&quot;.&lt;/li&gt;
&lt;li&gt;Click &quot;Add Bucket Policy&quot; on the &quot;Permissions tab again&lt;/li&gt;
&lt;/ol&gt;
&lt;p&gt;Paste this:&lt;/p&gt;
&lt;pre&gt;&lt;code&gt;{
  &quot;Version&quot;: &quot;2008-10-17&quot;,
  &quot;Statement&quot;: [
    {
      &quot;Sid&quot;: &quot;Allow Public Access to All Objects&quot;,
      &quot;Effect&quot;: &quot;Allow&quot;,
      &quot;Principal&quot;: {
        &quot;AWS&quot;: &quot;*&quot;
      },
      &quot;Action&quot;: &quot;s3:GetObject&quot;,
      &quot;Resource&quot;: &quot;arn:aws:s3:::BUCKET_NAME/*&quot;
    }
  ]
}
&lt;/code&gt;&lt;/pre&gt;
&lt;p&gt;Remember to replace BUCKET_NAME with your bucket&lt;/p&gt;
&lt;h2&gt;Deploy&lt;/h2&gt;
&lt;p&gt;Test your configuration by running:&lt;/p&gt;
&lt;pre&gt;&lt;code&gt;s3_website push --dry-run
&lt;/code&gt;&lt;/pre&gt;
&lt;p&gt;If everything works:&lt;/p&gt;
&lt;pre&gt;&lt;code&gt;s3_website push
&lt;/code&gt;&lt;/pre&gt;
&lt;h2&gt;Success!&lt;/h2&gt;
&lt;p&gt;Your Jekyll powered website is now live on your bucket endpoint. Ex: &lt;a href=&quot;http://bucketname.s3-website-us-east-1.amazonaws.com/&quot;&gt;http://bucketname.s3-website-us-east-1.amazonaws.com/&lt;/a&gt;&lt;/p&gt;
&lt;h2&gt;Next steps&lt;/h2&gt;
&lt;ul&gt;
&lt;li&gt;Cloudfront...&lt;/li&gt;
&lt;li&gt;Custom domain&lt;/li&gt;
&lt;/ul&gt;
&lt;h3&gt;Next step?&lt;/h3&gt;
&lt;p&gt;Read &lt;a href=&quot;/writings/jekyll-aws-2/&quot;&gt;Part 2&lt;/a&gt;&lt;/p&gt;
</content:encoded></item><item><title>Nicer Facebook Sharing</title><link>https://urre.me/writing/facebook-feed-dialouge/</link><guid isPermaLink="true">https://urre.me/writing/facebook-feed-dialouge/</guid><description>Make your users publish individual stories to their timeline.</description><pubDate>Sat, 18 May 2013 00:00:00 GMT</pubDate><content:encoded>&lt;h2&gt;Share on Facebook using Feed Dialog&lt;/h2&gt;
&lt;p&gt;Facebooks regular like and share buttons works well, but sometimes you want to make it easier for your users to share something more specific or dynamic to their timeline. Maybe a customized message and an image that the users selects or generates themselves. Nothing new under the sun, the Feed Dialog has been around quite sometime. But the old sharer.php is still used frequently, but is has some limitations. This post is focused around non-logged in shares. When you&apos;re logged in you can use other api-calls through the Graph API.&lt;/p&gt;
&lt;h3&gt;Good ol&apos; sharer.php&lt;/h3&gt;
&lt;p&gt;You can create your own links or custom buttons using parameters to sharer.php, this is has been possible for ages.&lt;/p&gt;
&lt;h4&gt;Limitations&lt;/h4&gt;
&lt;p&gt;Even if you use the  &lt;a href=&quot;http://ogp.me/&quot;&gt;Open Graph-tas&lt;/a&gt; tags correctly, you&apos;re still limited in some ways. Yes, you can generate different content dynamically server side, but it might not solve your needs. If you just use &lt;code&gt;sharer.php&lt;/code&gt; you have to settle with the standard text &quot;Has shared a link&quot; next to your shared post.&lt;/p&gt;
&lt;h4&gt;Only three sharing images&lt;/h4&gt;
&lt;p&gt;You can yse &lt;a href=&quot;http://stackoverflow.com/questions/1138460/how-does-facebook-sharer-select-images&quot;&gt;multiple og tags&lt;/a&gt; for images, but the number of images is limited to 3. So it doesn&apos;t matter if you provide more tags.&lt;/p&gt;
&lt;pre&gt;&lt;code&gt;&amp;lt;meta property=&quot;og:image&quot; content=&quot;http://sjoosandstrom.se/wp-content/uploads/2014/01/90.png&quot;/&amp;gt;
&amp;lt;meta property=&quot;og:image&quot; content=&quot;http://sjoosandstrom.se/wp-content/uploads/2014/01/60.png&quot;/&amp;gt;
&amp;lt;meta property=&quot;og:image&quot; content=&quot;http://sjoosandstrom.se/wp-content/uploads/2014/01/51.png&quot;/&amp;gt;
&lt;/code&gt;&lt;/pre&gt;
&lt;h3&gt;Hello Feed dialog!&lt;/h3&gt;
&lt;p&gt;By using Feed dialog you can customize and personalize the shared content on the timeline. You don&apos;t need any extended permissions form the API to do this. &lt;a href=&quot;https://developers.facebook.com/docs/sharing/reference/feed-dialog&quot;&gt;Read more about Feed dialog&lt;/a&gt;&lt;/p&gt;
&lt;p&gt;Feed dialog can be implementended with the Javascript SDK, iOS, Android but also using URL redirection. You&apos;re application can alsp publish directly to a users timeline without asking the user, by using this &lt;a href=&quot;http://www.writeyourcode.com/share-with-facebook-feed-dialog-2/&quot;&gt;Graph API call&lt;/a&gt;&lt;/p&gt;
&lt;h3&gt;Create a new app on Facebook developer&lt;/h3&gt;
&lt;p&gt;För att jobba med Feed dialog behöver du en Facebook App. Om du mot förmodan inte redan har en app, så skapa en på &lt;a href=&quot;facebook.com/developers&quot;&gt;Facebook Developers&lt;/a&gt;. Antecka ditt app-id.&lt;/p&gt;
&lt;h3&gt;URL redirection. Create a link with your content&lt;/h3&gt;
&lt;p&gt;För att kunna göra en delning med Feed dialog och URL redirection behöver du skapa en länk likt:&lt;/p&gt;
&lt;pre&gt;&lt;code&gt;https://www.facebook.com/dialog/feed?app_id=XXXXXXXXX&amp;amp;display=popup&amp;amp;caption=An%20example%20caption&amp;amp;link=https%3A%2F%2Fdevelopers.facebook.com%2Fdocs%2Fdialogs%2F&amp;amp;redirect_uri=https://developers.facebook.com/tools/explorer
&lt;/code&gt;&lt;/pre&gt;
&lt;p&gt;Under &lt;a href=&quot;https://developers.facebook.com/docs/sharing/reference/feed-dialog#params&quot;&gt;Feed Dialog - Params&lt;/a&gt; you will the correct parameters.&lt;/p&gt;
&lt;p&gt;Here&apos;s an example with a link created with Javscript, some strings need to be url encoded:&lt;/p&gt;
&lt;pre&gt;&lt;code&gt;var url = &apos;http://www.facebook.com/dialog/feed?app_id=&apos; + fbAppId +
&apos;&amp;amp;link=&apos; + fbShareUrl +
&apos;&amp;amp;picture=&apos; + fbShareImg +
&apos;&amp;amp;name=&apos; + encodeURIComponent(fbShareName) +
&apos;&amp;amp;caption=&apos; + encodeURIComponent(fbShareCaption) +
&apos;&amp;amp;description=&apos; + encodeURIComponent(fbShareDescription) +
&apos;&amp;amp;redirect_uri=&apos; + redirectURL +
&apos;&amp;amp;display=popup&apos;;
&lt;/code&gt;&lt;/pre&gt;
&lt;p&gt;You can then open this link in a regular window, like:&lt;/p&gt;
&lt;pre&gt;&lt;code&gt;window.open(url, &apos;feedDialog&apos;, &apos;toolbar=0,status=0,width=626,height=436&apos;);
&lt;/code&gt;&lt;/pre&gt;
&lt;h4&gt;Redirect uri&lt;/h4&gt;
&lt;p&gt;After the content has been shared to the users timeline, you will be redirected back to a specified link. This can be a simple html page that closes itself and redirect the user back to the page, or another url in the scope for the FB app.&lt;/p&gt;
&lt;h3&gt;Look ma, nicer shares!&lt;/h3&gt;
&lt;p&gt;Your shared content now looks better than ever. This is also more clear and professional. You can also upload a app icon that shows next to the shares.&lt;/p&gt;
&lt;p&gt;Here is some examples from the &lt;a href=&quot;http://sjoosandstrom.se/collection/royal-steel-classic/#008591&quot;&gt;Sjöö Sandström&lt;/a&gt; website. A website i made while working at &lt;a href=&quot;http://grandpublic.se&quot;&gt;Grand Public&lt;/a&gt;. Here you can share watches by using the Facebook icon to the lower right.&lt;/p&gt;
&lt;p&gt;&lt;img src=&quot;http://res.cloudinary.com/urre/image/upload/v1512417691/klockor_vulwnj.png&quot; alt=&quot;Sjöö Sandström&quot; /&gt;&lt;/p&gt;
&lt;p&gt;&lt;img src=&quot;https://res.cloudinary.com/urre/image/upload/v1512417569/dela_ojy45d.jpg&quot; alt=&quot;Share&quot; /&gt;&lt;/p&gt;
&lt;p&gt;&lt;img src=&quot;https://res.cloudinary.com/urre/image/upload/v1512417618/fb-aktivitetslogg-kommentar_qgzdbp.jpg&quot; alt=&quot;Activity log&quot; /&gt;&lt;/p&gt;
&lt;p&gt;Activity log&lt;/p&gt;
&lt;p&gt;&lt;img src=&quot;https://res.cloudinary.com/urre/image/upload/v1512417618/fb-feed-kommentar_kifsae.jpg&quot; alt=&quot;Feed&quot; /&gt;&lt;/p&gt;
&lt;p&gt;Feed&lt;/p&gt;
&lt;p&gt;&lt;img src=&quot;http://res.cloudinary.com/urre/image/upload/v1512417619/fb-feed2-kommentar_jzc4em.jpg&quot; alt=&quot;Feed&quot; /&gt;&lt;/p&gt;
&lt;p&gt;Feed&lt;/p&gt;
&lt;h2&gt;Checklist&lt;/h2&gt;
&lt;blockquote&gt;
&lt;ul&gt;
&lt;li&gt;&lt;a href=&quot;https://developers.facebook.com/docs/opengraph/howtos/maximizing-distribution-media-content/&quot;&gt;Use images with the correct size and ratio&lt;/a&gt;&lt;/li&gt;
&lt;li&gt;Use Open Graph tags&lt;/li&gt;
&lt;li&gt;Use the &lt;a href=&quot;https://developers.facebook.com/tools/debug/&quot;&gt;debug tool&lt;/a&gt;, useful for debugging your open graph tags&lt;/li&gt;
&lt;li&gt;Use Insights for checking analytics&lt;/li&gt;
&lt;li&gt;Implement JavaScript event tracking to track your shares.&lt;/li&gt;
&lt;/ul&gt;
&lt;/blockquote&gt;
&lt;h2&gt;Read more&lt;/h2&gt;
&lt;ol&gt;
&lt;li&gt;&lt;a href=&quot;http://ogp.me/&quot;&gt;The Open Graph protocol&lt;/a&gt;&lt;/li&gt;
&lt;li&gt;&lt;a href=&quot;https://developers.facebook.com/tools/debug/&quot;&gt;Debugger&lt;/a&gt;&lt;/li&gt;
&lt;li&gt;&lt;a href=&quot;https://developers.facebook.com/docs/plugins/&quot;&gt;Social Plugins&lt;/a&gt;&lt;/li&gt;
&lt;li&gt;&lt;a href=&quot;https://developers.facebook.com/docs/sharing/reference/feed-dialog&quot;&gt;Feed dialog&lt;/a&gt;&lt;/li&gt;
&lt;/ol&gt;
</content:encoded></item><item><title>Sublime Text</title><link>https://urre.me/writing/sublime-text/</link><guid isPermaLink="true">https://urre.me/writing/sublime-text/</guid><description>Plugins, themes, settings, icons, snippets...</description><pubDate>Mon, 21 Jan 2013 00:00:00 GMT</pubDate><content:encoded>&lt;p&gt;Sublime Text is fantastic editor. A few tips and tricks:&lt;/p&gt;
&lt;ol&gt;
&lt;li&gt;&lt;a href=&quot;#plugins&quot;&gt;Plugins&lt;/a&gt;&lt;/li&gt;
&lt;li&gt;&lt;a href=&quot;#themes&quot;&gt;Themes&lt;/a&gt;&lt;/li&gt;
&lt;li&gt;&lt;a href=&quot;#icons&quot;&gt;Icons&lt;/a&gt;&lt;/li&gt;
&lt;li&gt;&lt;a href=&quot;#snippets&quot;&gt;Snippets&lt;/a&gt;&lt;/li&gt;
&lt;li&gt;&lt;a href=&quot;#completions&quot;&gt;Completions&lt;/a&gt;&lt;/li&gt;
&lt;li&gt;&lt;a href=&quot;#settings&quot;&gt;Settings&lt;/a&gt;&lt;/li&gt;
&lt;li&gt;&lt;a href=&quot;#shortcuts&quot;&gt;Kortkommandon&lt;/a&gt;&lt;/li&gt;
&lt;li&gt;&lt;a href=&quot;#tools&quot;&gt;Tools&lt;/a&gt;&lt;/li&gt;
&lt;li&gt;&lt;a href=&quot;#workflow&quot;&gt;Workflow&lt;/a&gt;&lt;/li&gt;
&lt;li&gt;&lt;a href=&quot;#cli&quot;&gt;CLI&lt;/a&gt;&lt;/li&gt;
&lt;/ol&gt;
&lt;h2&gt;&amp;lt;a name=&quot;plugins&quot;&amp;gt;&amp;lt;/a&amp;gt;Plugins&lt;/h2&gt;
&lt;h3&gt;&lt;a href=&quot;https://github.com/temochka/sublime-text-2-github-tools&quot;&gt;Github Tools&lt;/a&gt;&lt;/h3&gt;
&lt;p&gt;A set of handy tools to use Sublime Text 2+ with Github&lt;/p&gt;
&lt;h3&gt;&lt;a href=&quot;https://sublime.wbond.net/packages/Unsplash&quot;&gt;Unsplash&lt;/a&gt;&lt;/h3&gt;
&lt;p&gt;Unsplash for Sublime Text brings beautiful images from Unsplash to Sublime Text, your favorite code editor&lt;/p&gt;
&lt;h3&gt;&lt;a href=&quot;https://github.com/xavi-/sublime-selectuntil&quot;&gt;SelectUntil&lt;/a&gt;&lt;/h3&gt;
&lt;p&gt;A sublime package that lets you expand your current selection until a specific character, regex, or char-count is encountered.&lt;/p&gt;
&lt;h3&gt;&lt;a href=&quot;https://sublime.wbond.net/packages/Syntax%20Highlighting%20for%20Sass&quot;&gt;Syntax Highlighting for Sass&lt;/a&gt;&lt;/h3&gt;
&lt;p&gt;Perfect syntax highlighting for both SCSS and Sass.&lt;/p&gt;
&lt;h3&gt;&lt;a href=&quot;https://sublime.wbond.net/packages/Modific&quot;&gt;Modific&lt;/a&gt;&lt;/h3&gt;
&lt;p&gt;Highlight lines changed since the last commit (supports Git, SVN, Bazaar, Mercurial and TFS) / ST2(3) plugin&lt;/p&gt;
&lt;h3&gt;&lt;a href=&quot;https://sublime.wbond.net/packages/Reindent%20on%20save&quot;&gt;Reindent on Save&lt;/a&gt;&lt;/h3&gt;
&lt;p&gt;Reindent on save&lt;/p&gt;
&lt;h3&gt;&lt;a href=&quot;https://github.com/aronwoost/sublime-expand-region&quot;&gt;Expand Region&lt;/a&gt;&lt;/h3&gt;
&lt;p&gt;Like Expand Selection to Scope. But better!&lt;/p&gt;
&lt;h3&gt;&lt;a href=&quot;https://sublime.wbond.net/packages/Sound&quot;&gt;Sound&lt;/a&gt;&lt;/h3&gt;
&lt;p&gt;Sublime-Text plugin to play event sounds&lt;/p&gt;
&lt;h3&gt;&lt;a href=&quot;https://github.com/spadgos/sublime-ToggleQuotes&quot;&gt;ToggleQuotes&lt;/a&gt;&lt;/h3&gt;
&lt;p&gt;ST2 Plugin for toggling quote marks&lt;/p&gt;
&lt;h3&gt;&lt;a href=&quot;https://github.com/AlphawolfWMP/sublime-text-2-wpseek&quot;&gt;WP Seek&lt;/a&gt;&lt;/h3&gt;
&lt;p&gt;A bundle built with the sole purpose of reducing the amount of time spent digging around the WordPress core to look up the little things that we work with every day.**&lt;/p&gt;
&lt;h3&gt;&lt;a href=&quot;https://sublime.wbond.net/packages/Fold%20Comments&quot;&gt;Fold Comments&lt;/a&gt;&lt;/h3&gt;
&lt;p&gt;Folding comments&lt;/p&gt;
&lt;h3&gt;&lt;a href=&quot;https://github.com/fitnr/SublimeDataConverter&quot;&gt;Sublime Data Converter&lt;/a&gt;&lt;/h3&gt;
&lt;p&gt;A package for Sublime Text 2 for converting CSV data to other formats&lt;/p&gt;
&lt;h3&gt;&lt;a href=&quot;https://sublime.wbond.net/packages/Origami&quot;&gt;Origami&lt;/a&gt;&lt;/h3&gt;
&lt;p&gt;Split the window however you like! Create new panes, delete panes, move and clone views from pane to pane.&lt;/p&gt;
&lt;h3&gt;&lt;a href=&quot;https://sublime.wbond.net/packages/Gutter%20Color&quot;&gt;Gutter Color&lt;/a&gt;&lt;/h3&gt;
&lt;p&gt;&lt;img src=&quot;https://packagecontrol.io/readmes/img/9e54a585d6130a35c40677cf42e7f54f1b2cc3d0.png&quot; alt=&quot;Screenshot&quot; /&gt;&lt;/p&gt;
&lt;p&gt;Gutter Color is a Sublime Text plugin which displays a colored icon for all lines which contain a color&lt;/p&gt;
&lt;h3&gt;&lt;a href=&quot;http://hayakubundle.com/&quot;&gt;Hayaku&lt;/a&gt;&lt;/h3&gt;
&lt;h3&gt;&lt;a href=&quot;https://github.com/i-akhmadullin/Sublime-CSS3&quot;&gt;Sublime CSS3&lt;/a&gt;&lt;/h3&gt;
&lt;p&gt;Better CSS3 syntax highlight for Sublime Text&lt;/p&gt;
&lt;h3&gt;&lt;a href=&quot;https://github.com/alienhard/SublimeAllAutocomplete&quot;&gt;AllAutocomplete&lt;/a&gt;&lt;/h3&gt;
&lt;p&gt;Autocomplete in all open files&lt;/p&gt;
&lt;h3&gt;&lt;a href=&quot;https://github.com/skuroda/Sublime-AdvancedNewFile&quot;&gt;Advanced New File&lt;/a&gt;&lt;/h3&gt;
&lt;p&gt;Quick way of creating new files ana folders&lt;/p&gt;
&lt;h3&gt;&lt;a href=&quot;https://github.com/randy3k/AlignTab&quot;&gt;AlignTab&lt;/a&gt;&lt;/h3&gt;
&lt;p&gt;An alignment plugin using regular expression&lt;/p&gt;
&lt;h3&gt;&lt;a href=&quot;http://wbond.net/sublime_packages/alignment&quot;&gt;Alignment&lt;/a&gt;&lt;/h3&gt;
&lt;p&gt;Indentering deluxe&lt;/p&gt;
&lt;h3&gt;&lt;a href=&quot;https://github.com/titoBouzout/SideBarEnhancements&quot;&gt;Sidebar Enhancements&lt;/a&gt;&lt;/h3&gt;
&lt;p&gt;Add more actions to the sidebar, like duplicate&lt;/p&gt;
&lt;h3&gt;&lt;a href=&quot;http://wbond.net/sublime_packages/package_control&quot;&gt;Package Control&lt;/a&gt;&lt;/h3&gt;
&lt;p&gt;First plugin to install. Essential.&lt;/p&gt;
&lt;h3&gt;&lt;a href=&quot;http://emmet.io&quot;&gt;Emmet (Zen Coding)&lt;/a&gt;&lt;/h3&gt;
&lt;p&gt;Zen Coding ftw&lt;/p&gt;
&lt;h3&gt;&lt;a href=&quot;https://github.com/condemil/Gist&quot;&gt;Gist&lt;/a&gt;&lt;/h3&gt;
&lt;p&gt;Integration of Github Gist&lt;/p&gt;
&lt;h3&gt;&lt;a href=&quot;http://wbond.net/sublime_packages/terminal&quot;&gt;Terminal&lt;/a&gt;&lt;/h3&gt;
&lt;p&gt;Open the  terminalen i current folder&lt;/p&gt;
&lt;h3&gt;&lt;a href=&quot;https://github.com/SublimeLinter/SublimeLinter&quot;&gt;Sublime Linter&lt;/a&gt;&lt;/h3&gt;
&lt;p&gt;Good code linter&lt;/p&gt;
&lt;h3&gt;&lt;a href=&quot;https://github.com/purplefish32/sublime-text-2-wordpress&quot;&gt;WordPress&lt;/a&gt;&lt;/h3&gt;
&lt;p&gt;Autocomplete for the WordPress API&lt;/p&gt;
&lt;h3&gt;&lt;a href=&quot;https://github.com/Kronuz/SublimeCodeIntel&quot;&gt;SublimeCodeIntel&lt;/a&gt;&lt;/h3&gt;
&lt;p&gt;Full-featured code intelligence and smart autocomplete engine&lt;/p&gt;
&lt;h3&gt;&lt;a href=&quot;https://github.com/NicholasBuse/sublime_DeleteBlankLines&quot;&gt;Delete Blank Lines&lt;/a&gt;&lt;/h3&gt;
&lt;p&gt;As it sounds&lt;/p&gt;
&lt;h3&gt;&lt;a href=&quot;https://github.com/P233/Syntax-highlighting-for-Sass&quot;&gt;Syntax-highlighting-for-Sass&lt;/a&gt;&lt;/h3&gt;
&lt;h3&gt;&lt;a href=&quot;https://github.com/kuroir/SCSS.tmbundle&quot;&gt;Sas/Scss for Sublime&lt;/a&gt;&lt;/h3&gt;
&lt;p&gt;Sass-Autocomplete/highlighting&lt;/p&gt;
&lt;h3&gt;&lt;a href=&quot;https://github.com/colinta/SublimeFileDiffs&quot;&gt;SublimeFileDiffs&lt;/a&gt;&lt;/h3&gt;
&lt;p&gt;Diff files&lt;/p&gt;
&lt;h3&gt;&lt;a href=&quot;https://github.com/spadgos/sublime-jsdocs&quot;&gt;DocBlockr&lt;/a&gt;&lt;/h3&gt;
&lt;p&gt;Simplifies writing DocBlock comments in Javascript, PHP, CoffeeScript, Actionscript, C &amp;amp; C++&lt;/p&gt;
&lt;h3&gt;&lt;a href=&quot;https://github.com/SubZane/Sublime-Placehold.it&quot;&gt;Sublime-Placehold.it&lt;/a&gt;&lt;/h3&gt;
&lt;p&gt;Placehold.it in Sublime text&lt;/p&gt;
&lt;h3&gt;&lt;a href=&quot;https://github.com/SublimeText/TrailingSpaces&quot;&gt;TrailingSpaces&lt;/a&gt;&lt;/h3&gt;
&lt;p&gt;Remove trailing whitespace&lt;/p&gt;
&lt;h3&gt;&lt;a href=&quot;https://github.com/jisaacks/GitGutter&quot;&gt;GitGutter&lt;/a&gt;&lt;/h3&gt;
&lt;p&gt;Show git status in the gutter&lt;/p&gt;
&lt;h3&gt;&lt;a href=&quot;https://github.com/BoundInCode/AutoFileName&quot;&gt;AutoFileName&lt;/a&gt;&lt;/h3&gt;
&lt;p&gt;Autocomplete filnames in your project.&lt;/p&gt;
&lt;h4&gt;&lt;a href=&quot;https://github.com/welovewordpress/SublimeWordPressCodex&quot;&gt;Search WordPress Codex&lt;/a&gt;&lt;/h4&gt;
&lt;p&gt;Search &lt;a href=&quot;http://codex.wordpress.org/&quot;&gt;Wordpress Codex&lt;/a&gt;&lt;/p&gt;
&lt;h3&gt;&lt;a href=&quot;https://github.com/ericmartel/Sublime-Text-2-Stackoverflow-Plugin&quot;&gt;Sublime Text 2 Stack Overflow Plugin&lt;/a&gt;&lt;/h3&gt;
&lt;p&gt;Search &lt;a href=&quot;stackoverflow.com&quot;&gt;Stack Overflow&lt;/a&gt;&lt;/p&gt;
&lt;h3&gt;&lt;a href=&quot;https://github.com/afterdesign/MacTerminal&quot;&gt;MacTerminal&lt;/a&gt;&lt;/h3&gt;
&lt;p&gt;Alternative to &lt;a href=&quot;http://wbond.net/sublime_packages/terminal&quot;&gt;Terminal&lt;/a&gt;.&lt;/p&gt;
&lt;h2&gt;&amp;lt;a name=&quot;snippets&quot;&amp;gt;&amp;lt;/a&amp;gt;Snippets&lt;/h2&gt;
&lt;h3&gt;&lt;a href=&quot;https://sublime.wbond.net/packages/HTML%20Boilerplate&quot;&gt;HTML5 Boilerplate&lt;/a&gt;&lt;/h3&gt;
&lt;p&gt;A Sublime Text 2/3 snippet to generate the HTML5 Boilerplate template&lt;/p&gt;
&lt;h3&gt;&lt;a href=&quot;https://github.com/joshnh/HTML-Snippets&quot;&gt;HTML Snippets&lt;/a&gt;&lt;/h3&gt;
&lt;p&gt;Some html snippets&lt;/p&gt;
&lt;h3&gt;&lt;a href=&quot;https://github.com/laravel/sublime-snippets&quot;&gt;Laravel Snippets&lt;/a&gt;&lt;/h3&gt;
&lt;p&gt;Snippets for Laravel&lt;/p&gt;
&lt;h3&gt;&lt;a href=&quot;https://github.com/caiogondim/js-patterns-sublime-snippets&quot;&gt;Javascript patterns&lt;/a&gt;&lt;/h3&gt;
&lt;p&gt;Some js snippets&lt;/p&gt;
&lt;h3&gt;&lt;a href=&quot;https://github.com/TerrordactylDesigns/Sublime-2-Handy-Snippets&quot;&gt;Sublime-2-Handy-Snippets&lt;/a&gt;&lt;/h3&gt;
&lt;p&gt;Handy snippets&lt;/p&gt;
&lt;h3&gt;&lt;a href=&quot;https://github.com/hugoassuncao/wordpress_snippets&quot;&gt;WordPress snippets&lt;/a&gt;&lt;/h3&gt;
&lt;p&gt;Meta boxes, custom logo login, custom admin and some other stuff&lt;/p&gt;
&lt;h2&gt;&amp;lt;a name=&quot;themes&quot;&amp;gt;&amp;lt;/a&amp;gt;Themes&lt;/h2&gt;
&lt;p&gt;&lt;img src=&quot;https://d13yacurqjgara.cloudfront.net/users/44860/screenshots/2085617/material-theme-sublime-text-3.jpg&quot; alt=&quot;Material Theme&quot; /&gt;&lt;/p&gt;
&lt;p&gt;&lt;a href=&quot;http://equinusocio.github.io/material-theme/&quot;&gt;Material Theme ⤴&lt;/a&gt;&lt;/p&gt;
&lt;p&gt;&lt;img src=&quot;http://yabatadesign.github.io/afterglow-theme/img/dist/Afterglow.tmTheme.png&quot; alt=&quot;Afterglow&quot; /&gt;&lt;/p&gt;
&lt;p&gt;&lt;a href=&quot;http://yabatadesign.github.io/afterglow-theme/&quot;&gt;Afterglow ⤴&lt;/a&gt;&lt;/p&gt;
&lt;p&gt;&lt;img src=&quot;https://raw.github.com/SalGnt/brackets-theme/master/Resources/Images/Brackets.png&quot; alt=&quot;Brackets&quot; /&gt;&lt;/p&gt;
&lt;p&gt;&lt;a href=&quot;https://github.com/SalvoGentile/brackets-theme&quot;&gt;Brackets ⤴&lt;/a&gt;&lt;/p&gt;
&lt;p&gt;Inspirerad av Adobes editor, Brackets&lt;/p&gt;
&lt;p&gt;&lt;img src=&quot;http://kkga.github.io/spacegray/assets/spacegray.png&quot; alt=&quot;Spacegrey&quot; /&gt;&lt;/p&gt;
&lt;p&gt;&lt;a href=&quot;http://kkga.github.io/spacegray/&quot;&gt;Spacegrey ⤴&lt;/a&gt;&lt;/p&gt;
&lt;p&gt;A Hyperminimal UI Theme for Sublime Text&lt;/p&gt;
&lt;p&gt;&lt;img src=&quot;https://camo.githubusercontent.com/5dd0c9e38c89f3cd5e9e97ab451cf86c4968af10/687474703a2f2f692e696d6775722e636f6d2f775676346b63782e706e67&quot; alt=&quot;Watson&quot; /&gt;&lt;/p&gt;
&lt;p&gt;&lt;a href=&quot;https://github.com/dennistimmermann/watson-theme&quot;&gt;Watson ⤴&lt;/a&gt;&lt;/p&gt;
&lt;p&gt;Custom UI theme for Sublime Text 3&lt;/p&gt;
&lt;p&gt;&lt;img src=&quot;https://camo.githubusercontent.com/1a17b32e9582fe4aeff549ce6e18ad2c1ba73878/68747470733a2f2f7777772e64726f70626f782e636f6d2f732f636767387a673472356162796266352f50686f656e69782d4c696768742e706e673f646c3d31&quot; alt=&quot;Phoenix&quot; /&gt;&lt;/p&gt;
&lt;p&gt;&lt;a href=&quot;https://github.com/netatoo/phoenix-theme&quot;&gt;Phoenix ⤴&lt;/a&gt;&lt;/p&gt;
&lt;p&gt;Nice themes, also styling for tabs and sidebar&lt;/p&gt;
&lt;p&gt;&lt;img src=&quot;http://ethanschoonover.com/solarized/img/solarized-vim.png&quot; alt=&quot;Solarized&quot; /&gt;&lt;/p&gt;
&lt;p&gt;&lt;a href=&quot;http://ethanschoonover.com/solarized&quot;&gt;Solarized ⤴ &lt;/a&gt;&lt;/p&gt;
&lt;p&gt;Precision colors for machines and people&lt;/p&gt;
&lt;p&gt;&lt;img src=&quot;https://github-camo.global.ssl.fastly.net/092b029ad05a780ed38533c48e473e903ea7ce65/687474703a2f2f6275796d6561736f64612e6769746875622e636f6d2f736f64612d7468656d652f696d616765732f73637265656e73686f74732f736f64612d322d6c696768742d7468656d652e706e673f763d34&quot; alt=&quot;Soda&quot; /&gt;&lt;/p&gt;
&lt;p&gt;&lt;a href=&quot;https://github.com/buymeasoda/soda-theme&quot;&gt;Soda ⤴&lt;/a&gt;&lt;/p&gt;
&lt;p&gt;UI-theme with Retina support&lt;/p&gt;
&lt;p&gt;&lt;img src=&quot;https://github-camo.global.ssl.fastly.net/3846ab553386dad7e5ab2e27e1ca000af48d0350/687474703a2f2f662e636c2e6c792f6974656d732f3162305233423138305a337932583064313033412f737330332e706e67&quot; alt=&quot;TMThemeEditor&quot; /&gt;&lt;/p&gt;
&lt;p&gt;&lt;a href=&quot;https://github.com/aziz/tmTheme-Editor&quot;&gt;TMThemeEditor ⤴&lt;/a&gt;&lt;/p&gt;
&lt;p&gt;Build themes in the browser (Chrome).&lt;/p&gt;
&lt;p&gt;&lt;img src=&quot;http://colorsublime.com/img/ColorSublime_logo.png&quot; alt=&quot;Colorsublime&quot; /&gt;&lt;/p&gt;
&lt;p&gt;&lt;a href=&quot;http://colorsublime.com&quot;&gt;Colorsublime ⤴&lt;/a&gt;&lt;/p&gt;
&lt;p&gt;Great collection&lt;/p&gt;
&lt;p&gt;&lt;img src=&quot;https://raw.github.com/ChrisKempson/Tomorrow-Theme/master/Images/Tomorrow-Night.png&quot; alt=&quot;Tomorrow Themes&quot; /&gt;&lt;/p&gt;
&lt;p&gt;&lt;a href=&quot;https://github.com/chriskempson/tomorrow-theme&quot;&gt;Tomorrow Themes ⤴&lt;/a&gt;&lt;/p&gt;
&lt;p&gt;&lt;img src=&quot;https://raw.github.com/daylerees/colour-schemes/master/screenshots/freshcut.png&quot; alt=&quot;Freshcut&quot; /&gt;&lt;/p&gt;
&lt;p&gt;&lt;a href=&quot;https://github.com/daylerees/colour-schemes&quot;&gt;Colour Schemes ⤴&lt;/a&gt;&lt;/p&gt;
&lt;p&gt;Great collection&lt;/p&gt;
&lt;p&gt;&lt;img src=&quot;https://raw.github.com/thinkpixellab/flatland/master/screenshots.png&quot; alt=&quot;Flatland&quot; /&gt;&lt;/p&gt;
&lt;p&gt;&lt;a href=&quot;https://github.com/thinkpixellab/flatland&quot;&gt;Flatland ⤴&lt;/a&gt;&lt;/p&gt;
&lt;p&gt;Flat ui theme&lt;/p&gt;
&lt;h2&gt;&amp;lt;a name=&quot;icons&quot;&amp;gt;&amp;lt;/a&amp;gt;Icons&lt;/h2&gt;
&lt;p&gt;Some great replacement icons for Sublime Text:&lt;/p&gt;
&lt;p&gt;&lt;img src=&quot;https://rawgit.com/YabataDesign/sublime-text-icon/master/Sublime_text_256x256x32.png&quot; alt=&quot;&quot; /&gt;
&lt;a href=&quot;https://github.com/YabataDesign/afterglow-theme&quot;&gt;Afterglow dock icon&lt;/a&gt;&lt;/p&gt;
&lt;p&gt;&lt;img src=&quot;https://d13yacurqjgara.cloudfront.net/users/19335/screenshots/1743122/dribbble.png&quot; alt=&quot;Sublime Text Yosemite icon&quot; /&gt;
&lt;strong&gt;&lt;a href=&quot;https://dribbble.com/shots/1743122-Sublime-Text-Yosemite-icon&quot;&gt;Sublime Text Yosemite icon&lt;/a&gt; av &lt;a href=&quot;https://dribbble.com/eldh&quot;&gt;Andreas Eldh&lt;/a&gt;&lt;/strong&gt;&lt;/p&gt;
&lt;p&gt;&lt;img src=&quot;https://d13yacurqjgara.cloudfront.net/users/305998/screenshots/1827488/post4.png&quot; alt=&quot;Sublime Text Replacement Icon&quot; /&gt;
&lt;strong&gt;&lt;a href=&quot;https://dribbble.com/shots/1827488-Final-Sublime-Text-Replacement-Icon&quot;&gt;Sublime Text Replacement Icon&lt;/a&gt; av &lt;a href=&quot;https://dribbble.com/janniks&quot;&gt;Jannik Sieberg&lt;/a&gt;&lt;/strong&gt;&lt;/p&gt;
&lt;p&gt;&lt;img src=&quot;https://d13yacurqjgara.cloudfront.net/users/491092/screenshots/1503805/st.jpeg&quot; alt=&quot;Sublime Text.app icon&quot; /&gt;
&lt;a href=&quot;https://dribbble.com/shots/1503805-Sublime-Text-app-icon&quot;&gt;Sublime Text.app icon&lt;/a&gt; av &lt;a href=&quot;https://dribbble.com/russbot&quot;&gt;Russ&lt;/a&gt;&lt;/p&gt;
&lt;p&gt;&lt;img src=&quot;https://d13yacurqjgara.cloudfront.net/users/296458/screenshots/1582459/dribbble_shot.png&quot; alt=&quot;Sublime Text Icon, for Yosemite&quot; /&gt;
&lt;a href=&quot;https://dribbble.com/shots/1582459-Sublime-Text-Icon-for-Yosemite&quot;&gt;Sublime Text Icon, for Yosemite&lt;/a&gt; av &lt;a href=&quot;https://dribbble.com/rafahari&quot;&gt;Rafael Conde&lt;/a&gt;&lt;/p&gt;
&lt;p&gt;&lt;img src=&quot;https://d13yacurqjgara.cloudfront.net/users/11073/screenshots/1132096/drrrrr.png&quot; alt=&quot;Sublime Text&quot; /&gt;
&lt;strong&gt;&lt;a href=&quot;https://dribbble.com/shots/1132096-Sublime-Text&quot;&gt;Sublime Text&lt;/a&gt; av &lt;a href=&quot;https://dribbble.com/poltergeist&quot;&gt;David Öhlin&lt;/a&gt;&lt;/strong&gt;&lt;/p&gt;
&lt;p&gt;&lt;img src=&quot;http://dribbble.s3.amazonaws.com/users/14467/screenshots/593029/dribbble-st2.png&quot; alt=&quot;Sublime Text 2 icon&quot; /&gt;
&lt;a href=&quot;http://dribbble.com/shots/593029-Sublime-Text-2-icon&quot;&gt;Sublime Text 2 icon&lt;/a&gt; av &lt;a href=&quot;http://dribbble.com/mynameisbryce&quot;&gt;Bryce Thompson&lt;/a&gt;&lt;/p&gt;
&lt;p&gt;&lt;img src=&quot;http://dribbble.s3.amazonaws.com/users/9514/screenshots/378184/sublime-icon-2-dribbble.jpg&quot; alt=&quot;Unofficial Sublime Text 2 Icon&quot; /&gt;
&lt;a href=&quot;http://dribbble.com/shots/378184-Unofficial-Sublime-Text-2-Icon-Replacement-Final&quot;&gt;Unofficial Sublime Text 2 Icon Replacement Final&lt;/a&gt; av &lt;a href=&quot;http://dribbble.com/adamkiss&quot;&gt;Adam Kiss&lt;/a&gt;&lt;/p&gt;
&lt;p&gt;&lt;img src=&quot;http://dribbble.s3.amazonaws.com/users/28018/screenshots/1086883/sublimetext-icon-dribbble_1x.png&quot; alt=&quot;Sublime Text Replacement Icon&quot; /&gt;
&lt;a href=&quot;http://dribbble.com/shots/1086883-Sublime-Text-Replacement-Icon&quot;&gt;Sublime Text Replacement Icon&lt;/a&gt; av &lt;a href=&quot;http://dribbble.com/tgines&quot;&gt;Tony Gines&lt;/a&gt;&lt;/p&gt;
&lt;p&gt;&lt;img src=&quot;http://dribbble.s3.amazonaws.com/users/42840/screenshots/1069298/sublime-text-icon-redux_1x.png&quot; alt=&quot;Redux&quot; /&gt;
&lt;a href=&quot;http://dribbble.com/shots/1069298-Sublime-Text-Icon-Redux&quot;&gt;Sublime-Text-Icon-Redux&lt;/a&gt; av &lt;a href=&quot;http://dribbble.com/flynnduism&quot;&gt;Ronan Flynn&lt;/a&gt;&lt;/p&gt;
&lt;p&gt;&lt;img src=&quot;http://dribbble.s3.amazonaws.com/users/13658/screenshots/468176/dribble-sublime.png&quot; alt=&quot;Sublime Text 2&quot; /&gt;
&lt;a href=&quot;http://dribbble.com/shots/468176-Sublime-Text-2-icon-you-can-actually-see-when-switching-apps&quot;&gt;Sublime Text 2 &lt;/a&gt; av &lt;a href=&quot;http://dribbble.com/vocaltsunami&quot;&gt;Dmitry Svetlichny&lt;/a&gt;&lt;/p&gt;
&lt;p&gt;&lt;img src=&quot;http://dribbble.s3.amazonaws.com/users/105143/screenshots/872166/sublime-text-2.png&quot; alt=&quot;Sublime Text 2 Replacement Icon&quot; /&gt;
&lt;a href=&quot;http://dribbble.com/shots/872166-Sublime-Text-2-Replacement-Icon&quot;&gt;Sublime Text 2 Replacement Icon&lt;/a&gt; av &lt;a href=&quot;http://dribbble.com/ElliotEKJ&quot;&gt;Elliot Jackson&lt;/a&gt;&lt;/p&gt;
&lt;p&gt;&lt;img src=&quot;http://dribbble.s3.amazonaws.com/users/7579/screenshots/337996/sublime.png&quot; alt=&quot;Sublime Text 2 Icon&quot; /&gt;
&lt;a href=&quot;http://dribbble.com/shots/337996-Sublime-Text-2-Icon&quot;&gt;Sublime Text 2 Icon&lt;/a&gt; av &lt;a href=&quot;http://dribbble.com/dmatarazzo&quot;&gt;Daniel Matarazzo&lt;/a&gt;&lt;/p&gt;
&lt;h2&gt;&amp;lt;a name=&quot;completions&quot;&amp;gt;&amp;lt;/a&amp;gt;Completions&lt;/h2&gt;
&lt;h3&gt;&lt;a href=&quot;https://github.com/daneden/sublime-css-completions&quot;&gt;Sublime CSS Completions&lt;/a&gt;&lt;/h3&gt;
&lt;h3&gt;&lt;a href=&quot;https://github.com/Pleasurazy/Sublime-Better-Completion&quot;&gt;Sublime-Better-Completion&lt;/a&gt;&lt;/h3&gt;
&lt;h3&gt;&lt;a href=&quot;https://github.com/allaire/HTML5-sublime-completions&quot;&gt;HTML5-sublime-completions&lt;/a&gt;&lt;/h3&gt;
&lt;p&gt;A more complete library of CSS autocompletion for Sublime Text.&lt;/p&gt;
&lt;h2&gt;&amp;lt;a name=&quot;settings&quot;&amp;gt;&amp;lt;/a&amp;gt;Settings&lt;/h2&gt;
&lt;p&gt;Preferences -&amp;gt; Settings -&amp;gt; User&lt;/p&gt;
&lt;p&gt;Folder exclude patterns in a project&lt;/p&gt;
&lt;pre&gt;&lt;code&gt;&quot;folder_exclude_patterns&quot;:
[
	&quot;.svn&quot;,
	&quot;.git&quot;,
	&quot;.hg&quot;,
	&quot;CVS&quot;,
	&quot;_build&quot;,
	&quot;dist&quot;,
	&quot;build&quot;,
	&quot;site&quot;,
	&quot;.sass-cache&quot;,
	&quot;.phptidy-cache&quot;,
	&quot;node_modules&quot;
],
&lt;/code&gt;&lt;/pre&gt;
&lt;p&gt;Trimm whitespace on save&lt;/p&gt;
&lt;pre&gt;&lt;code&gt;&quot;trim_automatic_white_space&quot;: true,
&quot;trim_trailing_white_space_on_save&quot;: true,
&lt;/code&gt;&lt;/pre&gt;
&lt;p&gt;Scroll past end. Useful when editing code far down in a long document&lt;/p&gt;
&lt;pre&gt;&lt;code&gt;&quot;scroll_past_end&quot;: true
&lt;/code&gt;&lt;/pre&gt;
&lt;p&gt;Markera aktuell rad&lt;/p&gt;
&lt;pre&gt;&lt;code&gt;&quot;highlight_line&quot;: true
&lt;/code&gt;&lt;/pre&gt;
&lt;p&gt;Copy selected text to the search/replace panel&lt;/p&gt;
&lt;pre&gt;&lt;code&gt;&quot;find_selected_text&quot;: true
&lt;/code&gt;&lt;/pre&gt;
&lt;p&gt;Show indentation helpers&lt;/p&gt;
&lt;pre&gt;&lt;code&gt;&quot;draw_indent_guides&quot;: true
&lt;/code&gt;&lt;/pre&gt;
&lt;p&gt;Bracket settings&lt;/p&gt;
&lt;pre&gt;&lt;code&gt;&quot;match_brackets&quot;: true,
&quot;match_brackets_angle&quot;: true,
&quot;match_brackets_braces&quot;: true,
&quot;match_brackets_content&quot;: true,
&quot;match_brackets_square&quot;: true,
&lt;/code&gt;&lt;/pre&gt;
&lt;p&gt;Caret style. Choose between &quot;smooth&quot;, &quot;phase&quot;, &quot;blink&quot;, &quot;wide&quot; och &quot;solid&quot;.&lt;/p&gt;
&lt;pre&gt;&lt;code&gt;&quot;caret_style&quot;: &quot;phase&quot;
&lt;/code&gt;&lt;/pre&gt;
&lt;p&gt;Line padding&lt;/p&gt;
&lt;pre&gt;&lt;code&gt;&quot;line_padding_bottom&quot;: 1,
&quot;line_padding_top&quot;: 1
&lt;/code&gt;&lt;/pre&gt;
&lt;p&gt;Typography settings&lt;/p&gt;
&lt;pre&gt;&lt;code&gt;&quot;font_face&quot;: &quot;Source Code Pro&quot;,
&quot;font_size&quot;: 14,
&quot;font_options&quot;:
[
	&quot;subpixel_antialias&quot;
],
&lt;/code&gt;&lt;/pre&gt;
&lt;h3&gt;&lt;a href=&quot;https://gist.github.com/etrepat/1289965&quot;&gt;More settings tips&lt;/a&gt;&lt;/h3&gt;
&lt;h3&gt;Links&lt;/h3&gt;
&lt;blockquote&gt;
&lt;p&gt;&lt;a href=&quot;http://sublime-text-unofficial-documentation.readthedocs.org/en/sublime-text-2/reference/keyboard_shortcuts_osx.html&quot;&gt;Official Docs: Keyboard Shortcuts OSX&lt;/a&gt;
&lt;a href=&quot;http://sublime-text-unofficial-documentation.readthedocs.org/en/sublime-text-2/reference/keyboard_shortcuts_win.html&quot;&gt;Official Docs: Keyboard Shortcuts Win&lt;/a&gt;
&lt;a href=&quot;http://www.wdtutorials.com/2013/06/23/sublime-text-keyboard-shortcuts-cheat-sheet-win-os-x-and-linux#.U7WHWI1_vUI&quot;&gt;Kortkommandon för OSX, Windows och Linux&lt;/a&gt;
&lt;a href=&quot;https://gist.github.com/eteanga/1736542&quot;&gt;Useful Shortcuts&lt;/a&gt;&lt;/p&gt;
&lt;/blockquote&gt;
&lt;h2&gt;&amp;lt;a name=&quot;tools&quot;&amp;gt;&amp;lt;/a&amp;gt;Tools&lt;/h2&gt;
&lt;h3&gt;&lt;a href=&quot;http://sublimetexttips.com/&quot;&gt;Free Sublime Text tips&lt;/a&gt;&lt;/h3&gt;
&lt;p&gt;&lt;strong&gt;Delivered straight to your inbox&lt;/strong&gt;&lt;/p&gt;
&lt;h3&gt;&lt;a href=&quot;http://www.sublimerge.com/&quot;&gt;Sublimerge&lt;/a&gt;&lt;/h3&gt;
&lt;p&gt;&lt;strong&gt;The professional diff and merge tool for Sublime Text 2 and 3&lt;/strong&gt;&lt;/p&gt;
&lt;h3&gt;&lt;a href=&quot;http://www.caniswitchtosublimetext3.com/&quot;&gt;Can I Switch To Sublime Text 3?&lt;/a&gt;&lt;/h3&gt;
&lt;h3&gt;&lt;a href=&quot;http://sublimall.org/&quot;&gt;Sublimall&lt;/a&gt;&lt;/h3&gt;
&lt;p&gt;Sync the Sublime settings&lt;/p&gt;
&lt;h2&gt;&amp;lt;a name=&quot;workflow&quot;&amp;gt;&amp;lt;/a&amp;gt;Workflow&lt;/h2&gt;
&lt;h3&gt;&lt;a href=&quot;http://drewbarontini.com/setup/sublime-text/&quot;&gt;Sublime Text&lt;/a&gt;&lt;/h3&gt;
&lt;p&gt;&lt;strong&gt;The usefuless of this setup guide will vary based on your personal preferences for how your text editor should function, but it should help with the initial setup of Sublime Text. Let’s get started.&lt;/strong&gt;&lt;/p&gt;
&lt;h3&gt;&lt;a href=&quot;http://blog.alexmaccaw.com/sublime-text&quot;&gt;Setting up Sublime Text&lt;/a&gt;&lt;/h3&gt;
&lt;p&gt;&lt;strong&gt;Tips from Alex MacCaw&lt;/strong&gt;&lt;/p&gt;
&lt;h3&gt;&lt;a href=&quot;http://blog.manikrathee.com/posts/2013/07/27/sublime-text.html&quot;&gt;Customizing your Workflow&lt;/a&gt;&lt;/h3&gt;
&lt;h3&gt;&lt;a href=&quot;http://wesbos.github.io/Sublime-Text-Power-User-Talk/#1&quot;&gt;Become a Sublime Text Power User&lt;/a&gt;&lt;/h3&gt;
&lt;p&gt;Canadian sized hot tips. Av &lt;a href=&quot;http://twitter.com/wesbos&quot;&gt;@wesbos&lt;/a&gt;&lt;/p&gt;
&lt;h3&gt;&lt;a href=&quot;https://github.com/cbracco/ST2-Setup&quot;&gt;ST2-Setup&lt;/a&gt;&lt;/h3&gt;
&lt;p&gt;Setup tips from &lt;a href=&quot;https://github.com/cbracco&quot;&gt;@cbracco&lt;/a&gt;&lt;/p&gt;
&lt;h2&gt;&amp;lt;a name=&quot;cli&quot;&amp;gt;&amp;lt;/a&amp;gt;CLI&lt;/h2&gt;
&lt;pre&gt;&lt;code&gt;ln -s &quot;/Applications/Sublime Text 3.app/Contents/SharedSupport/bin/subl&quot; /bin/subl
&lt;/code&gt;&lt;/pre&gt;
&lt;p&gt;Open files from the terminal&lt;/p&gt;
&lt;h2&gt;Use Sublime as the default editor for Git&lt;/h2&gt;
&lt;pre&gt;&lt;code&gt;git config --global core.editor &quot;open -a &apos;Sublime Text 2&apos;&quot;
&lt;/code&gt;&lt;/pre&gt;
</content:encoded></item><item><title>WordPress, Nginx and PHP-FPM</title><link>https://urre.me/writing/nginx-wordpress/</link><guid isPermaLink="true">https://urre.me/writing/nginx-wordpress/</guid><description>Setting up a lightning fast server for WordPress</description><pubDate>Wed, 31 Oct 2012 00:00:00 GMT</pubDate><content:encoded>&lt;p&gt;This is my notes for setting up a VPS optimized for WordPress, with Nginx and PHP5-FPM. I&apos;m setting up MySQL, W3 Total Cache, Git and a few other things.
I assume that you already have a VPS with has an allocated a ip adress. Also, you must have a domain.&lt;/p&gt;
&lt;h2&gt;Nginx?&lt;/h2&gt;
&lt;p&gt;NGINX is the world’s most popular open source web server for high traffic sites, powering over 100 million properties. Nginx works differently than Apache, mainly with regard to how it handles threads. Nginx has grown in popularity since its release due to its light-weight resource utilization and its ability to scale easily on minimal hardware. Nginx excels at serving static content quickly and is designed to pass dynamic requests off to other software that is better suited for those purposes.&lt;/p&gt;
&lt;p&gt;&lt;a href=&quot;https://www.digitalocean.com/community/tutorials/apache-vs-nginx-practical-considerations&quot;&gt;Read more&lt;/a&gt;&lt;/p&gt;
&lt;h2&gt;Configure and update your VPS&lt;/h2&gt;
&lt;pre&gt;&lt;code&gt;sudo apt-get install python-software-properties
sudo apt-get update
sudo apt-get upgrade
&lt;/code&gt;&lt;/pre&gt;
&lt;h3&gt;Install the Nano editor (or just use Vim)&lt;/h3&gt;
&lt;pre&gt;&lt;code&gt;sudo apt-get install nano
&lt;/code&gt;&lt;/pre&gt;
&lt;h3&gt;Configure hostname&lt;/h3&gt;
&lt;pre&gt;&lt;code&gt;nano /etc/hosts

127.0.0.1 localhost.localdomain localhost
127.0.0.1 myserver
&lt;/code&gt;&lt;/pre&gt;
&lt;p&gt;hostname = the name on your VPS&lt;/p&gt;
&lt;h2&gt;Install Nginx, PHP and PHP5-FPM&lt;/h2&gt;
&lt;pre&gt;&lt;code&gt;sudo apt-get install nginx
sudo apt-get install php5-cli php5-common php5-mysql php5-imagick php5-gd php5-dev
sudo apt-get install php5-fpm php5-cgi php-pear php5-memcache php-apc
&lt;/code&gt;&lt;/pre&gt;
&lt;h3&gt;Start PHP-FPM&lt;/h3&gt;
&lt;pre&gt;&lt;code&gt;sudo service php5-fpm start
&lt;/code&gt;&lt;/pre&gt;
&lt;h3&gt;Create a sym link to the default site settings file&lt;/h3&gt;
&lt;pre&gt;&lt;code&gt;cd /etc/nginx/sites-enabled
sudo ln -s ../sites-available/default default
&lt;/code&gt;&lt;/pre&gt;
&lt;h3&gt;Start Nginx&lt;/h3&gt;
&lt;pre&gt;&lt;code&gt;sudo service nginx start
&lt;/code&gt;&lt;/pre&gt;
&lt;p&gt;You can now visit your domain mywebsite.com and see &quot;Welcome to Nginx&quot;&lt;/p&gt;
&lt;pre&gt;&lt;code&gt;sudo rm default
sudo service nginx stop
sudo service php5-fpm stop
&lt;/code&gt;&lt;/pre&gt;
&lt;p&gt;Remove the symlink igen and stop Nginx&lt;/p&gt;
&lt;h2&gt;Configure Nginx&lt;/h2&gt;
&lt;pre&gt;&lt;code&gt;cd /etc/nginx
&lt;/code&gt;&lt;/pre&gt;
&lt;p&gt;Edit &lt;code&gt;nginx.conf&lt;/code&gt;&lt;/p&gt;
&lt;pre&gt;&lt;code&gt;nano nginx.conf
&lt;/code&gt;&lt;/pre&gt;
&lt;p&gt;Add this &lt;a href=&quot;https://gist.github.com/3982382&quot;&gt;(gist)&lt;/a&gt;&lt;/p&gt;
&lt;blockquote&gt;
&lt;p&gt;Change worker_processes and worker_connections to match your server. If your VPS has got 6 CPU cores, adjust worker_processes to 6. worker_connections till 6 * 1024 = 6144. Find out how many CPU cores by running &lt;code&gt;cat /proc/cpuinfo&lt;/code&gt;&lt;/p&gt;
&lt;/blockquote&gt;
&lt;h3&gt;Go to /sites-avaliable&lt;/h3&gt;
&lt;pre&gt;&lt;code&gt;cd sites-available
&lt;/code&gt;&lt;/pre&gt;
&lt;h3&gt;Create a file called mywebsite.com&lt;/h3&gt;
&lt;pre&gt;&lt;code&gt;touch mywebsite.com
nano mywebsite.com
&lt;/code&gt;&lt;/pre&gt;
&lt;p&gt;Add this &lt;a href=&quot;https://gist.github.com/3982392&quot;&gt;(gist)&lt;/a&gt;&lt;/p&gt;
&lt;h3&gt;Create the folder &lt;code&gt;global&lt;/code&gt; inside the &lt;code&gt;nginx&lt;/code&gt; folder&lt;/h3&gt;
&lt;pre&gt;&lt;code&gt;cd /etc/nginx
sudo mkdir global
cd global
&lt;/code&gt;&lt;/pre&gt;
&lt;h3&gt;Create the file &lt;code&gt;restrictions.conf&lt;/code&gt;&lt;/h3&gt;
&lt;pre&gt;&lt;code&gt;touch restrictions.conf
nano restrictions.conf
&lt;/code&gt;&lt;/pre&gt;
&lt;p&gt;Add this: &lt;a href=&quot;https://gist.github.com/3982386&quot;&gt;(gist)&lt;/a&gt;&lt;/p&gt;
&lt;h3&gt;Create the file &lt;code&gt;php5-fpm.conf&lt;/code&gt; inside the global directory&lt;/h3&gt;
&lt;pre&gt;&lt;code&gt;touch php5-fpm.conf
nano php5-fpm.conf
&lt;/code&gt;&lt;/pre&gt;
&lt;p&gt;Add this &lt;a href=&quot;https://gist.github.com/3982429&quot;&gt;(gist)&lt;/a&gt;&lt;/p&gt;
&lt;h2&gt;Set up your site&lt;/h2&gt;
&lt;h3&gt;Activate the server configuration with a symlink&lt;/h3&gt;
&lt;pre&gt;&lt;code&gt;cd /etc/nginx/sites-enabled
sudo ln -s ../sites-available/mywebsite.com.se mywebsite.com
&lt;/code&gt;&lt;/pre&gt;
&lt;h3&gt;Go to the www folder&lt;/h3&gt;
&lt;pre&gt;&lt;code&gt;cd /var/www
&lt;/code&gt;&lt;/pre&gt;
&lt;h3&gt;Create a group&lt;/h3&gt;
&lt;pre&gt;&lt;code&gt;sudo groupadd web
&lt;/code&gt;&lt;/pre&gt;
&lt;h3&gt;Add admin rights&lt;/h3&gt;
&lt;pre&gt;&lt;code&gt;sudo usermod -a -G web YOURUSER
&lt;/code&gt;&lt;/pre&gt;
&lt;h3&gt;Add the group&lt;/h3&gt;
&lt;pre&gt;&lt;code&gt;sudo chgrp web /var/www
&lt;/code&gt;&lt;/pre&gt;
&lt;h3&gt;Make the www directory writable&lt;/h3&gt;
&lt;pre&gt;&lt;code&gt;sudo chmod -R 775 /var/www
&lt;/code&gt;&lt;/pre&gt;
&lt;h3&gt;Assign all files to the group&lt;/h3&gt;
&lt;pre&gt;&lt;code&gt;sudo chmod g+s /var/www
&lt;/code&gt;&lt;/pre&gt;
&lt;h3&gt;Create a folder for your website&lt;/h3&gt;
&lt;pre&gt;&lt;code&gt;mkdir mywebsite.com
cd mywebsite.com
&lt;/code&gt;&lt;/pre&gt;
&lt;h3&gt;Create a index.php and try out the configuration&lt;/h3&gt;
&lt;pre&gt;&lt;code&gt;touch index.php
nano index.php
&lt;/code&gt;&lt;/pre&gt;
&lt;p&gt;Add &lt;code&gt;phpinfo();&lt;/code&gt; and check so everything works&lt;/p&gt;
&lt;h3&gt;Start Nginx&lt;/h3&gt;
&lt;pre&gt;&lt;code&gt;sudo service nginx start
&lt;/code&gt;&lt;/pre&gt;
&lt;h3&gt;Start PHP-FPM&lt;/h3&gt;
&lt;pre&gt;&lt;code&gt;sudo service php5-fpm start
&lt;/code&gt;&lt;/pre&gt;
&lt;h3&gt;Great success!&lt;/h3&gt;
&lt;h2&gt;Secure SSH&lt;/h2&gt;
&lt;pre&gt;&lt;code&gt;Create a user
&lt;/code&gt;&lt;/pre&gt;
&lt;pre&gt;&lt;code&gt;adduser --home /home/name name
&lt;/code&gt;&lt;/pre&gt;
&lt;h3&gt;Add user as sudoer&lt;/h3&gt;
&lt;pre&gt;&lt;code&gt;visudo
&lt;/code&gt;&lt;/pre&gt;
&lt;p&gt;Add&lt;/p&gt;
&lt;pre&gt;&lt;code&gt;name ALL=(ALL) ALL
&lt;/code&gt;&lt;/pre&gt;
&lt;h3&gt;Turn off root login&lt;/h3&gt;
&lt;pre&gt;&lt;code&gt;nano /etc/ssh/sshd_config
&lt;/code&gt;&lt;/pre&gt;
&lt;p&gt;Add&lt;/p&gt;
&lt;pre&gt;&lt;code&gt;PermitRootLogin no
PasswordAuthentication no
&lt;/code&gt;&lt;/pre&gt;
&lt;h2&gt;Install MySQL&lt;/h2&gt;
&lt;pre&gt;&lt;code&gt;sudo apt-get install mysql-server
sudo apt-get install php5-mysql
&lt;/code&gt;&lt;/pre&gt;
&lt;h3&gt;Create database&lt;/h3&gt;
&lt;pre&gt;&lt;code&gt;mysqladmin -u root -p create databasnamn
&lt;/code&gt;&lt;/pre&gt;
&lt;h3&gt;Secure MySQL&lt;/h3&gt;
&lt;pre&gt;&lt;code&gt;mysql_secure_installation
&lt;/code&gt;&lt;/pre&gt;
&lt;h3&gt;Log in&lt;/h3&gt;
&lt;pre&gt;&lt;code&gt;mysql -u root -p
&lt;/code&gt;&lt;/pre&gt;
&lt;h3&gt;Create user&lt;/h3&gt;
&lt;pre&gt;&lt;code&gt;CREATE USER &apos;anvnamn&apos;@&apos;localhost&apos; IDENTIFIED BY &apos;c0MpLiCaTeDp@55w0rd&apos;;
&lt;/code&gt;&lt;/pre&gt;
&lt;h3&gt;Grant access&lt;/h3&gt;
&lt;pre&gt;&lt;code&gt;GRANT ALL ON *.* TO &apos;anvnamn&apos;@&apos;localhost&apos;;
&lt;/code&gt;&lt;/pre&gt;
&lt;h3&gt;Logout from the MySQL shell&lt;/h3&gt;
&lt;pre&gt;&lt;code&gt;exit
&lt;/code&gt;&lt;/pre&gt;
&lt;h3&gt;Manage the database&lt;/h3&gt;
&lt;p&gt;I prefer to use &lt;a href=&quot;http://sequelpro.com&quot;&gt;Sequel Pro&lt;/a&gt; . It is a fast, easy-to-use Mac database management application for working with MySQL databases. Simple and looks great.
&lt;img src=&quot;http://f.cl.ly/items/0p192V141J332D3h3A0D/sequelpro.jpg&quot; alt=&quot;Sequel Pro&quot; /&gt;&lt;/p&gt;
&lt;h2&gt;Install WordPress&lt;/h2&gt;
&lt;blockquote&gt;
&lt;p&gt;This is outdated. You should use WP-CLI instead.&lt;/p&gt;
&lt;/blockquote&gt;
&lt;p&gt;Istall wget&lt;/p&gt;
&lt;pre&gt;&lt;code&gt;sudo bash
apt-get update
apt-get -f install
apt-get install wget
&lt;/code&gt;&lt;/pre&gt;
&lt;h4&gt;Download WordPress&lt;/h4&gt;
&lt;pre&gt;&lt;code&gt;wget http://sv.wordpress.org/wordpress-4.2.2-sv_SE.tar.gz
tar xfz wordpress-4.1-sv_SE.tar.gz
mv wordpress/* ./
rmdir ./wordpress/
rm -f wordpress-3.9.1-sv_SE.tar.gz
mv wp-config-sample.php wp-config.php
&lt;/code&gt;&lt;/pre&gt;
&lt;h3&gt;Edit wp-config add your credentials and settings&lt;/h3&gt;
&lt;pre&gt;&lt;code&gt;nano wp-config.php
&lt;/code&gt;&lt;/pre&gt;
&lt;h3&gt;Or use my little bash script &lt;a href=&quot;https://github.com/urre/wp-installer/blob/master/wp.sh&quot;&gt;wp-installer&lt;/a&gt;&lt;/h3&gt;
&lt;h3&gt;Install cURL&lt;/h3&gt;
&lt;pre&gt;&lt;code&gt;sudo apt-get install curl
&lt;/code&gt;&lt;/pre&gt;
&lt;h2&gt;Install WP-CLI&lt;/h2&gt;
&lt;pre&gt;&lt;code&gt;WP-CLI is a set of command-line tools for managing WordPress installations. You can update plugins, set up multisite installs and much more, without using a web browser.
&lt;/code&gt;&lt;/pre&gt;
&lt;p&gt;First, download wp-cli.phar using wget or curl. For example&lt;/p&gt;
&lt;pre&gt;&lt;code&gt;curl -O https://raw.githubusercontent.com/wp-cli/builds/gh-pages/phar/wp-cli.phar
&lt;/code&gt;&lt;/pre&gt;
&lt;p&gt;Then, check if it works:&lt;/p&gt;
&lt;pre&gt;&lt;code&gt;php wp-cli.phar --info
&lt;/code&gt;&lt;/pre&gt;
&lt;p&gt;To be able to type just wp, instead of php wp-cli.phar, you need to make the file executable and move it to somewhere in your PATH. For example:&lt;/p&gt;
&lt;pre&gt;&lt;code&gt;chmod +x wp-cli.phar
sudo mv wp-cli.phar /usr/local/bin/wp
&lt;/code&gt;&lt;/pre&gt;
&lt;p&gt;No try &lt;code&gt; wp --info&lt;/code&gt;&lt;/p&gt;
&lt;p&gt;Bonus: Add &lt;a href=&quot;http://wp-cli.org/&quot;&gt;Tab completions&lt;/a&gt;.&lt;/p&gt;
&lt;h2&gt;Setup SSH-keys&lt;/h2&gt;
&lt;p&gt;We need to connect to the server without using password every time:&lt;/p&gt;
&lt;pre&gt;&lt;code&gt;mkdir ~/.ssh
chmod 700 ~/.ssh
ssh-keygen -t rsa
&lt;/code&gt;&lt;/pre&gt;
&lt;p&gt;Own your .ssh folder (for user with rootaccess)&lt;/p&gt;
&lt;pre&gt;&lt;code&gt;cd ~
sudo chown name .ssh
&lt;/code&gt;&lt;/pre&gt;
&lt;p&gt;Copy keys to the server:&lt;/p&gt;
&lt;pre&gt;&lt;code&gt;cat ~/.ssh/id_rsa.pub | ssh user@dindoman.se &apos;cat - &amp;gt;&amp;gt; ~/.ssh/authorized_keys&apos;
&lt;/code&gt;&lt;/pre&gt;
&lt;p&gt;Set correct access&lt;/p&gt;
&lt;pre&gt;&lt;code&gt;chmod 600 ~/.ssh/authorized_keys &amp;amp;&amp;amp; chmod 700 ~/.ssh/
&lt;/code&gt;&lt;/pre&gt;
&lt;h4&gt;Links&lt;/h4&gt;
&lt;ul&gt;
&lt;li&gt;&lt;a href=&quot;https://help.github.com/articles/generating-ssh-keys&quot;&gt;Github: Generating SSH-keys&lt;/a&gt;&lt;/li&gt;
&lt;li&gt;&lt;a href=&quot;http://www.saintsjd.com/2011/01/setting-up-ssh-public-keys/&quot;&gt;John Saints: Setting Up SSH-keys&lt;/a&gt;&lt;/li&gt;
&lt;/ul&gt;
&lt;h2&gt;Install Git&lt;/h2&gt;
&lt;pre&gt;&lt;code&gt;apt-get install git-core
&lt;/code&gt;&lt;/pre&gt;
&lt;h3&gt;Add the git user&lt;/h3&gt;
&lt;pre&gt;&lt;code&gt;adduser git
su git
cd /home/git
mkdir .ssh
chmod 700 .ssh
cd .ssh
touch authorized_keys
&lt;/code&gt;&lt;/pre&gt;
&lt;h2&gt;Test&lt;/h2&gt;
&lt;pre&gt;&lt;code&gt;ssh git@mywebsite.com
&lt;/code&gt;&lt;/pre&gt;
&lt;h2&gt;Add remote git repo&lt;/h2&gt;
&lt;pre&gt;&lt;code&gt;git remote add origin git@mywebsite.com.se/var/www/mywebsite.com
&lt;/code&gt;&lt;/pre&gt;
&lt;h3&gt;Solve the git objects access rights&lt;/h3&gt;
&lt;pre&gt;&lt;code&gt;cd repository.git
sudo chmod -R g+ws *
sudo chgrp -R mygroup *
git config core.sharedRepository true
sudo chown -R git:git .git/
&lt;/code&gt;&lt;/pre&gt;
&lt;h3&gt;Set git user as sudoer&lt;/h3&gt;
&lt;pre&gt;&lt;code&gt;visudo
git ALL=(ALL) ALL
&lt;/code&gt;&lt;/pre&gt;
&lt;h2&gt;W3 Total Cache&lt;/h2&gt;
&lt;pre&gt;&lt;code&gt;touch /etc/nginx/sites-available/mywebsite.com
&lt;/code&gt;&lt;/pre&gt;
&lt;p&gt;Add&lt;/p&gt;
&lt;pre&gt;&lt;code&gt;include global/wordpress-w3-total-cache.conf;
&lt;/code&gt;&lt;/pre&gt;
&lt;p&gt;Create the w3 settings file&lt;/p&gt;
&lt;pre&gt;&lt;code&gt;touch /etc/nginx/global/wordpress-w3-total-cache.conf
&lt;/code&gt;&lt;/pre&gt;
&lt;pre&gt;&lt;code&gt;nano /etc/nginx/global/wordpress-w3-total-cache.conf
&lt;/code&gt;&lt;/pre&gt;
&lt;p&gt;Add this &lt;a href=&quot;https://gist.github.com/3982394&quot;&gt;(gist)&lt;/a&gt;&lt;/p&gt;
&lt;p&gt;Also create &lt;code&gt;nginx.conf&lt;/code&gt; inside &lt;code&gt;/var/ww/mywebsite.com&lt;/code&gt;&lt;/p&gt;
&lt;pre&gt;&lt;code&gt;touch nginx.conf
nano nginx.conf
&lt;/code&gt;&lt;/pre&gt;
&lt;p&gt;Add: &lt;a href=&quot;https://gist.github.com/3990374&quot;&gt;(gist)&lt;/a&gt;&lt;/p&gt;
&lt;h2&gt;Change allowed maximum file size&lt;/h2&gt;
&lt;pre&gt;&lt;code&gt;nano /etc/nginx/sites-available/default
&lt;/code&gt;&lt;/pre&gt;
&lt;p&gt;Add for example:&lt;/p&gt;
&lt;pre&gt;&lt;code&gt;client_max_body_size 30M;
&lt;/code&gt;&lt;/pre&gt;
&lt;p&gt;Edit php.ini&lt;/p&gt;
&lt;pre&gt;&lt;code&gt;nano /etc/php5/fpm/php.ini
&lt;/code&gt;&lt;/pre&gt;
&lt;p&gt;Under File Uploads, change to:&lt;/p&gt;
&lt;pre&gt;&lt;code&gt;upload_max_filesize = 30M;
&lt;/code&gt;&lt;/pre&gt;
&lt;p&gt;Reload PHP-FPM and Nginx&lt;/p&gt;
&lt;pre&gt;&lt;code&gt;service php5-fpm reload
service nginx reload
&lt;/code&gt;&lt;/pre&gt;
&lt;p&gt;Read more&lt;/p&gt;
&lt;ul&gt;
&lt;li&gt;&lt;a href=&quot;http://wordimpress.com/wordpress-nginx-http-error-on-image-uploader-fix/&quot;&gt;WordImpress&lt;/a&gt;&lt;/li&gt;
&lt;li&gt;&lt;a href=&quot;https://rtcamp.com/tutorials/php/increase-file-upload-size-limit/&quot;&gt;RTcamp&lt;/a&gt;&lt;/li&gt;
&lt;/ul&gt;
&lt;h2&gt;Add correct MIME-type for SVG (.svg)&lt;/h2&gt;
&lt;p&gt;Edit /etc/nginx/mime.types&lt;/p&gt;
&lt;pre&gt;&lt;code&gt;nano/etc/nginx/mime.types
image/svg+xml svg svgz;
&lt;/code&gt;&lt;/pre&gt;
&lt;h2&gt;Add correct mime-types for webfonts&lt;/h2&gt;
&lt;p&gt;if you use webfonts, Nginx can need a helping hand serving the correct mime-types, instead of just the default application/octet-stream. Edit /etc/nginx/mime.types&lt;/p&gt;
&lt;pre&gt;&lt;code&gt;application/vnd.ms-fontobject eot;
application/x-font-ttfttf;
font/opentype ott;
application/font-woff woff;
&lt;/code&gt;&lt;/pre&gt;
&lt;h2&gt;Support more file formats&lt;/h2&gt;
&lt;h3&gt;Allow .eps files to be uploaded in wp-admin&lt;/h3&gt;
&lt;pre&gt;&lt;code&gt;add_filter(&apos;upload_mimes&apos;, &apos;website_upload_mimes&apos;);

function website_upload_mimes ( $existing_mimes=array() ) {

// Add *.EPS files to Media upload
$existing_mimes[&apos;eps&apos;] = &apos;application/postscript&apos;;

return $existing_mimes;
}
&lt;/code&gt;&lt;/pre&gt;
&lt;h2&gt;Some links&lt;/h2&gt;
&lt;p&gt;&lt;a href=&quot;http://plusbryan.com/my-first-5-minutes-on-a-server-or-essential-security-for-linux-servers&quot;&gt;First 5 minutes on a server&lt;/a&gt;&lt;/p&gt;
&lt;p&gt;Update. If you use Ubuntu 12 och PHP 5.4+, check out:&lt;/p&gt;
&lt;ul&gt;
&lt;li&gt;&lt;a href=&quot;http://www.lonelycoder.be/nginx-php-fpm-mysql-phpmyadmin-on-ubuntu-12-04/&quot;&gt;Guide för Ubuntu 12&lt;/a&gt;&lt;/li&gt;
&lt;li&gt;&lt;a href=&quot;http://stackoverflow.com/questions/10003978/php-fpm-and-nginx-502-bad-gateway&quot;&gt;Tips för PHP 5.4&lt;/a&gt;&lt;/li&gt;
&lt;/ul&gt;
&lt;h3&gt;Fix &lt;a href=&quot;http://askubuntu.com/questions/162391/how-do-i-fix-my-locale-issue&quot;&gt;locale issues&lt;/a&gt;&lt;/h3&gt;
&lt;pre&gt;&lt;code&gt;locale-gen en_US en_US.UTF-8 hu_HU hu_HU.UTF-8
dpkg-reconfigure locales
&lt;/code&gt;&lt;/pre&gt;
</content:encoded></item></channel></rss>